
EZOfficeInventory caters to companies of all sizes, from small firms with a few employees to Fortune 500s. As employees and departments expand, there is a need to enforce group-based access control to better manage asset visibility and utilization within the organization.
There are two ways to achieve this with EZOfficeInventory:
- Separate EZOfficeInventory Accounts: Create separate accounts to allot separate accounts to department heads. For every account, you can have different policy settings and run independent reports. This works well when there is no sharing of items or employees across departments.
- Use Advanced Access Control: This feature enables the management of different departments and divisions from a single EZOfficeInventory account. Storing data in a single account enables aggregate reporting and consistent settings across all departments. This means multiple users can leverage the account to access details.
Benefits
Access control can benefit you in several ways, including:
- Enhanced asset safety: Restrict asset access by group or location, or group and location to allow only authorized users to access asset information.
- Role customization: Create and assign roles as per your organizational structure to give users, from different departments, access to assets based on their roles.
- Improved resource allocation: By restricting access and asset visibility, you ensure that only the resources relevant to the concerned departments are used. This way the users know the exact resources at their disposal so they can be used accordingly.
Let’s help you understand how to enable and use the ‘Advanced Access Control’ feature in EZOfficeInventory.
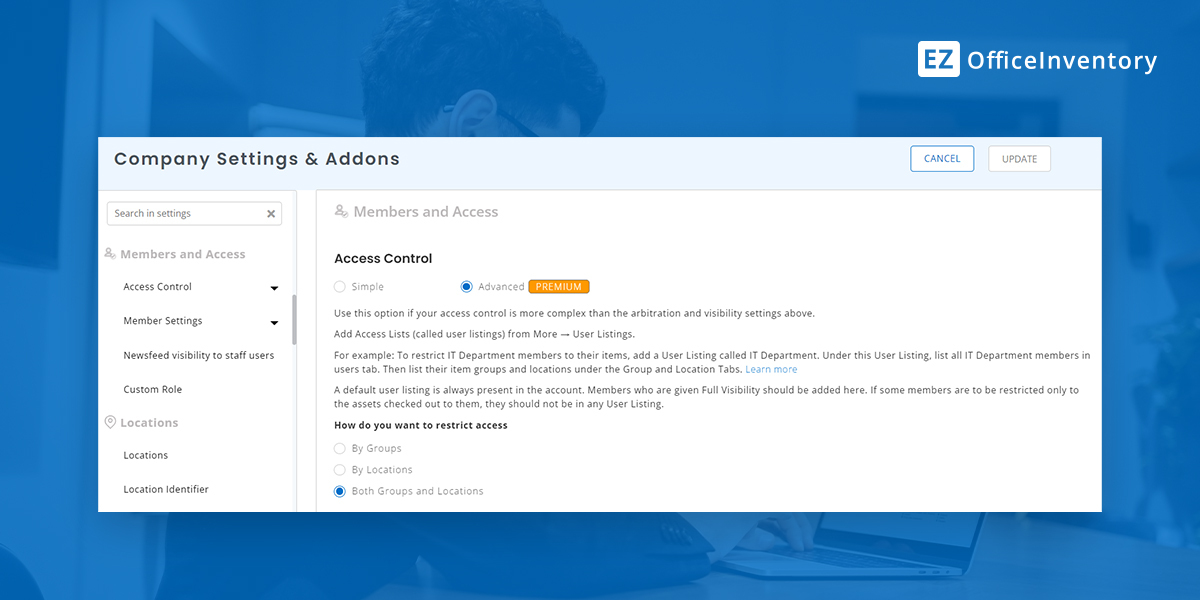
1. Enabling Access Control
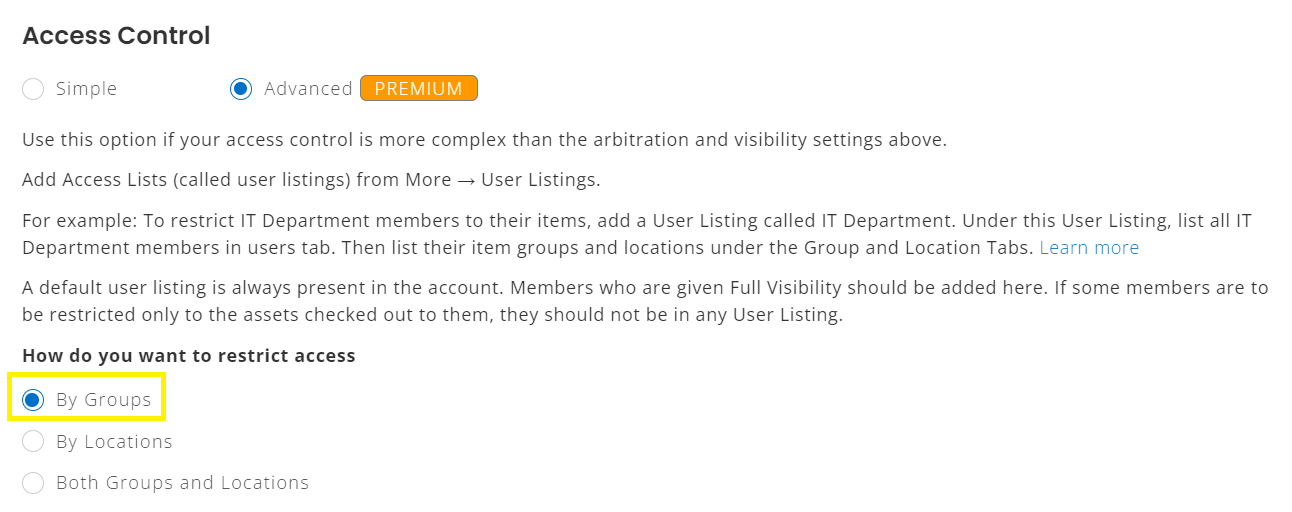
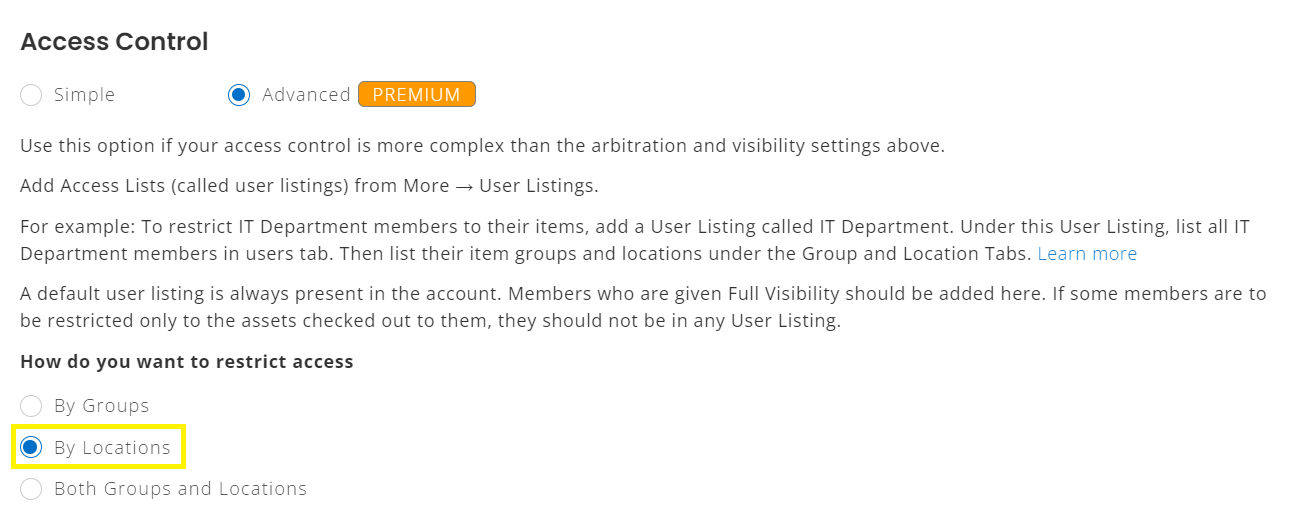
To enable the ‘Advanced Access Control’ feature, go to Settings → Company Settings & Add-ons→ Policy → Access Control, and select ‘Advanced’. Now save your settings.
You will see that there are three ways to restrict access to users: by groups, by locations, and by both groups and locations.
2. Restricting access by group
This will allow members of certain user listings to only view items in groups they have access to.
Let’s say you have three departments at your company; Library Support, Accounts, and Operations. Each department works independently, however, there is limited sharing of assets across the departments.
To start, you need to create a User Listing from the side navigation bar. Click on Members and Access → User Listings. A Default User Listing already exists and contains all item groups.
- Employees associated with the Default User Listing will be able to see all items.
- If there are no members in any user listing, no staff user or admin can see any items.
You now need to create a user listing to enable employees of different departments to access relevant items. Let’s start by creating a User Listing named Library Support for employees in this department. Click on ‘Add New User Listing’.

Once you’ve selected your groups for this listing, click on ‘Done’. This creates the User Listing.
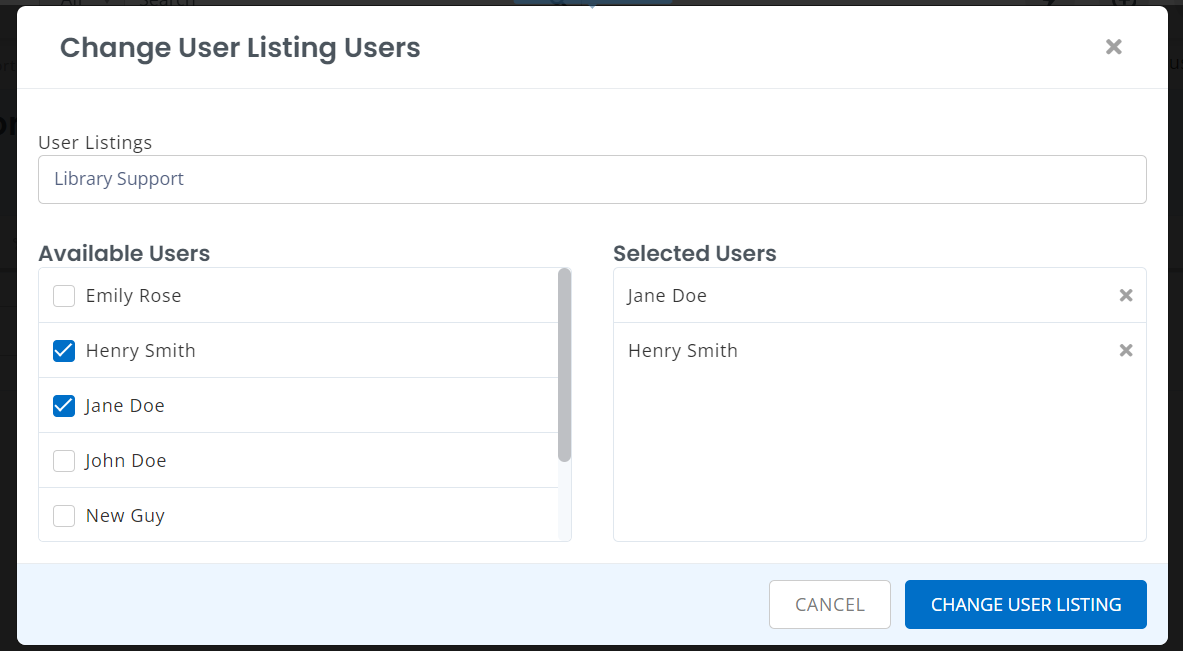
Next, click on Users → Add Or Remove Users to add employees to this listing.
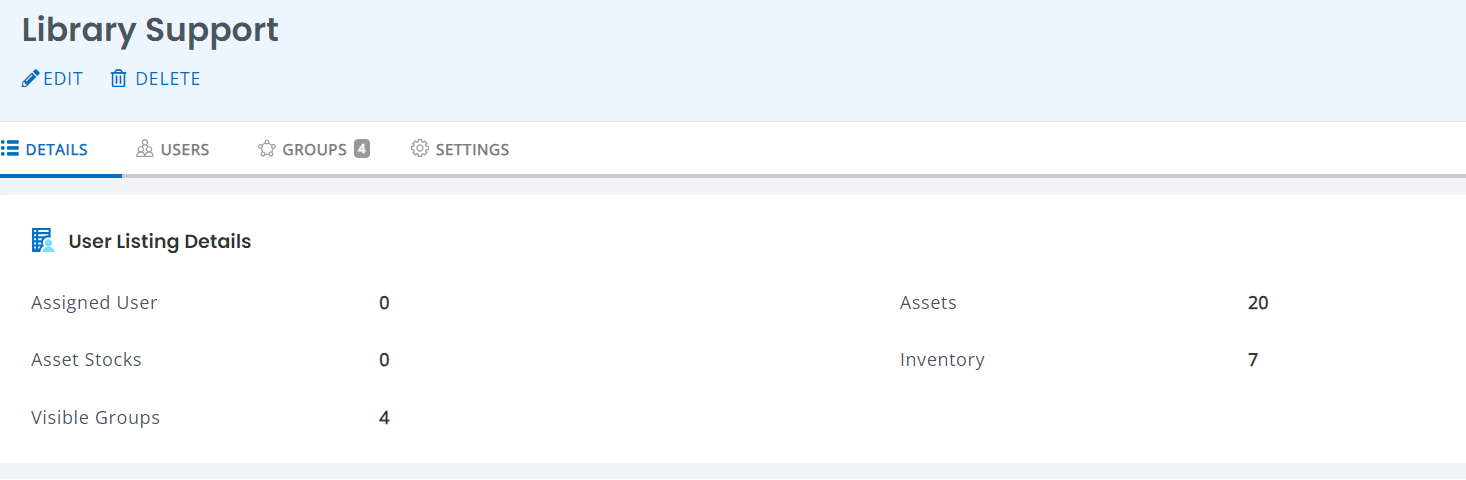
This is how the Library Support User Listing will now look:
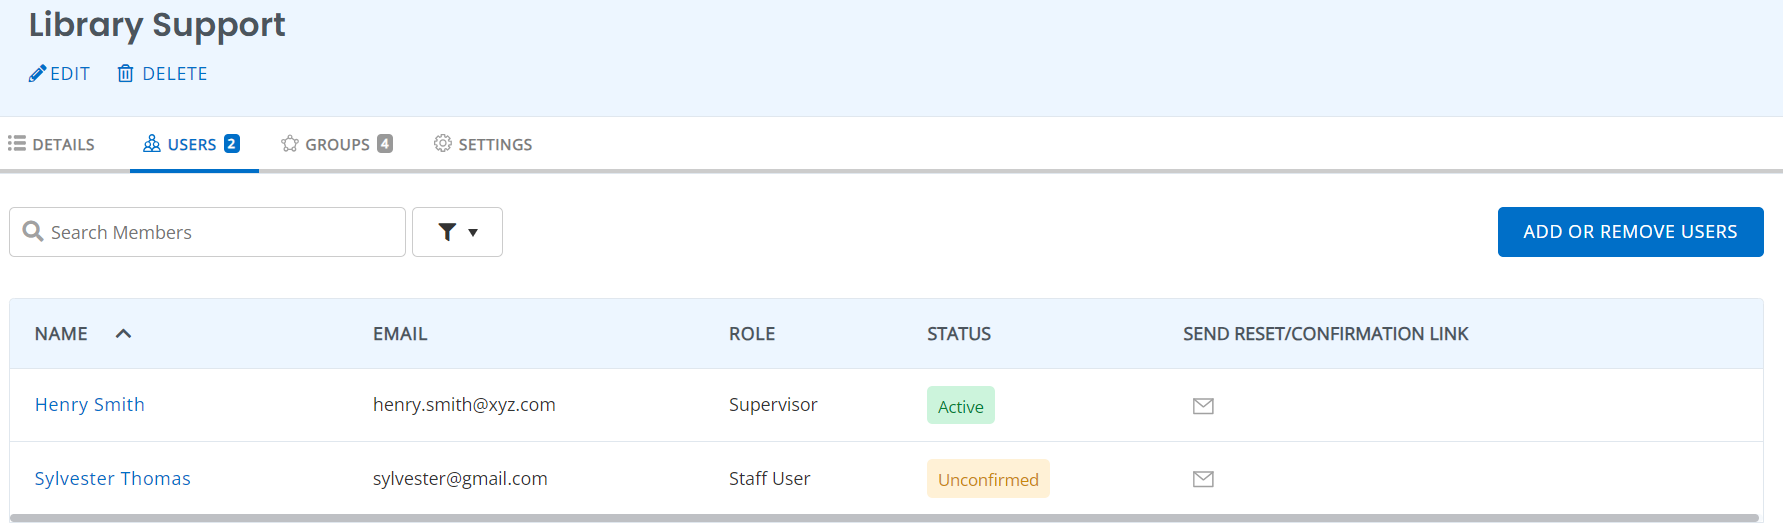
In this example, Sylvester can only see assets and inventory items to their assigned groups. They do not have access to items in other groups.
Henry is the supervisor for the Library Support User Listing. This means he’s an administrator but only for the users and groups in her User Listing. Within the Library Support User Listing, he can run reports, add assets, print labels, and add or remove employees.
In the same way, you can add listings for your Accounts and Operations departments. As an administrator, you can edit a member to change their role and/or User Listing. With User Listings enabled, you can choose either of the following roles: Administrator, Supervisor and Staff User.
To summarize:
- A new User Listing needs to be created for each access control group.
- Users can belong to at most a single User Listing.
- Any number of asset groups can belong to a User Listing i.e. items can be shared across departments.
- Staff users have visibility to only those items that belong to one of the groups in their User Listing.
- Supervisors are like admins but only for their own User Listing. They do not have access to items and members outside their User Listing.
- Administrators are not associated with any User Listing and have full access to all items and users.
- Users not associated with a User Listing only see assets checked out to them.
- Default User Listing contains all groups.
3. Restricting Access by Location
You can restrict access by locations instead of groups when setting up User Listings. Make sure to have this setting checked from Settings → Company Settings → Access Control. Here, select to restrict access ‘By Locations’.
Now, you can either create a new User Listing or assign locations to an existing one.
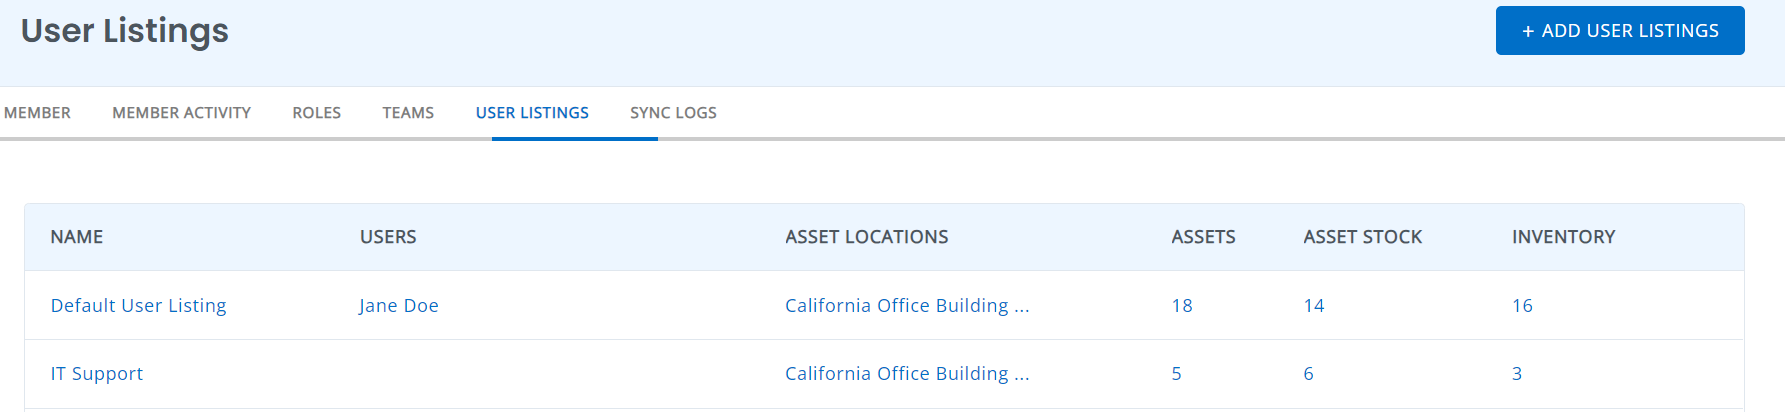
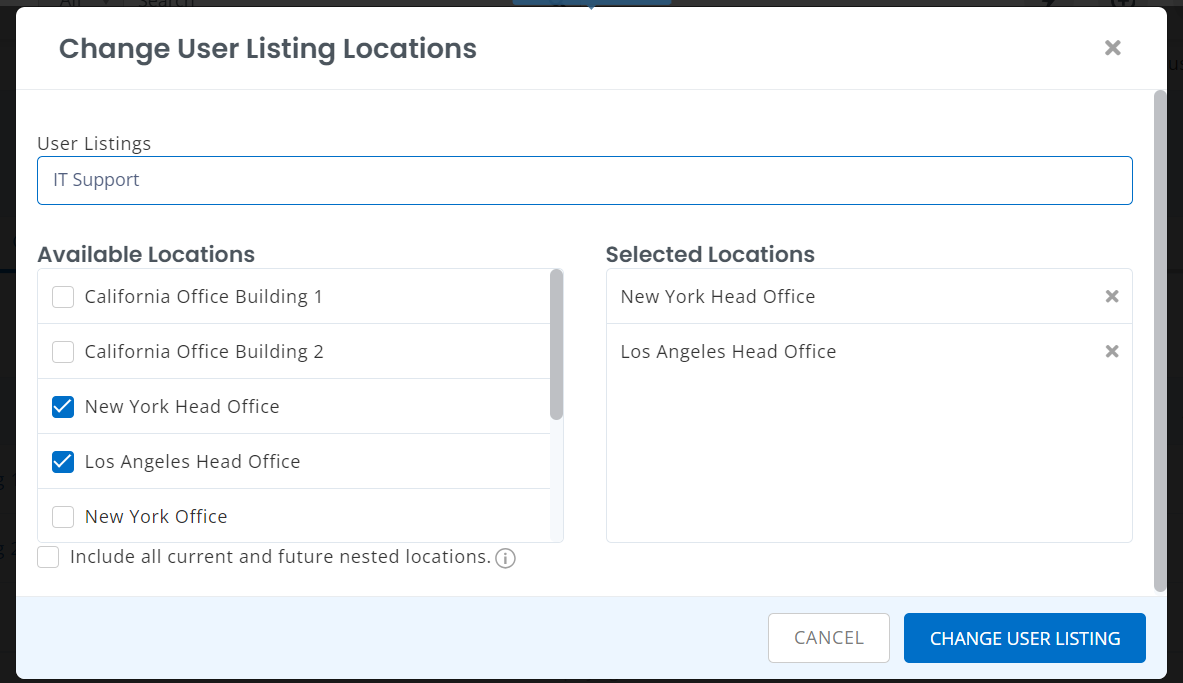
Let’s assign locations to an existing listing called ‘IT Support’. Go to More → User Listings and select ‘IT Support’.
Next, go to Locations → Add Or Remove Locations. Make your selections.
After adding your locations, this is what your IT Support User Listing should look like:
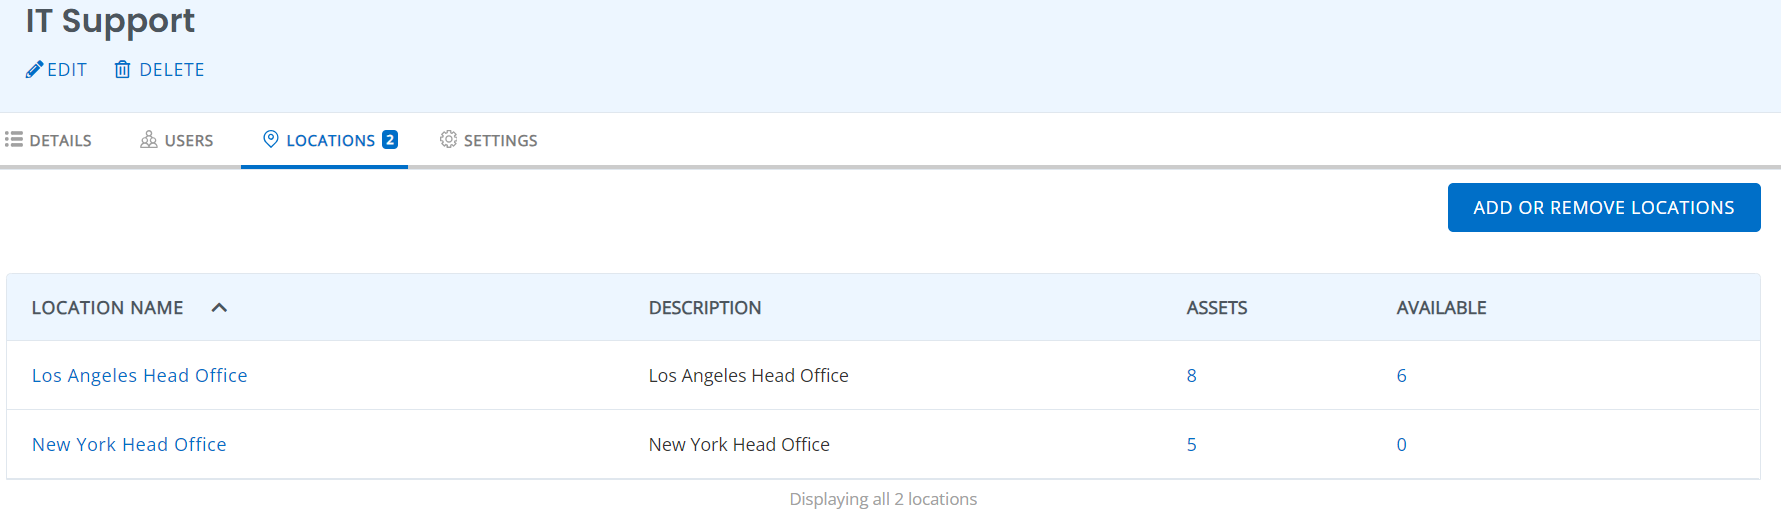
In the above example, all members in the User Listing ‘IT Support’ can access items in the location Annapolis.
Here’s how you can ensure Custom Roles assigned to a certain Location are able to view all Asset Stock available at their Location.
4. Restricting access by groups and locations
In case you have multiple offices in different locations, you may want employees to only access relevant items at their location only. For example, you want people in the NY office to only have access to items grouped under ‘Cameras’ in New York.
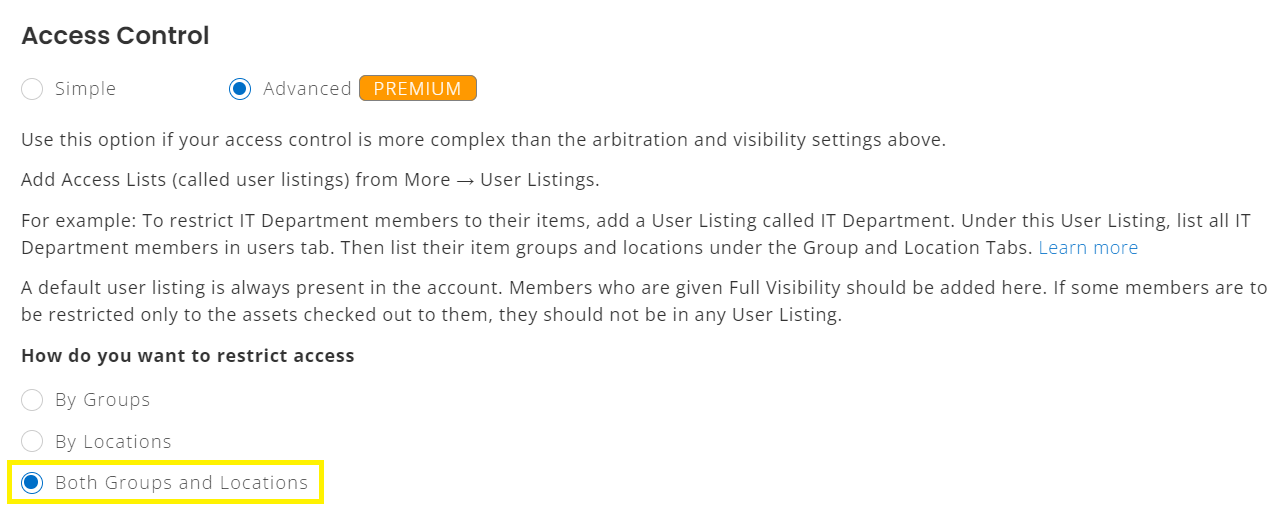
To enable restrictions by groups and location, make sure to check the setting: Settings → Company Settings → Policy → Access Control → Advanced → Restrict Access → Both Groups and Locations.
After enabling the settings, update the groups and locations set for your User Listings by going to Members and Access → User Listings.
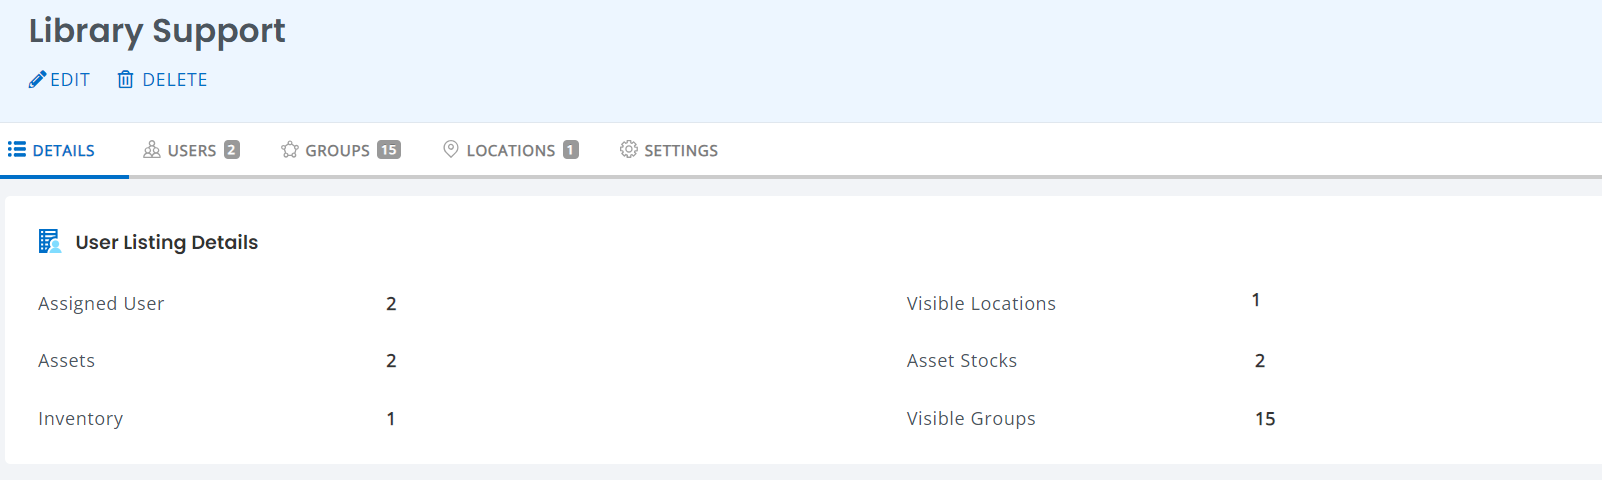
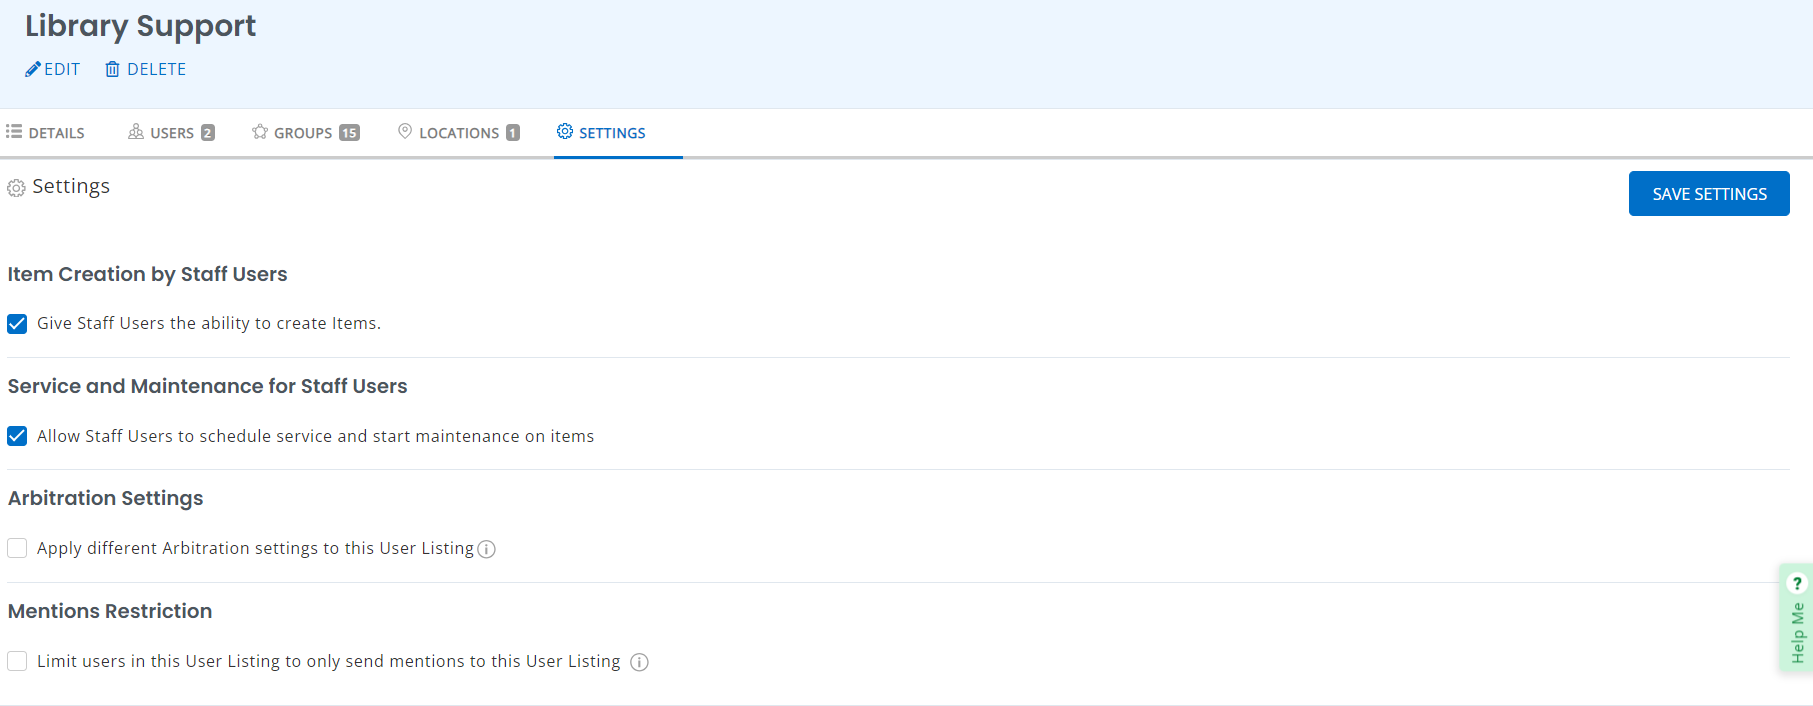
In the above example, the 2 users in the User Listing ‘Library Support’ can see everything in the 15 groups selected and at the 1 location selected.
5. Using Arbitration within User Listings
Arbitration (access control) in User Listing enables administrators to approve all items checked in/out by a user in the specified User Listing. Access these from the Company Settings → Arbitration in a User Listing.
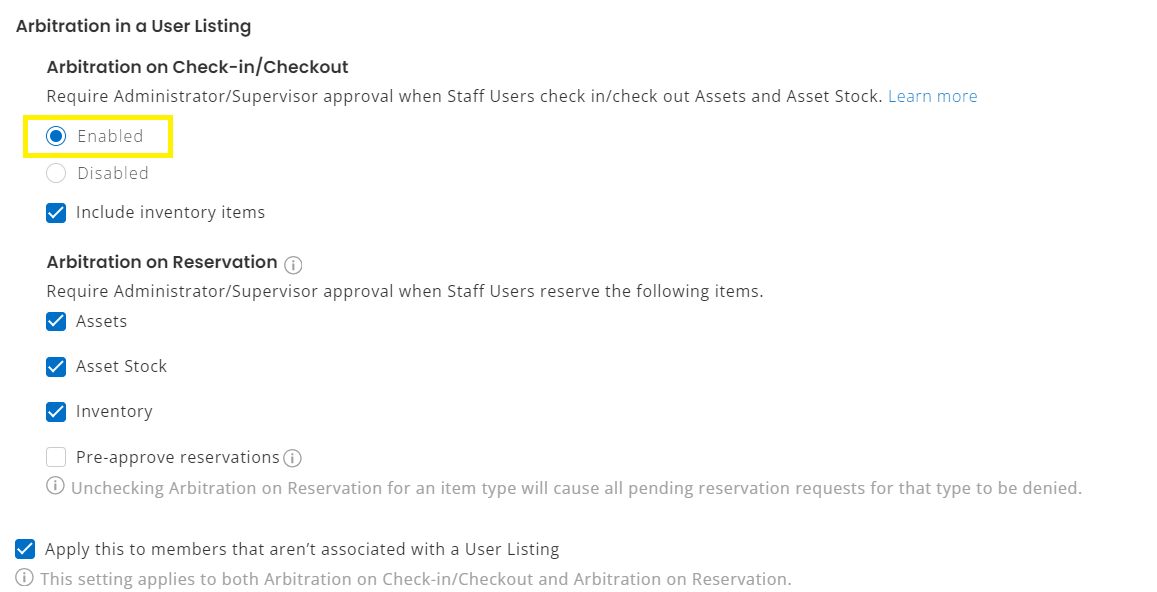
When Arbitration is enabled in a User Listing, all items reserved by members of the Listing will need to be approved by the Admin.
If Arbitration is enabled outside a User Listing, all items reserved by Users that aren’t part of any Listing will have to be approved by the Admin.
6. Staff User settings based on User Listings
You can enable Staff Users to take certain actions based on the User Listing(s) they belong to. These actions include:
- Creating items
- Scheduling and starting maintenance on items
To configure Staff User settings specific to each User Listing, go to User Listings → User Listing Name → Settings. Check the options illustrated below and hit ‘Save Settings’.
Note: The default Company Arbitration settings will apply to a User Listing if Arbitration settings specific to the User Listing have not been enabled.
7. Advanced Access Control or Custom Roles?
EZOfficeInventory’s Advanced Access Control restricts access by an employee’s department (User Listing in EZOfficeInventory) and status(user role in EZOfficeInventory). While these standard restrictions work for most industries, the User Listings approach offers limited flexibility for custom workflows.
If you require specific restrictions, use the Custom Roles feature. Completely personalize permissions for each role and gain granular control over asset permissions.
Please note that you should implement only one of the two methods. Using both Advanced Access Control and Custom Roles will lead to complicated workflows and unnecessary confusion for your administration.
By following these simple steps, you can improve the safety of your assets and use advanced controls for higher efficiency.


