
Several organizations use high-end equipment for daily operations. Using unrepaired resources for business activities is not conducive to their overall performance. More importantly, these hiccups affect business reliability and efficiency.
This blog takes you to the Basic Service and Maintenance feature in EZOfficeInventory to help keep your equipment in the best shape.
For Advanced Services and Maintenance (including Recurring Services and Service Triage, which can be enabled from Company Settings & Add Ons), click here.
1. Tracking Service and Maintenance Events
1.1. Starting and completing services
You can enter an asset into the maintenance state from the asset detail or asset listing page.
- From the Item Listings page
Pick one or more item(s) from the Asset listings page by selecting their relevant checkboxes, and click on Actions → Start Service.
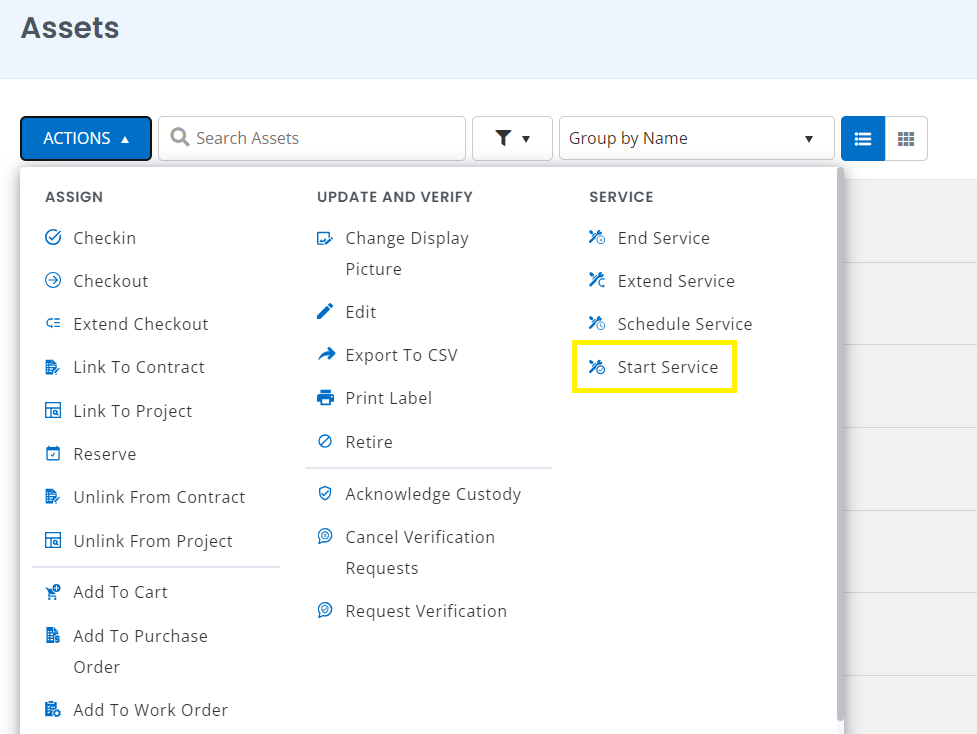
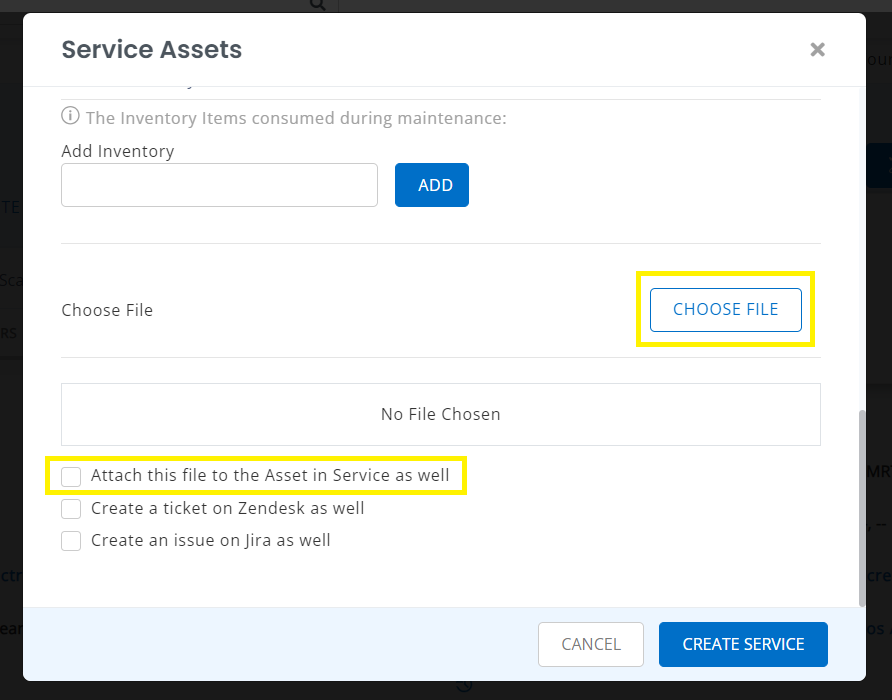
This will display a ‘Service Assets’ overlay.
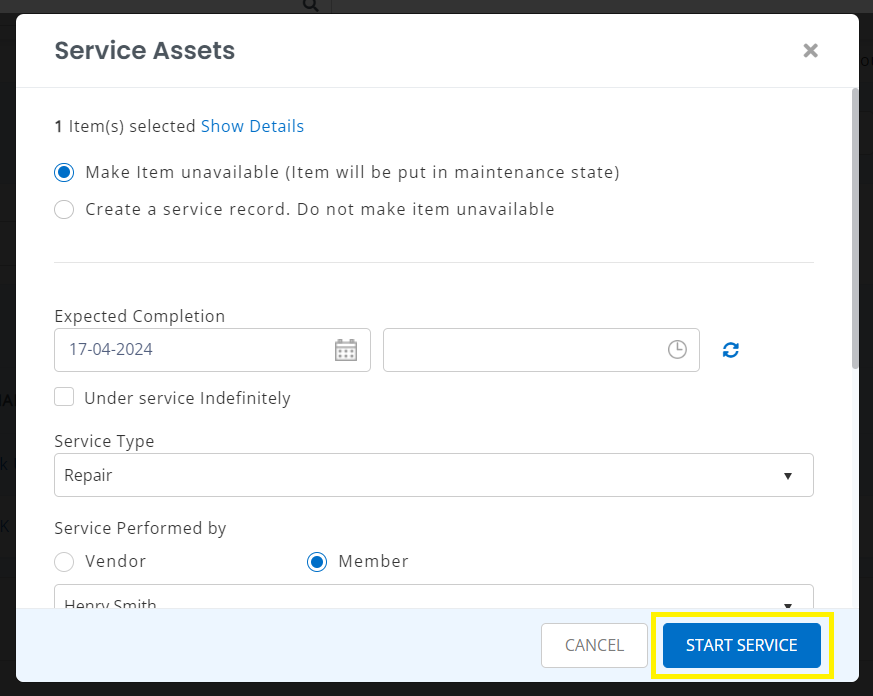
With every maintenance record, you can enter the type of service (standard, repair, warranty, or other), the vendor or member performing the service, and the description.
You can also add inventory items that will be consumed in this service. If you know when the service will end, specify an expected completion date to get alerts when this date arrives.
Once the service is started, you can edit/extend this date if it doesn’t go as scheduled.
- From the Asset Details page
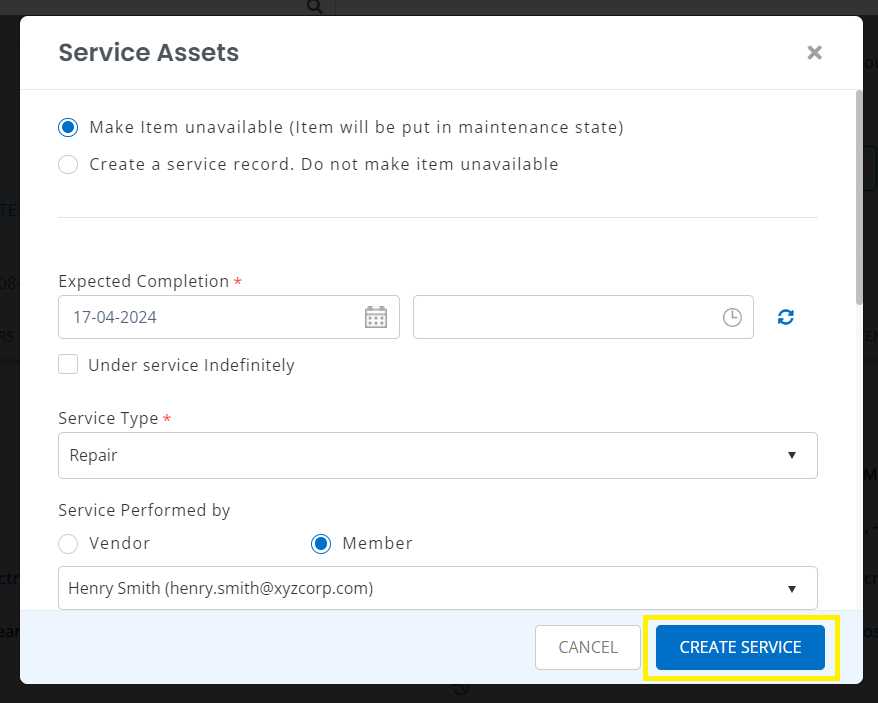
Click on Service → Start. This will prompt the following Service overlay. Click on ‘Create Service’ once you’ve specified all the details.
Note: Maintenance cannot be started for assets in a checked-out state (or checked-out cart). Service records can be added to an item being checked out or in a maintenance state.
- Extend, edit, or complete a service
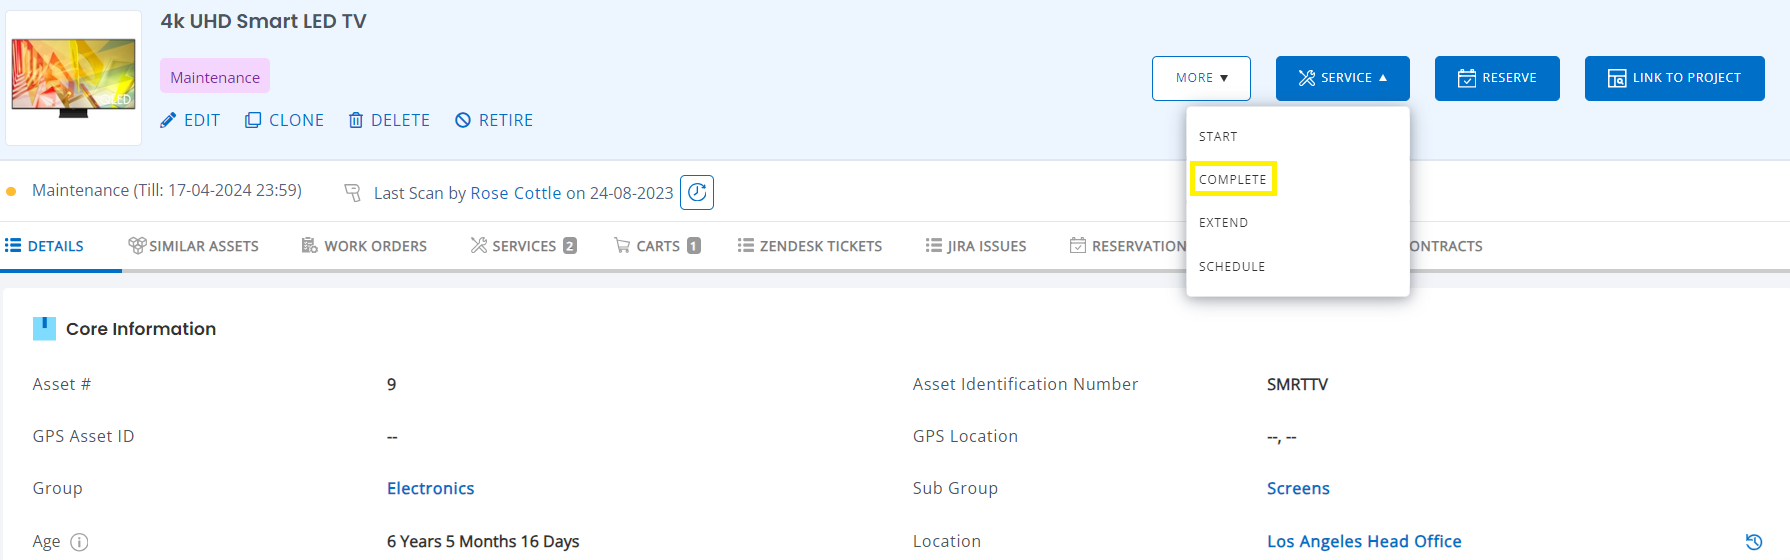
To extend, edit, or complete a service, follow the same paths for both the Asset Listings page and the Asset Details page. As an example, to complete a service, go to an Asset Details page and click on Service → Complete.
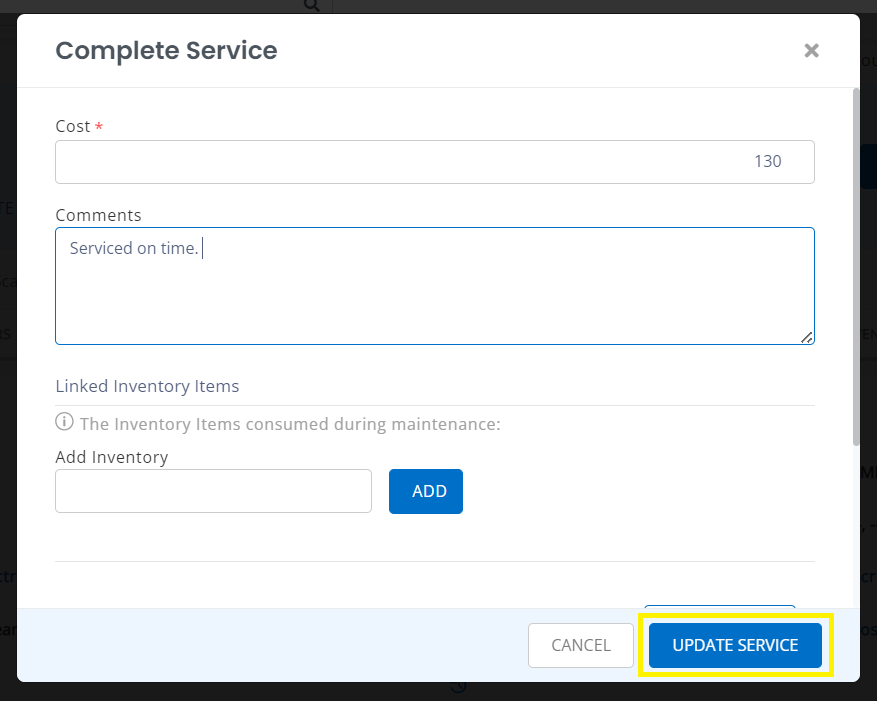
A new overlay will ask you to enter the cost of the service. You can also add comments or data regarding consumed inventory. Click on ‘Update Service’ once done.
1.2. Creating Service Records
If you simply want to record a service event without tracking the complete maintenance cycle or making the item unavailable, add a service record. This is useful for adding a service record when an asset is under maintenance or has beeb repaired.
To create a service record for multiple assets, select the checkboxes from the Asset Listings page, and then click on Actions → Start Service.
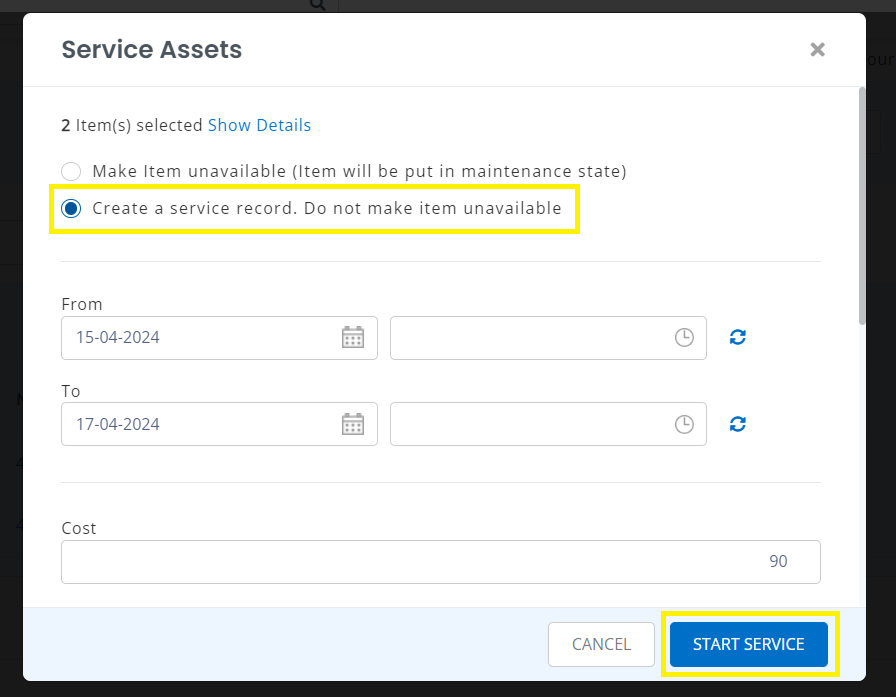
To create a service record for a single asset, go to the Asset Details page and click on Service → Start.
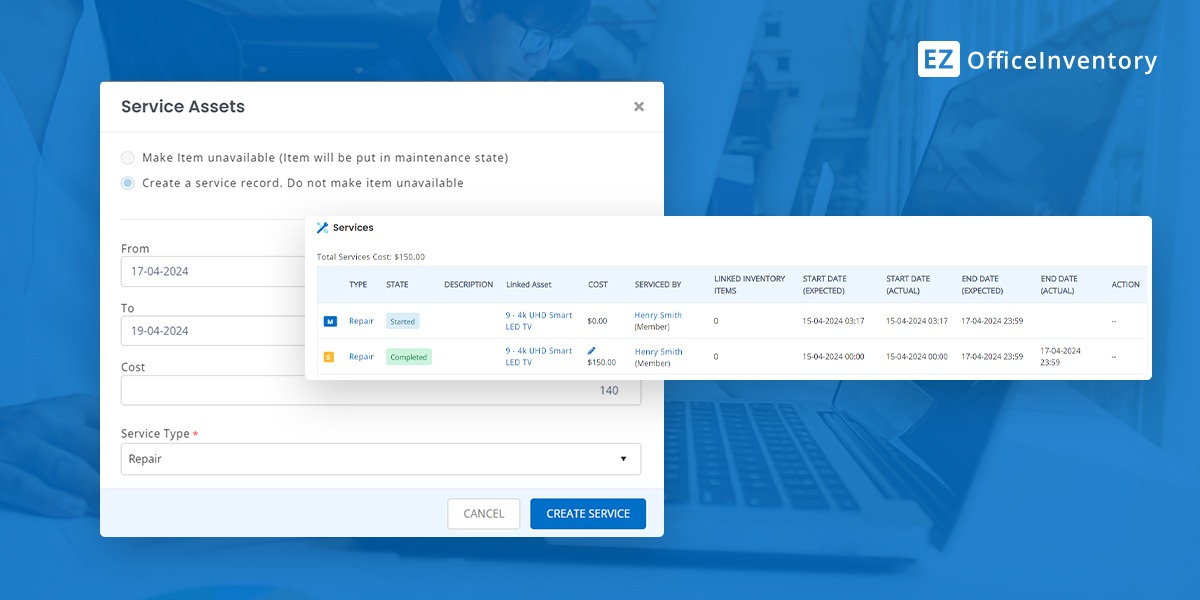
A Service overlay will appear. Select the ‘Create a service record’ button. Log all relevant data and click on ‘Create Service’.
Note: Service records are always marked as ‘Completed’.
Other than administrators, staff users can also comment on these service events if the assets in question are visible to them.
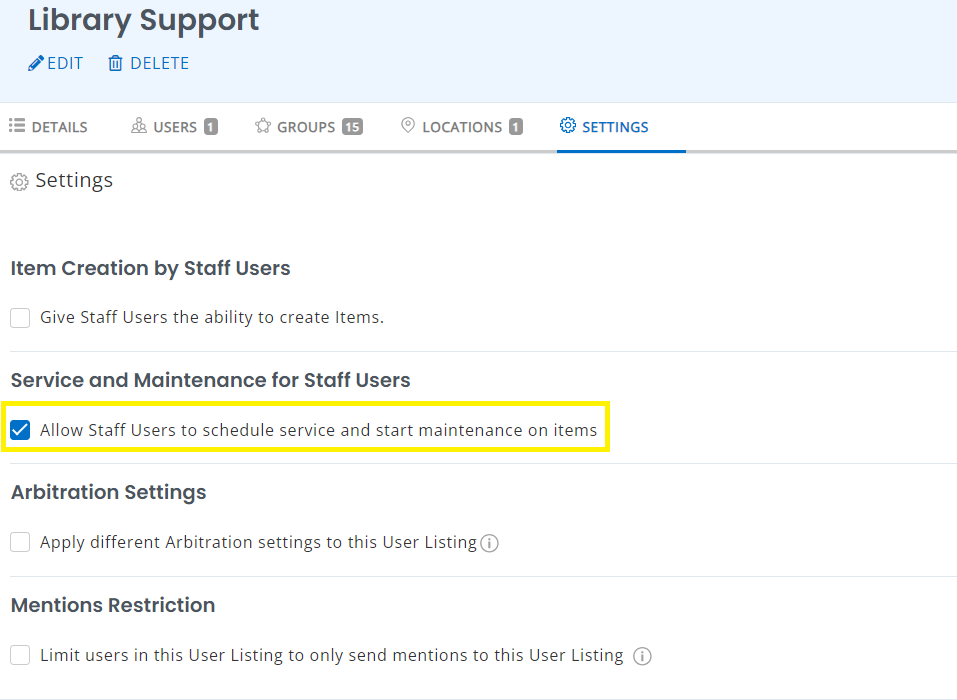
Staff Users can schedule services and put items into maintenance. You can enable this from Company Settings & Add-ons → Service and Maintenance for Staff Users.
You can also set these preferences for specific User Listings from Members & Access → User Listings > <Name of User Listing> → Settings → Enable Services and Maintenance for Staff Users. These individual settings will be given preference over the above mentioned.
1.3. Service History
All services and maintenance events for an asset are listed under its Services tab on the Asset Details page.
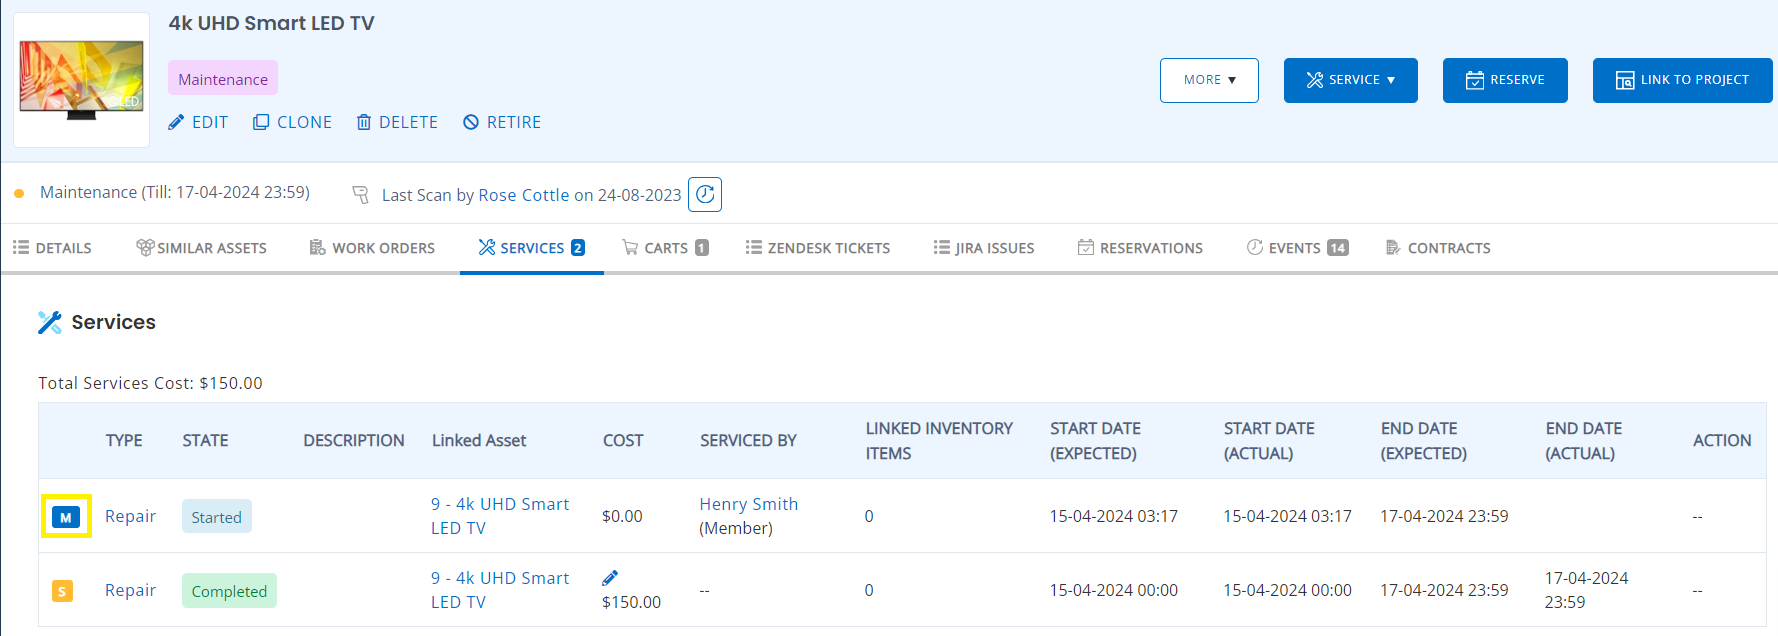
Note: The M next to the service type indicates whether this event is a maintenance event (M) or a service event (S).
Account Owners and Admins can also edit these events if you’ve enabled ‘Service Edit and Deletion’ from Company Settings. Please note that you can only edit the service date and description of an ‘active’ service, whereas a ‘completed’ service can be edited and deleted both. However, if deleted, any linked inventory consumed in that service will be replenished.
The items currently in maintenance are also summarized under the Notifications Bell. This is the place for a quick view and actions on service events i.e. active, and completed.
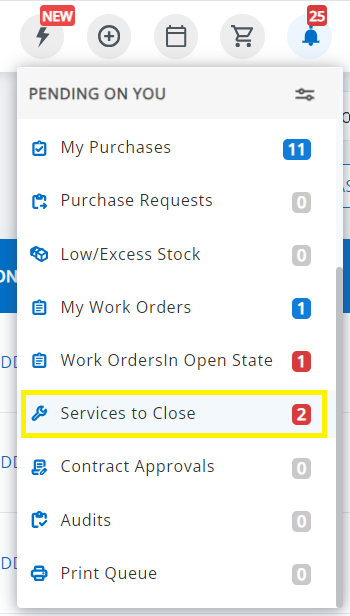
The service notifications let you keep tabs on service and maintenance events for all items in the system.
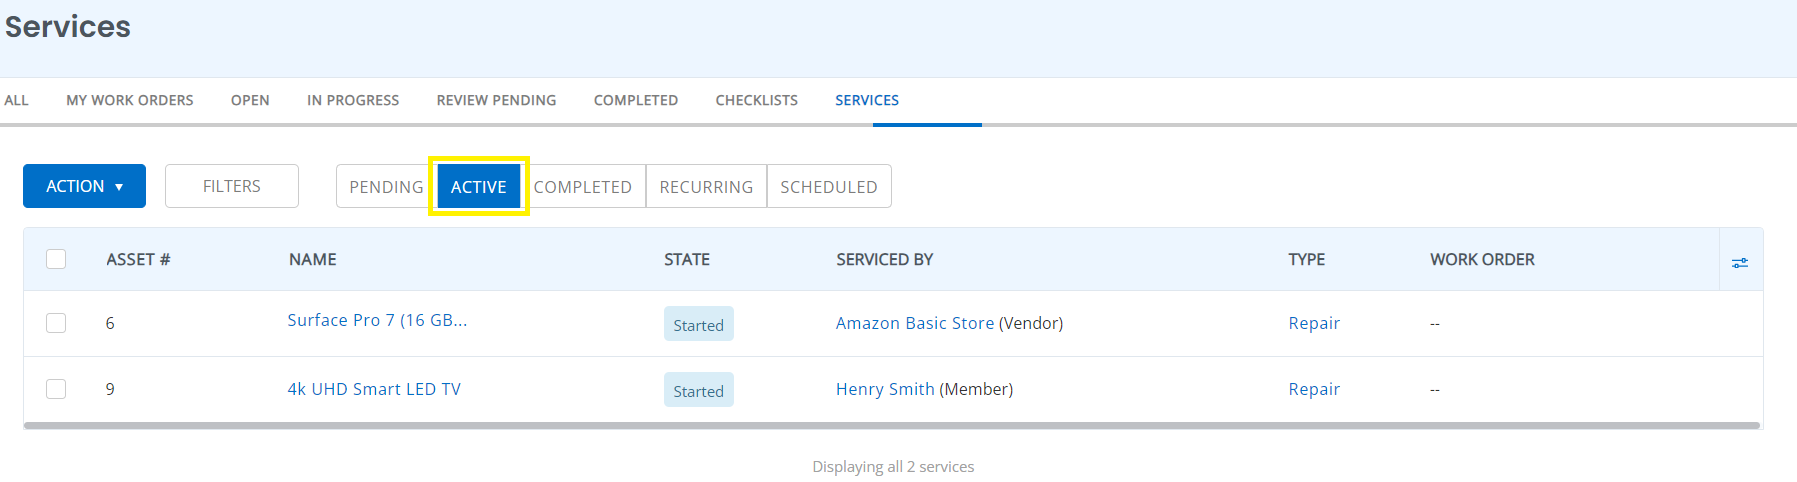
The Active tab shows all service items that are currently in the maintenance state, the Completed tab lists all completed service events while the Pending tab displays all service events that are due but are yet to be processed.
2. Tracking Warranties in EZOfficeInventory
This is how you can track warranty renewals in EZOfficeInventory using Custom Fields. Set a Date Alert for warranty renewals to enhance preventive maintenance.
3. Setting up Service and Maintenance Alerts
You can configure the following alerts from the Alerts tab
– Created: To get an email whenever a service ticket is created on an asset.
– Started: To get an email whenever a service is started on an asset/package.
– Extended: To get an email whenever a service is extended on an asset/package.
– Completed: To get an email whenever a service is completed on an asset/package.
– Completion Due: To get an email when the expected completion date for the service arrives.
– Comments: When someone enters comments on a service record.
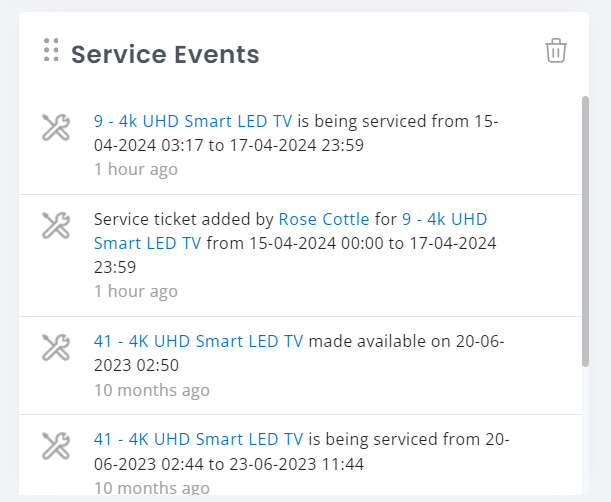
4. Service Events on the Dashboard
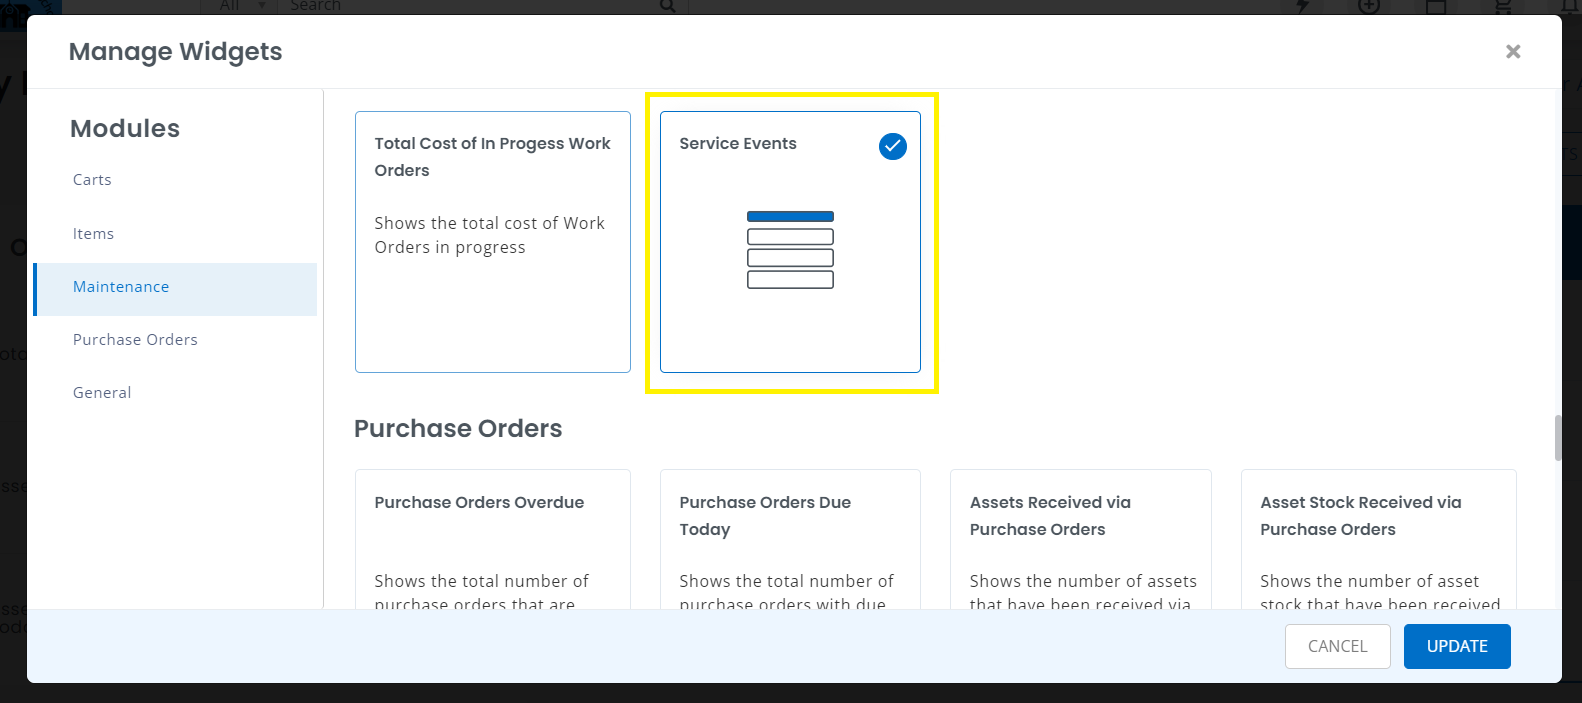
Enable service events on your dashboard by going to My Dashboard → Edit Dashboard and clicking on the relevant service tabs. Stay on top of all the service and maintenance events created by you or your staff members.
View these in the Latest Events on your Dashboard.
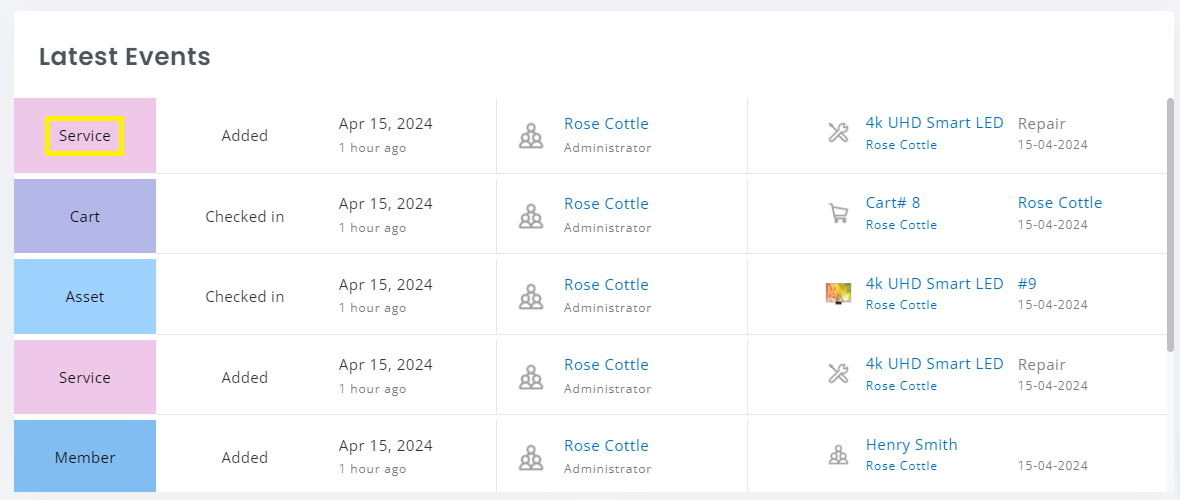
You can enable service-related ‘Latest Events’ from the dashboard to get a snapshot of all your service activities.
5. Service Reports
Get insights on your service and maintenance events from ‘Reports’. Filter equipment maintenance data based on the timeline, type of service, group the items belong to, or whether to include packages, retired assets, or Zendesk tickets in your audit data.
6. Service using the mobile app
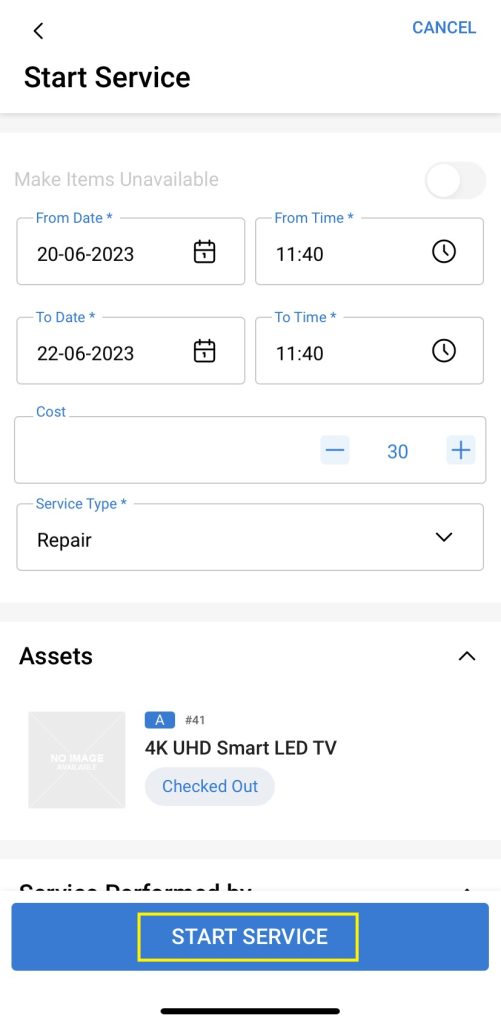
Use the mobile app (Android, iOS) to track maintenance events, on the go. You can also add services on mobile. You can start ‘Service’ for an Asset using the mobile app by clicking on the ‘Actions’ button. From there, Go to ‘Start Service’.
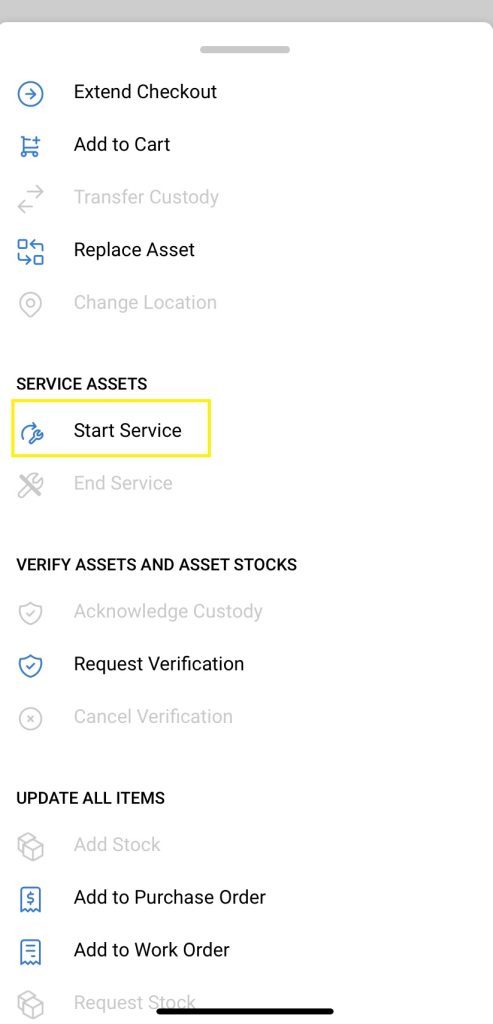
After you click on ‘Start Service’, you will be redirected to the Service Details page where you can enter the relevant details to send the Asset for service.
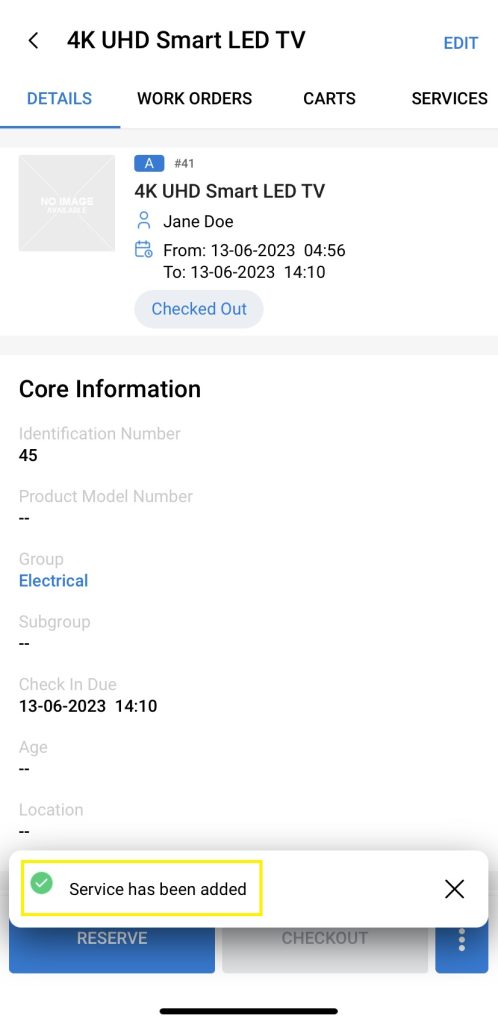
Once you ‘Start Service’, the following message will appear on your mobile screen.
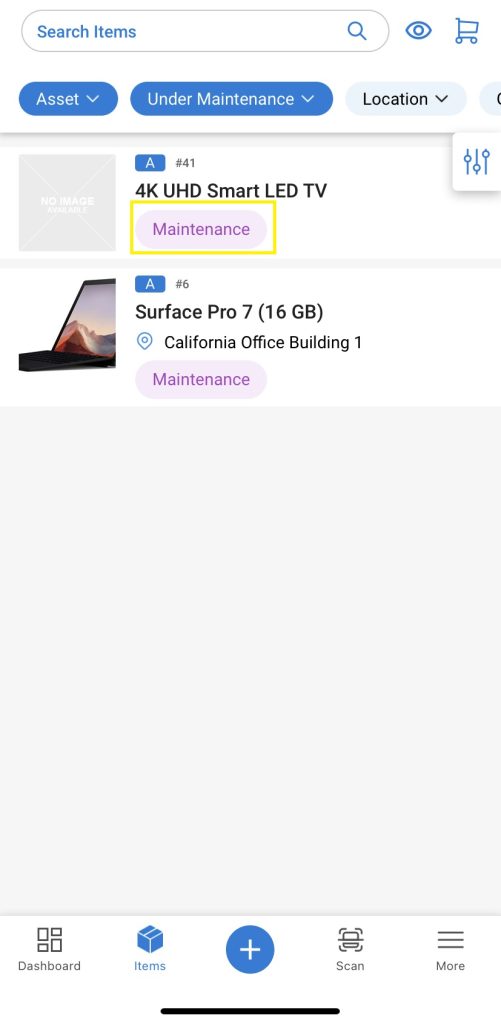
The status of the Asset will be updated as ‘Maintenance’.
To end the Service, simply Go to the Asset Details Page → click on the three dots on the bottom right of your screen and click ‘End Service’.
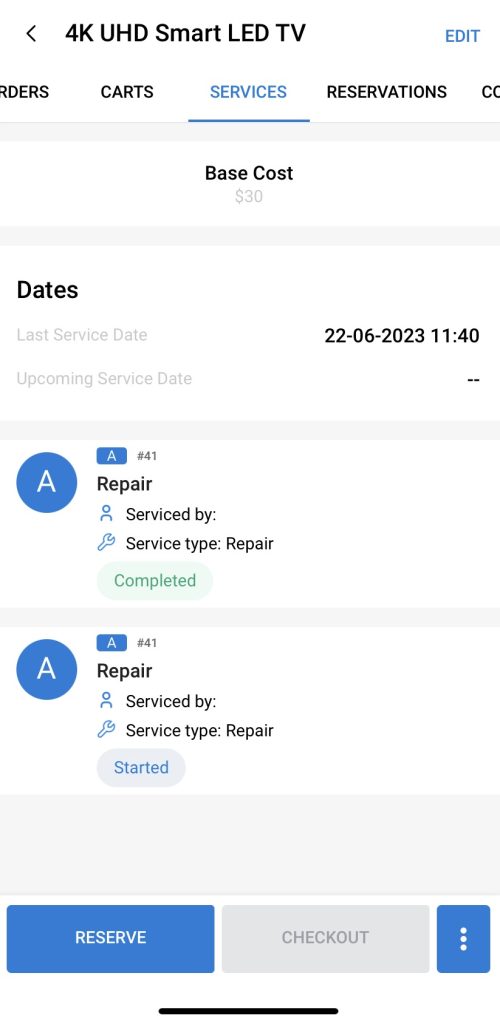
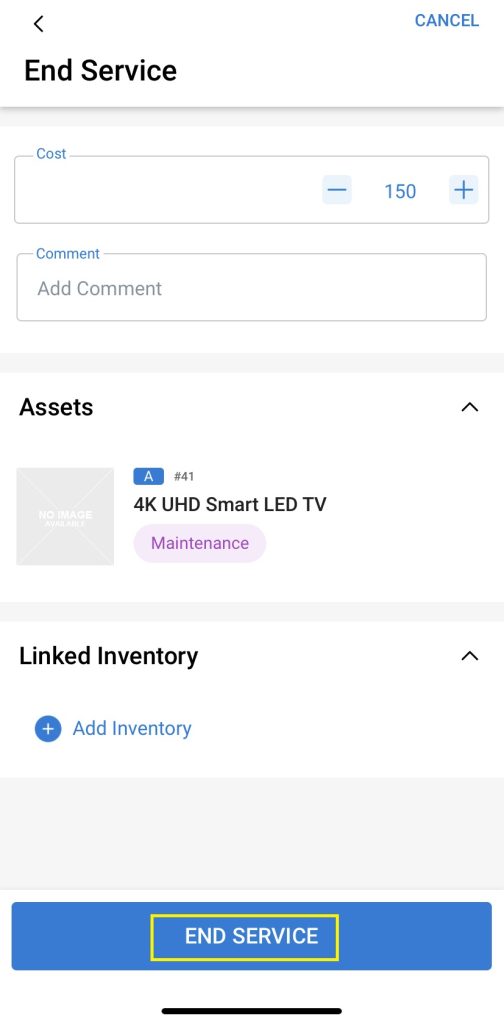
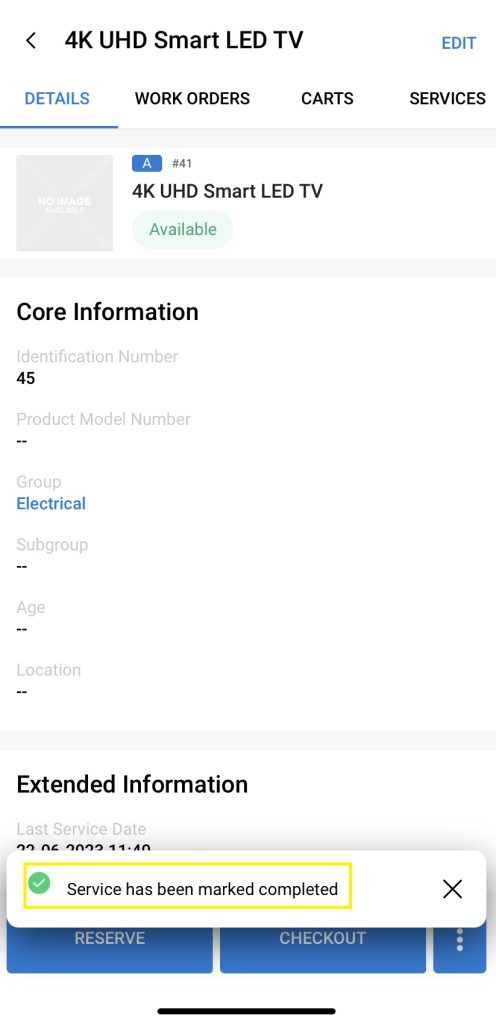
You will be notified on your screen once your Asset has been serviced.
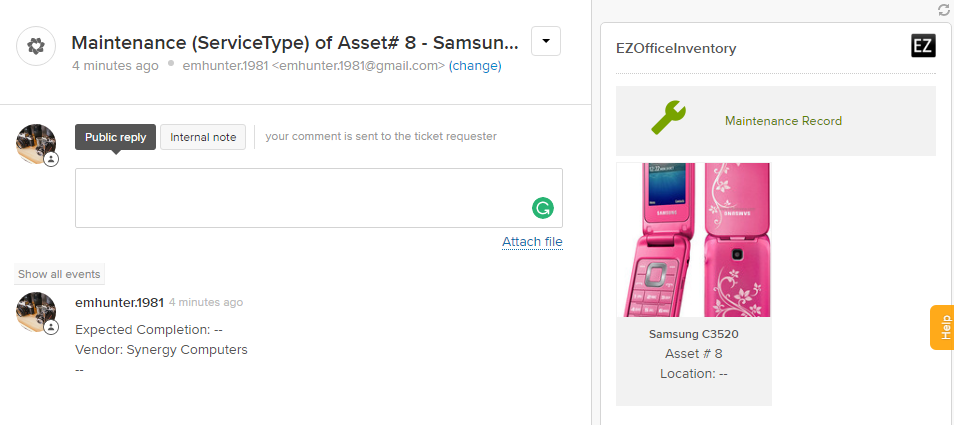
7. Tracking Service Tickets in Zendesk
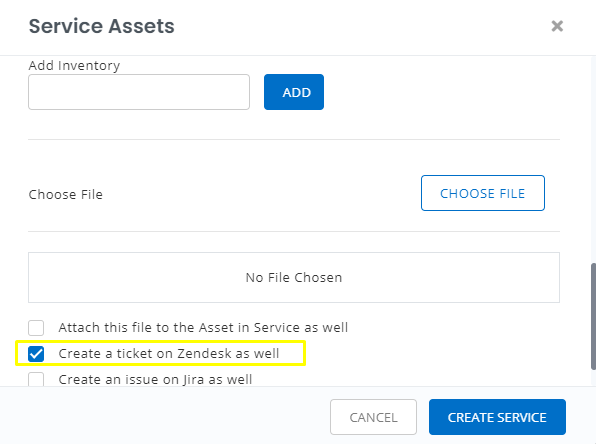
Services and maintenance in EZOfficeInventory can now be tracked using Zendesk tickets. Enable Zendesk Integration from Settings → Integrations. While creating a service ticket, enable ‘create a ticket at Zendesk as well.
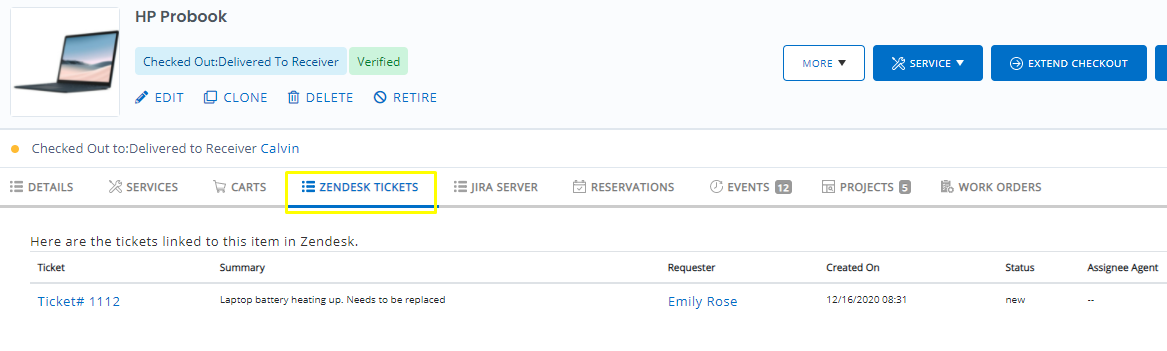
These tickets can be viewed on Asset details page.
Learn More about Zendesk EZOfficeInventory Integration.
By following these simple steps, you can keep your assets serviced using EZOfficeInventory.


