
A CMMS compliant equipment management software helps industries plan and schedule equipment maintenance to enhance general plant efficiency and reduce downtime.
This blog explains how to use the Advanced Services and Maintenance feature in EZOfficeInventory using features like Recurring Services and Service Triage. You can use these features to add value to the basic Services and Maintenance workflow.
Related blog: To learn more about using the basic functionality, click here.
1. Recurring Services
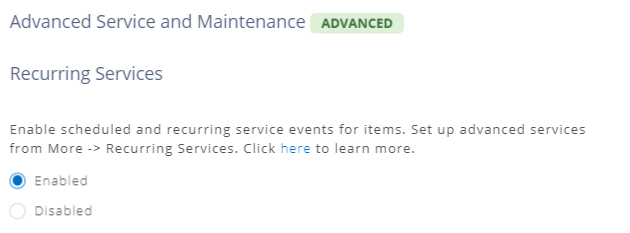
You can set recurring services on groups and subgroups using EZOfficeInventory, defining how often you want services to repeat, and establishing start and end dates for effortless maintenance management. To enable this feature, go to Settings → Add Ons → Advanced Service and Maintenance, and enable ‘Recurring Services’.
1.1. Adding Recurring Services
Associate Items to a Group or Subgroup: Define a set of items that require recurring maintenance tracking e.g. heavy construction servicing (group) or construction site accessories (subgroup).
Add ‘Heavy Construction Servicing’ as a group, go to Items → Groups, and add items to it. You can do the same when adding a subgroup to a group. Go to the left navigation bar and follow the pathway: Groups → Select a Group → Click ‘Add Subgroup’. The quickest way to do this is to select multiple items from the listing page → Actions → Edit → Click ‘Change Group’.
Create a new recurring service:
First, enable the recurring services by going to Settings → Add Ons → Advanced Service and Maintenance → Recurring Services and click ‘Enabled’. Hit ‘Update’.
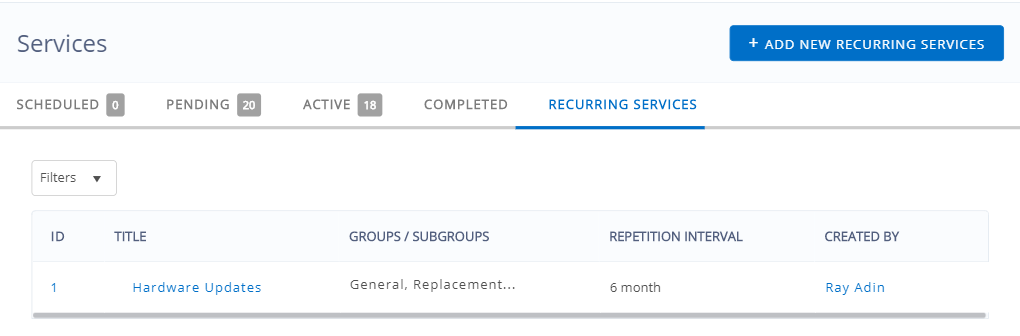
Then, go to Services → Recurring Services → Click ‘Add new recurring services’:

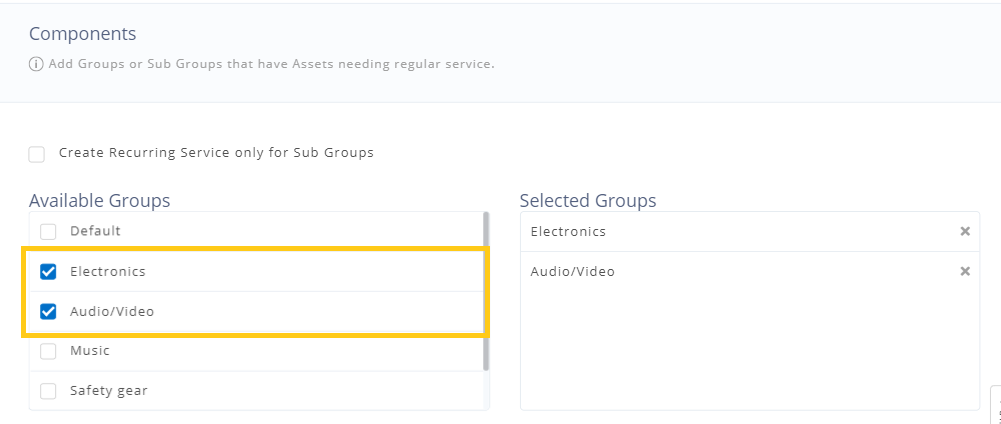
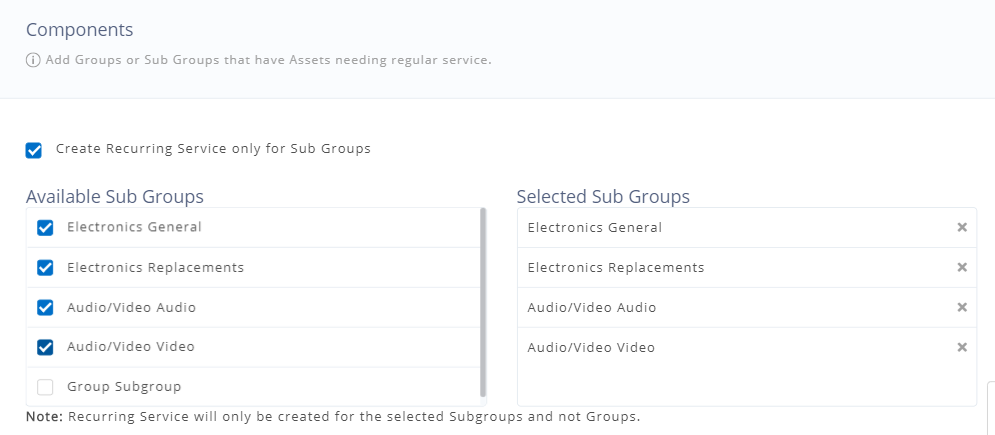
Add a component: This is a group or subgroup of assets that need regular servicing. You can add recurrence to unlimited groups or subgroups. A recurring service can only be created for components that are associated with EITHER a group OR a subgroup.
a. Adding components associated with a group:
b. Adding components associated with a subgroup:
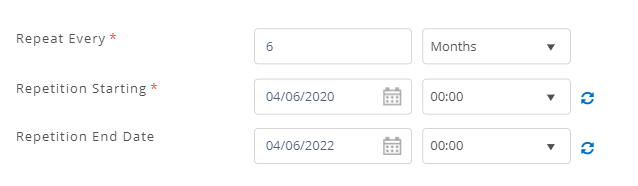
Define repetition criteria: Decide how often the maintenance event will be repeated, and add a start and end date:
Select a recurring sequence: Set a recurring service that will be created based on two different use cases.
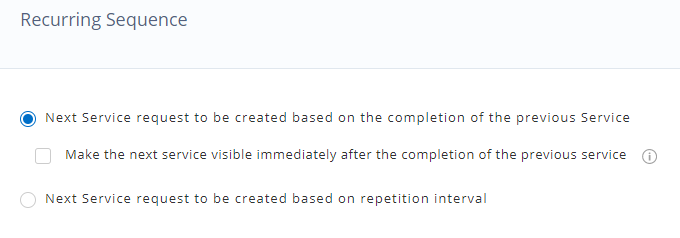
a. Next service request to be created after completion of the previous service:
This applies when a recurring service is created. Say, either an Excavator in Group ‘Heavy Construction Servicing’ or Forklift in Subgroup ‘Construction Accessories’ is in a maintenance state. To start the next recurring service sequence smoothly, the excavator or forklift must be available again.
This means if a service starts on 5th June and ends on 10th June, then the next service (which is supposed to recur every 6 months) will take place on 10th June six months from now instead of 5th June. So you will only be able to see information about the next upcoming service on 10th June and not before that.
However, if you want to be able to view information about the next service immediately, then you can select the checkbox ‘Make the next service visible immediately after the completion of the previous service’.
Note: You’ll have to wait an hour for the next service to become visible.
b. Next service request to be created based on repetition interval:
The next recurring service will be created based on the repetition interval set i.e. after 6 months.
Hit ‘Create Service’, and you’re done.
Note: You can always add new components to an existing recurring service. However, if the service has already begun, the change will come into effect during the next cycle.
1.2 States of Service
When a recurring service is created, components added in it go into the ‘Pending’ state. The state changes to ‘Active’ when the service event is initiated and is marked ‘Completed’ when it ends. These actions must be taken manually by the user.
Pending: In this state, assets associated with the component(s) defined in the recurring service are automatically sent to a Pending Service state.
Active: This means the service has started and the asset is now unavailable.
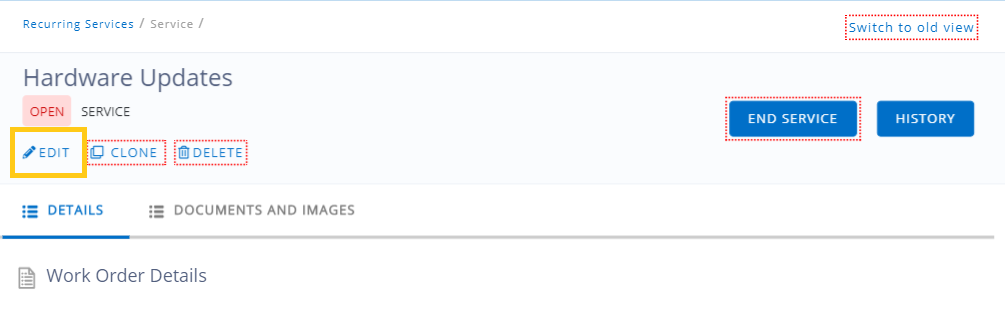
Completed: Clicking ‘End Service’ will stop recurring service on the groups you have configured under a recurring service.
1.3. Service Actions and Overview
To trigger the ‘Active’ state, you have two options.
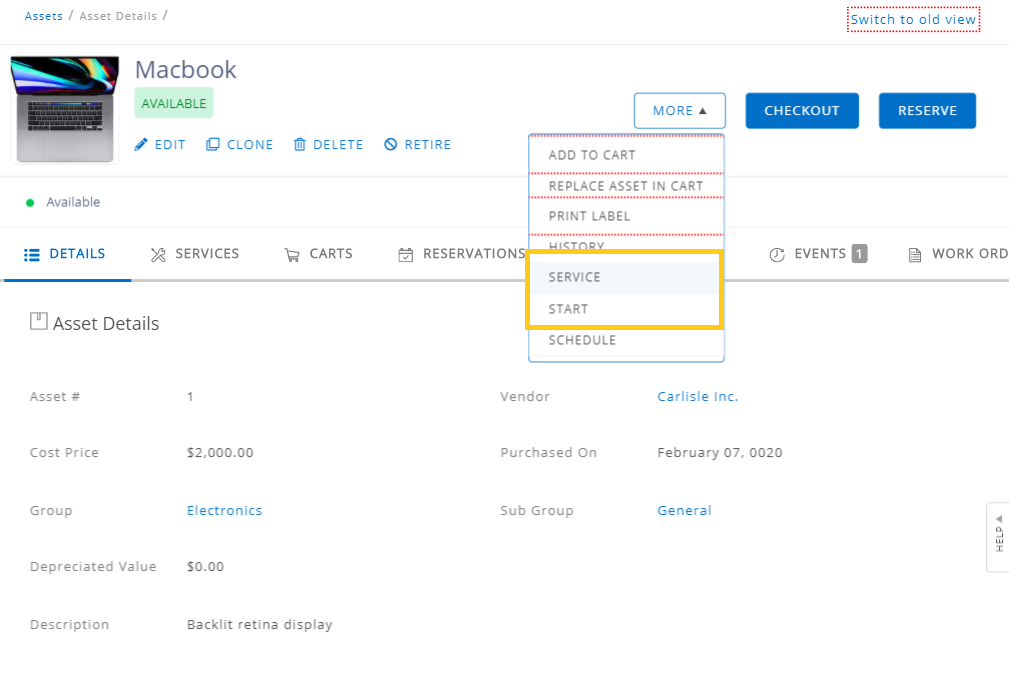
1) Asset’s Detail Page → Service → Start Service:
2) Notification Bell → Services → Pending Tab → Start Service.
This section is also a great place to get an overview of service events that are active, scheduled, completed, and pending:
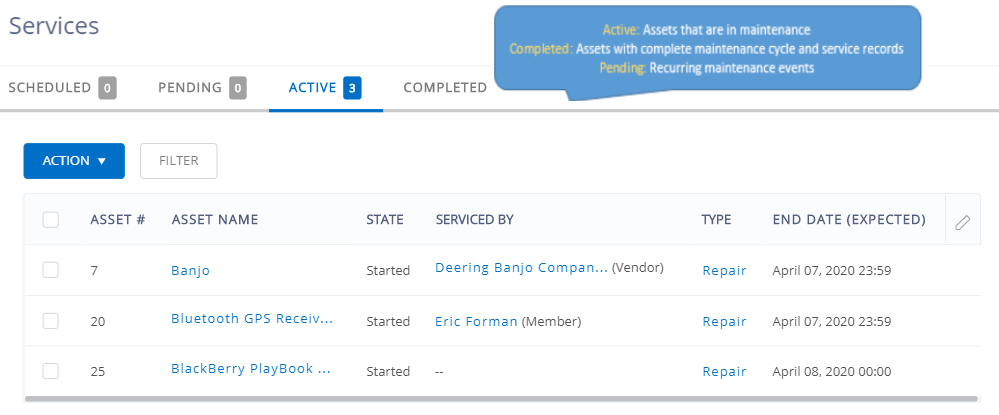
Account Owners and Admins can also enable ‘Service Edit and Deletion’ from Company Settings. Please note that you can only edit the service date and description of an ‘active’ service, whereas a ‘completed’ service can only be deleted. However, if deleted, any linked inventory consumed in that service will be replenished. See image below:
1.4. Recurring Services and Packages
Recurring service will only be applied to those items in a package that are associated with groups or subgroups included in a recurring service. All the items in a package that don’t belong to such groups or subgroups will be sent into ‘regular’ maintenance immediately.
Example: A package contains 2 cameras from Group ‘AV’ and 2 laptops from group ‘IT’. A recurring service has been created with the group ‘AV’ as a component. When the recurring service starts on this group, all the items in the package belonging to ‘AV’ will go into a Pending state for a recurring service, whereas all the items belonging to the group ‘IT’ will be sent into regular maintenance and will be marked as ‘Active’.
Learn More about how to use Packages.
2. Service Triage
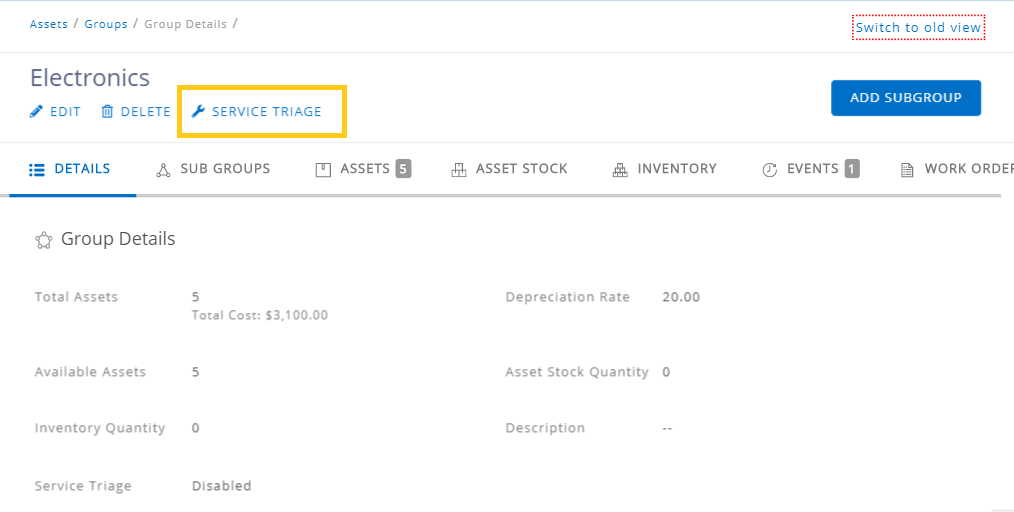
You can also set your account to automatically send assets into maintenance after an item is checked in. This will ensure that equipment is always in the best state before it is checked out again. To enable this, go to Settings → Add Ons → Service Triage. You can set the service period here. This can either be enabled for all groups or for a specific group from its detail page.
Once done, an asset will automatically be sent into maintenance for the duration specified each time it is checked in. You can also disable Service Triage on a certain group of assets from the group’s details page:
Share your queries on our CMMS feature
Keep your heavy equipment in optimal working conditions and conduct timely maintenance with our CMMS compliant software. It is the leading equipment management software used by a diverse set of companies worldwide.
For more assistance, drop us an email at support@ezo.io.


