
Asset tracking software can help you quickly make sense of all the locations and sublocations associated with your business equipment. You can import all these helpful details into EZOfficeInventory using our handy import wizard. Read on to find out more.
Before you start, it would be helpful to go through this quick guide on importing basics.
1. Importing New Locations
To begin importing new locations into EZOfficeInventory, go to Locations → Import Locations → Add New Locations.
You can now choose a spreadsheet with all your location details, and click Upload. An example of a location spreadsheet is given below, with a simple header row and a list of all the locations with corresponding values:
You can now map the columns from your CSV to columns found in EZOfficeInventory. You can also edit a column at any time, or skip it entirely:
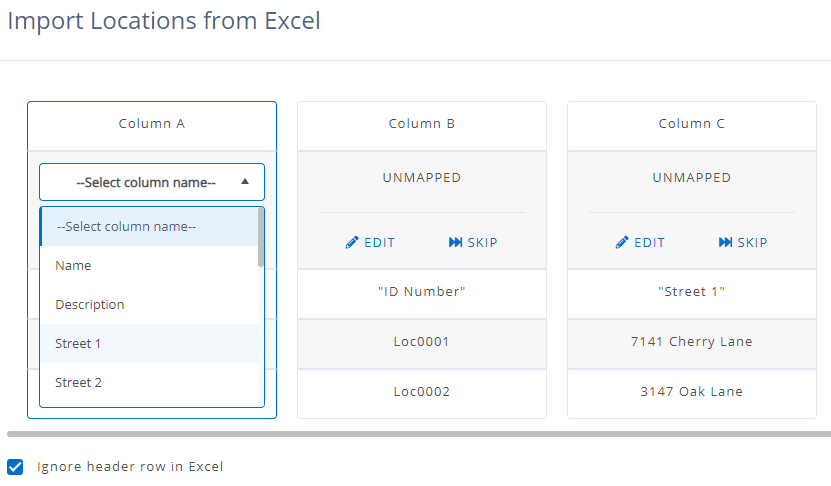
It is important to note that each column must either be skipped or mapped before the import can start.
You may ask the system to skip the header row – that is, titles such as ‘City’ or ‘Country Code’ – in your CSV when importing. To do this, select the checkbox ‘Ignore header row in Excel’.
When you’re done mapping all your columns, click ‘Preview’ to get things going:
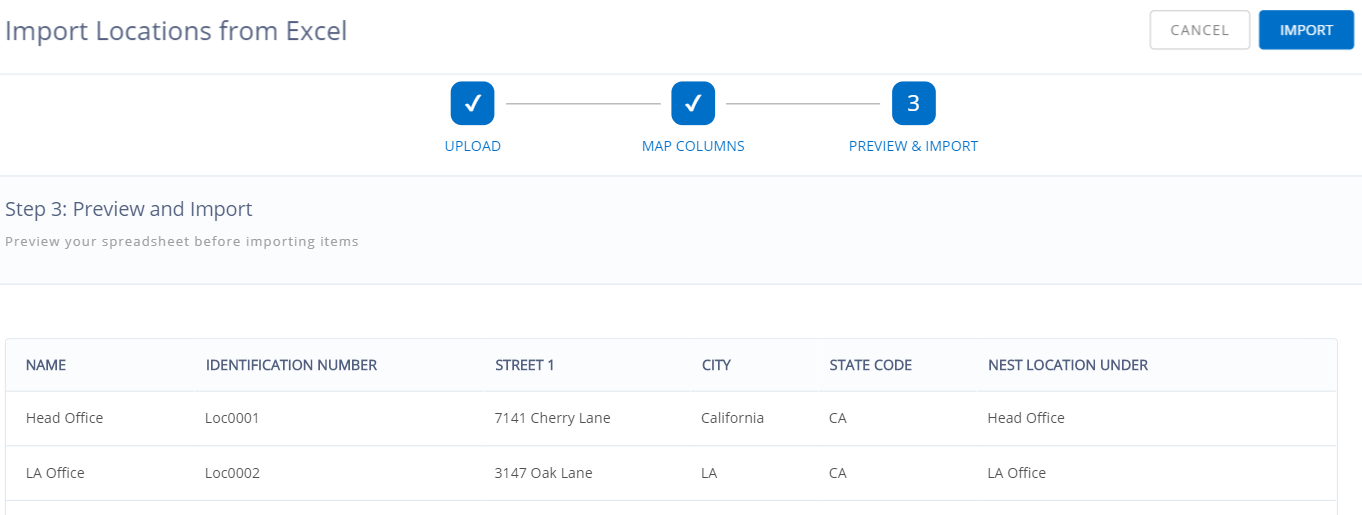
The system shows you a preview of all the details that are going to be imported. If everything looks good, click ‘Import’.
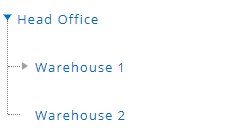
Your locations have been imported successfully! You can also expand the parent locations to see the nested locations under them:
2. Updating Existing Locations
You can update existing locations en-masse using a CSV import. Simply go to Locations → Import Locations → Update Existing Locations. Please note that using the ‘Add New Locations’ button for this will create duplicate locations!
After you’ve clicked ‘Update Existing Location’, follow the same steps you would when adding a new location. This time, rather than creating those locations afresh, EZOfficeInventory will simply update the values associated with them in the system.
3. Importing Sublocations
You can import sublocations into the system right when you’re adding or updating locations! As an example, say you have a Head Office with two Warehouses (1 and 2), with the first warehouse also having an aisle called Rack 1. This set of associations is shown below:
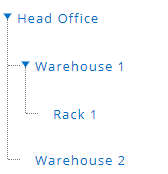
The associations under ‘Head Office’ can all be added through a CSV as follows: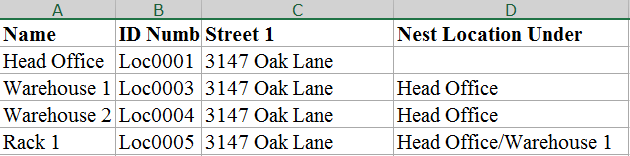
Use the ‘Nest Location Under’ field to create a simple Parent > Child association (such as ‘Warehouse 1’ being nested under ‘Head Office’). For adding further associations to sublocations, use the / symbol. In the example above ‘Rack 1’ is nested under ‘Head Office/Warehouse 1’, meaning Rack 1 is present in Warehouse 1, which in turn is located in the Head Office.
NOTE: You cannot use the ‘Nested Under Location’ field to create locations. This field will only create associations. To create a location, simply add it separately into the CSV like we have done above.
And that’s it, you’re on your way to adding hundreds of locations to EZOfficeInventory in moments!
Have feedback about our equipment tracking software?
EZOfficeInventory is the leading asset tracking software used by SMBs all over the globe.
For more assistance, drop us an email at support@ezo.io.


