
Speed up issue resolution, improve agent productivity and end user experience with new enhancements to the Jira integration. As part of continuous improvements to the integration, Admins can now take multiple actions on Items (Assets and Asset Stock) directly within Jira.
This eliminates the need to switch between apps while syncing all information in EZOfficeInventory simultaneously.
Here are some of the actions you can take within Jira:
1. Checkout/Extend Checkout for Items
According to the new update, Users can Checkout and Extend Checkout of Assets and Asset stock in the Jira App.
Here is how to get started.
1.1 Checkout Asset/Asset Stock in Jira
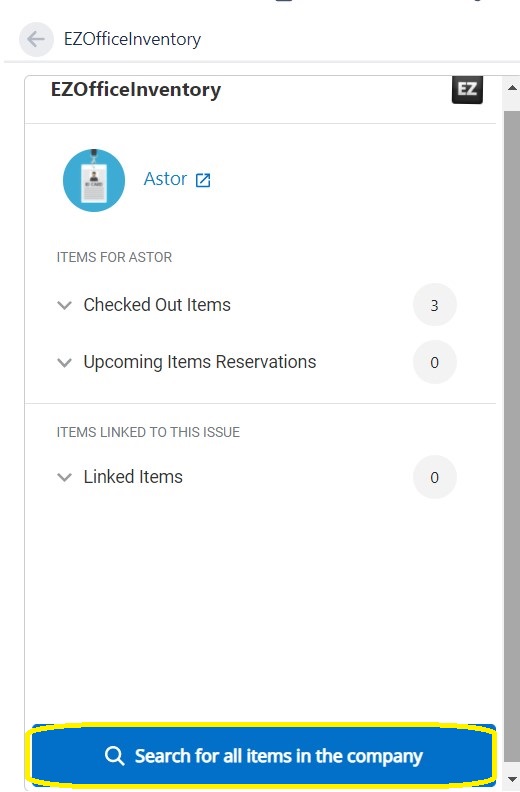
Go to the relevant ticket in Jira and search for the Assets you want to check out from the “Search for all items in the company” button.
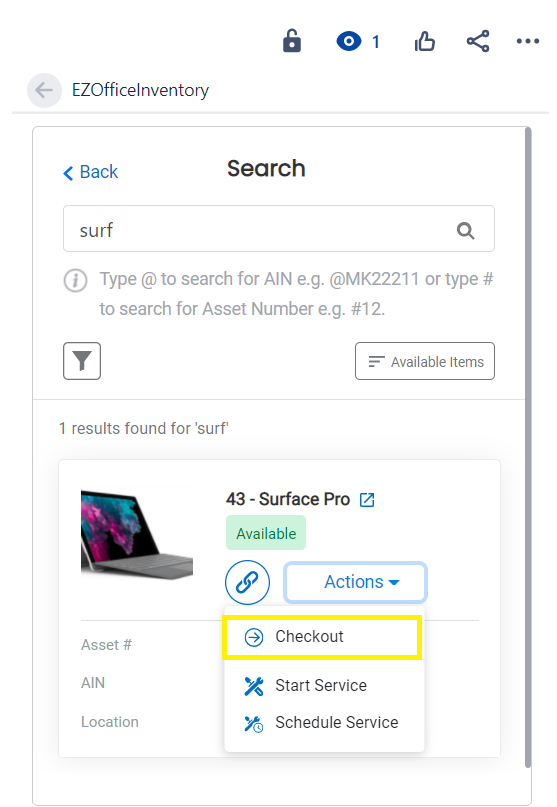
Click on the Actions button and Checkout an Asset from the dropdown menu as shown in the image below:
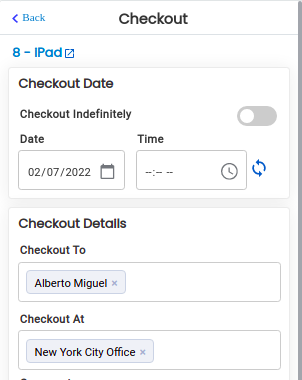
After this, you will be redirected to the Checkout details page with the same fields as those shown in EZOfficeInventory. Select the relevant details and check the Item out.
When checking out Asset Stock, users will be asked to enter the Quantity they want to Checkout :
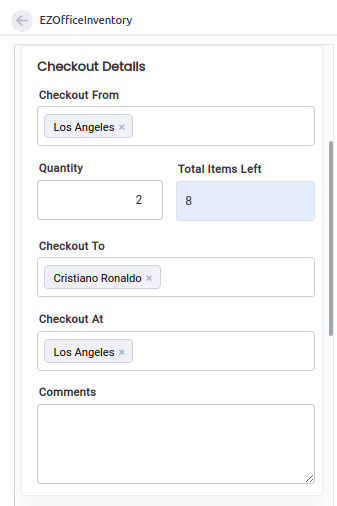
Once Asset Stock Quantity is entered, hit Checkout to confirm the action in Jira.
Read more: EZOfficeInventory Integrated with Jira to Enable Seamless Issue Tracking
1.2 Extend Checkout for Assets
Once an Asset/Asset Stock is checked out, Users can also extend the Checkout period from Jira. Simply go to the ticket and click on the extend checkout button as shown below:

Once you click this button, the following overlay will appear:
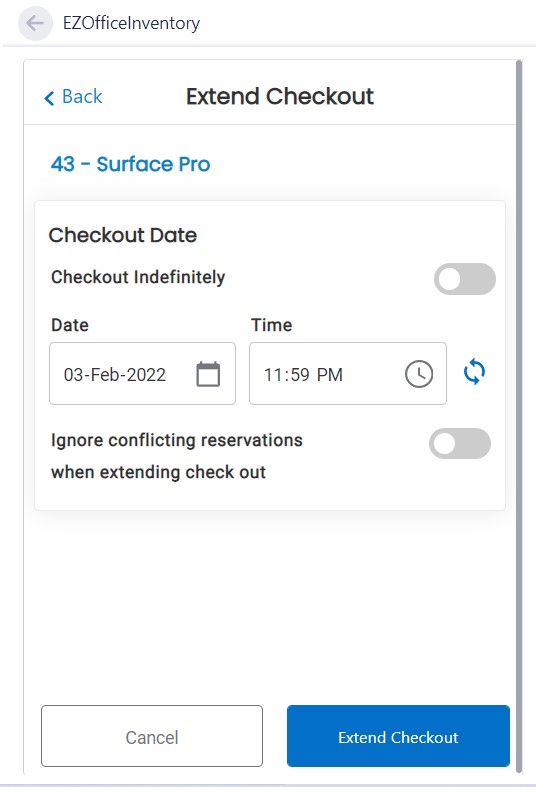
Provide the relevant details and click the Extend Checkout button.
1.3 Extend Checkout for Asset Stock
When extending Checkout for Asset Stock, users will be asked to choose the Line Item quantity they want to extend the Checkout for:
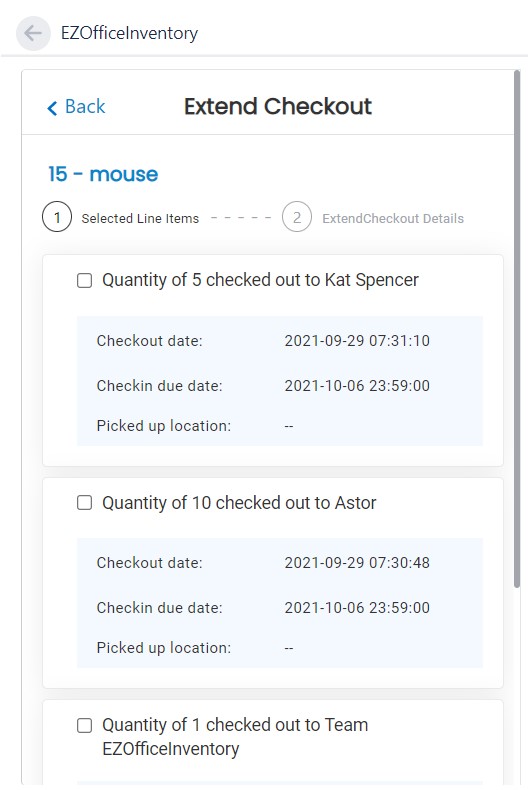
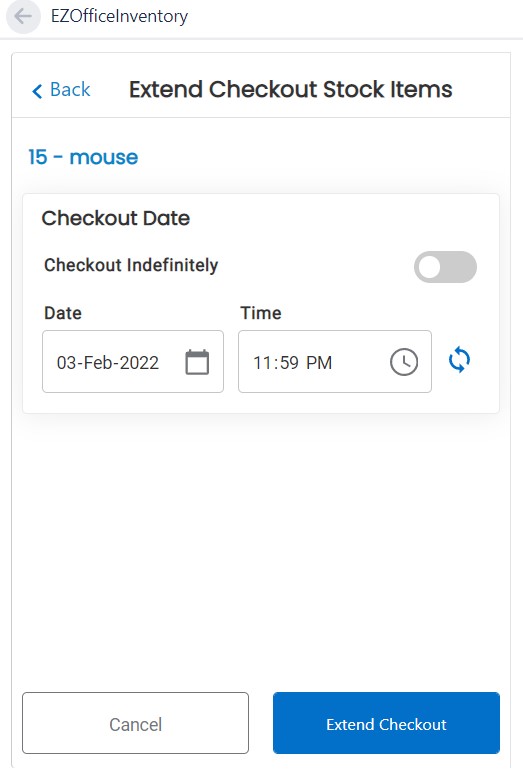
Once the line item is selected, the user can then move to Step 2 to fill in the following details:
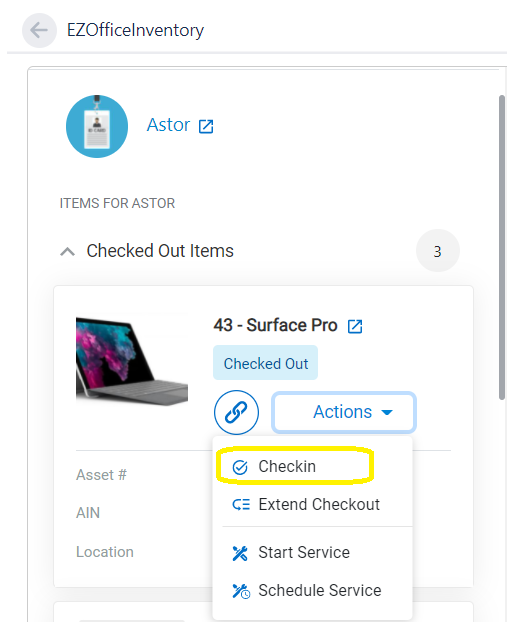
2. Check In Asset/Asset Stocks
Likewise, Users can also Check-in Assets from Jira by going to the Check-in Button and filling in the form with the relevant details:
However for Asset Stock, Users will be asked to select the Line Items they want to check in as shown below:
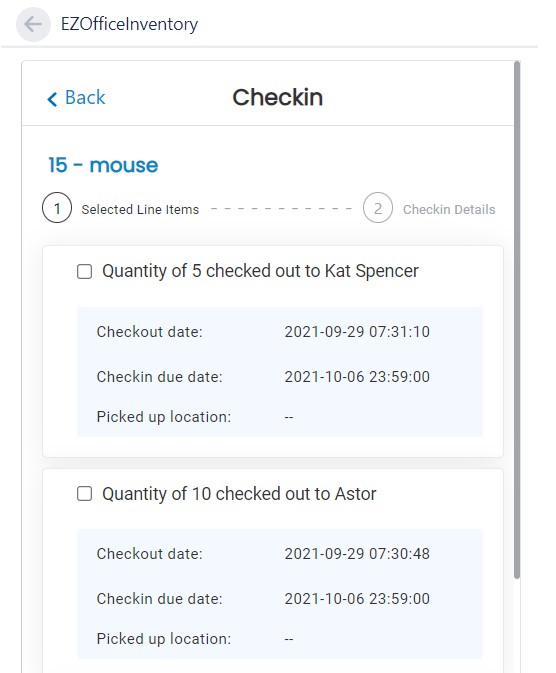
After selecting the relevant items, users will be able to confirm check-in for Asset Stock.
3. View history in EZOfficeInventory
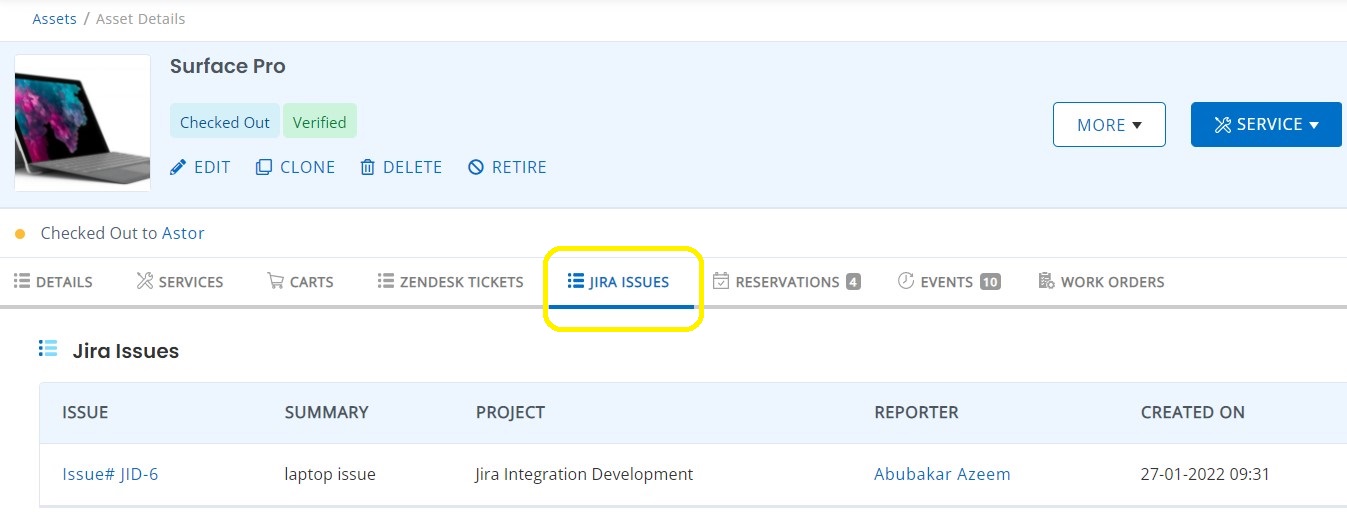
For all the tickets created, scheduled and completed in Jira, Users can now view them in their EZOfficeInventory account. Go to the Asset/ Asset Stock linked to the Jira ticket you created. On the details page, from the Jira Issues tab you can view the associated ticket:
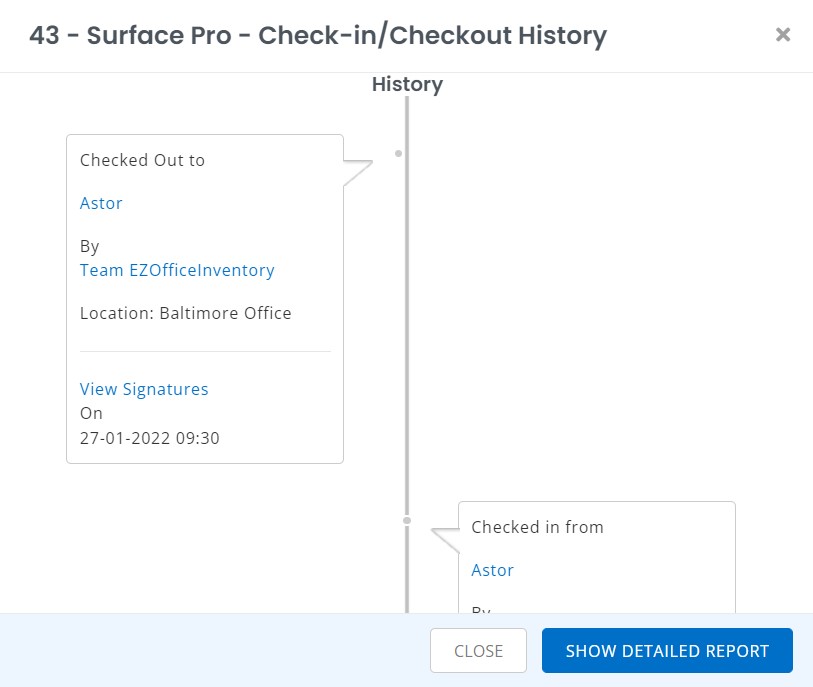
Similarly, users can also view Check-in and Checkout History associated with Items in EZOfficeInventory. Simply go to the Asset details page and then More → History → Check-in/Checkout History.
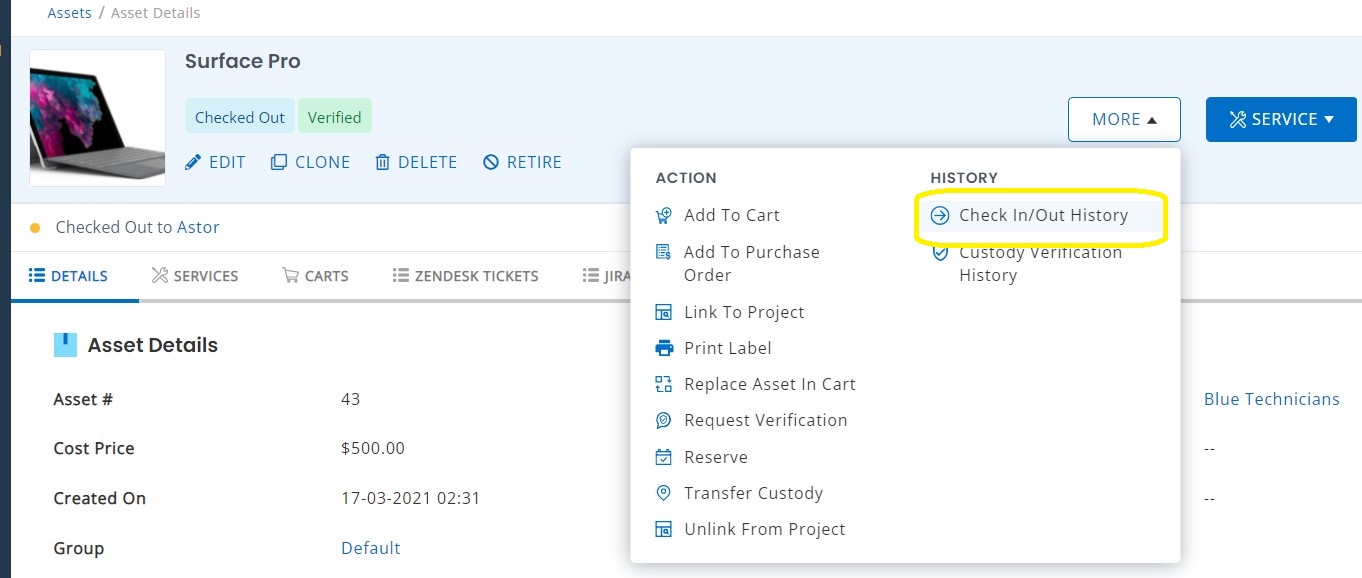
Here is an example of the checkout/check-in history for an Asset:
For Asset Stock go the details page of the relevant Asset Stock and More → History → Stock History.

About EZOfficeInventory
EZOfficeInventory is a leading asset tracking software. It allows you to track, maintain, and report on inventory from anywhere, at any time.


