
EZOfficeInventory’s Work Order Management Software enables you to create work orders and assign them to members to track and optimize performance. This helps you take control of maintenance and inspection tasks a lot more effectively.
Note: For new EZOfficeInventory users, the Work Orders module is being offered as the EZO CMMS add-on. Please contact support@ezo.io to get access to Work Orders. For more information you can view the details about our maintenance management software here.


1. Enable Work Orders
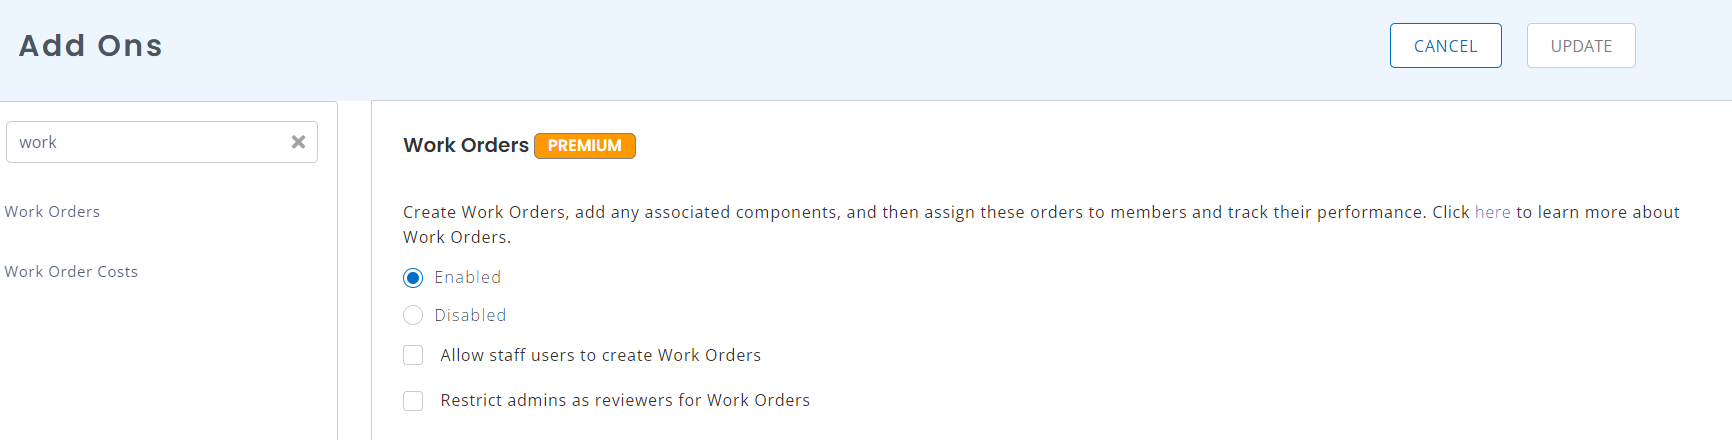
To start off, you need to enable ‘Work Orders’ under Settings → Add Ons.
If you’d like your Staff Users to be able to create Work Orders, check the checkbox shown above.
You can then access the module under ‘Work Orders’ from the dashboard. This takes you to the Work Orders listing page, which lays out important information:
2. Work Orders at a Glance
The Work Orders listing page is categorized into the four possible Work Order states (more on that below). You can add filters to each of the pages, sorting them based on who is set as the Assignee or Reviewer, the creation or starting date, the percentage of work completed, and other criteria. You can customize columns to include any details you’d like, such as priority, reviewer, or time spent on a task. Work Orders can also be easily exported as a CSV for further analysis.
You can take the following actions on your Work Orders listings page as illustrated below:
- Take mass actions
- Add Filters
- Create Checklists
- Customize columns
- Export as CSV
3. Work Order States
A Work Order passes through various states throughout its lifetime:
- Open: The Work Order is still a draft. You can add to it and edit all aspects of it.
- In Progress: This is when the Work Order has been formally started by a user.
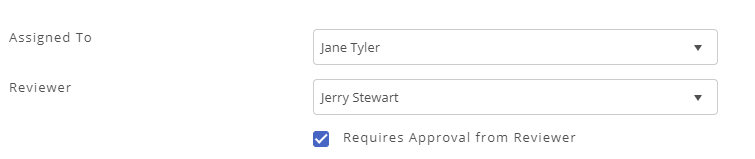
- Review Pending: This state only occurs if you check ‘Requires Approval from Reviewer’ when creating a Work Order:
The Work Order will not be moved to the ‘Completed’ state as with regular Work Orders. Admins and Account Owners will review the Work Order completed by you and then complete the Work Order.
Note: Reviews are mandatory for Staff Users. Account Owners and Administrators can skip the Review. - Completed: This state occurs when a Work Order has been formally ended by the relevant user. While you can still add Work Logs to completed Work Orders, you cannot edit other details.
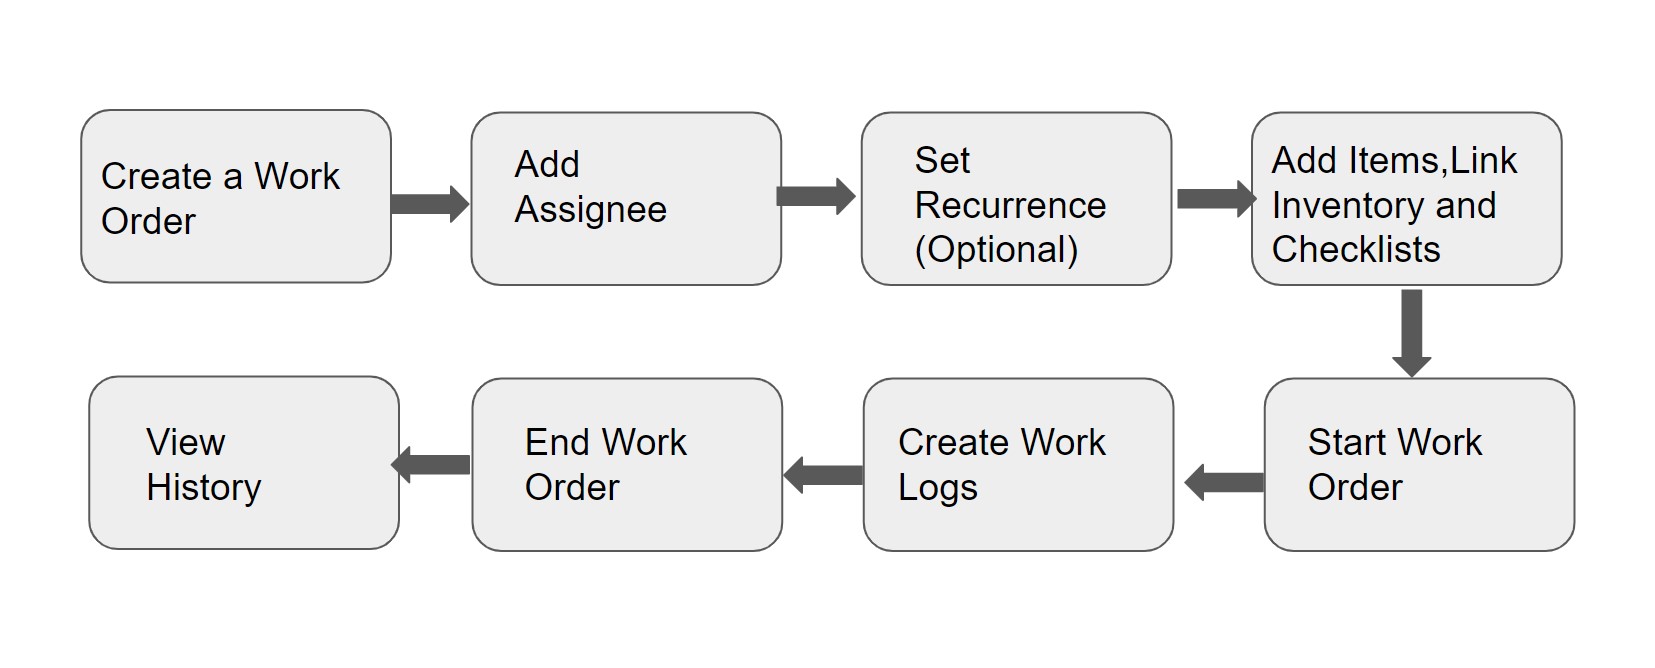
The various stages that a Work Order will pass through are explained below:
4. Work Orders Types
You can choose from two main classifications of Work Orders: Maintenance and General Work Orders. Lets look at them in detail:
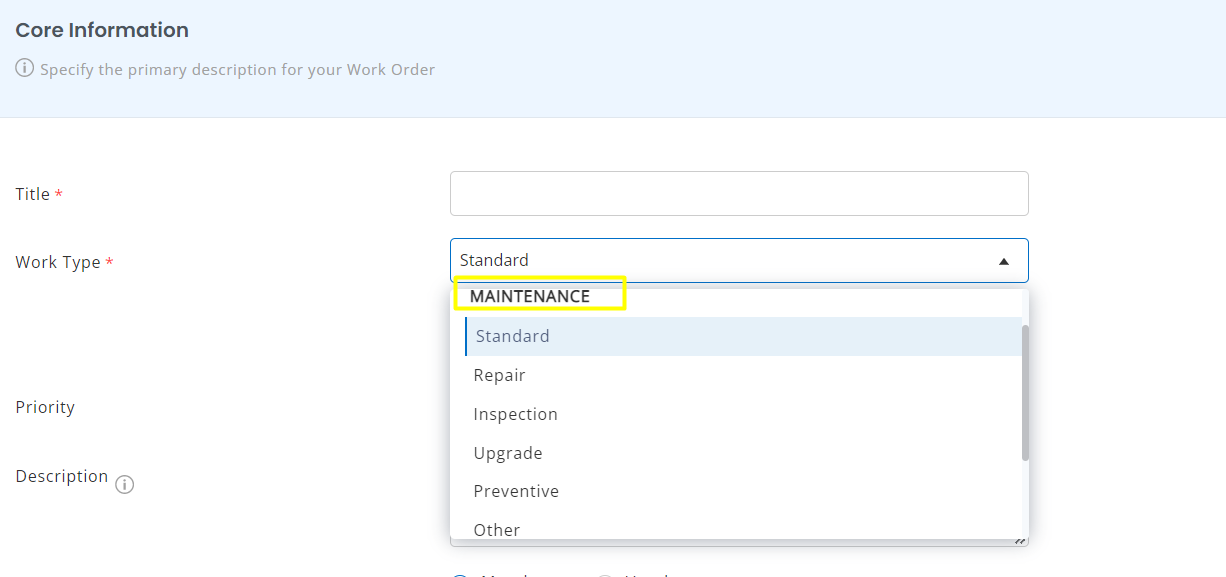
- Maintenance Work Orders: These Work Orders can only be generated for Assets. What sets them apart from General Work Orders is that they can trigger a maintenance event for assets. Within this classification, there are several types of Maintenance Work Orders such as Standard, Repair, Inspection, Upgrade, Preventive and Others.
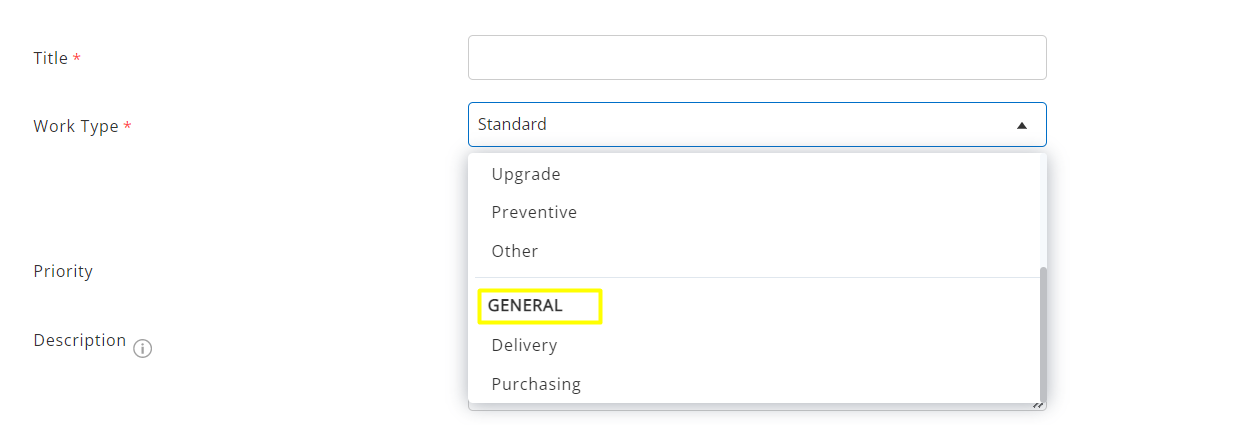
- General Work Orders: These Work Orders can be created against multiple components, including Assets, Asset Stock, Location, Vendor, Group, and more. They do not trigger maintenance events. General Work Order include delivery and purchasing.
We’ll learn more about these in the next section.
4.1. Work Order Elements
Click ‘Add Work Order’ to get things started. You can then fill in the basic details for your Work Order.
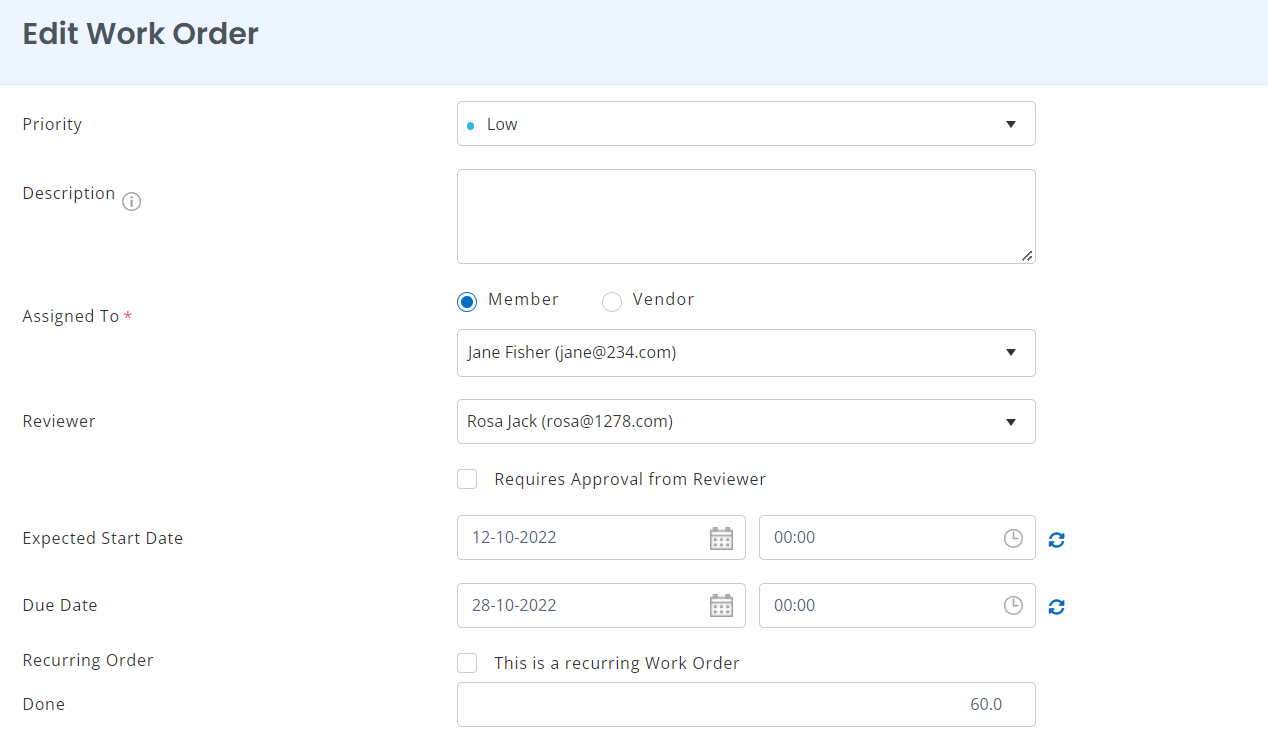
4.1.1. Core Fields
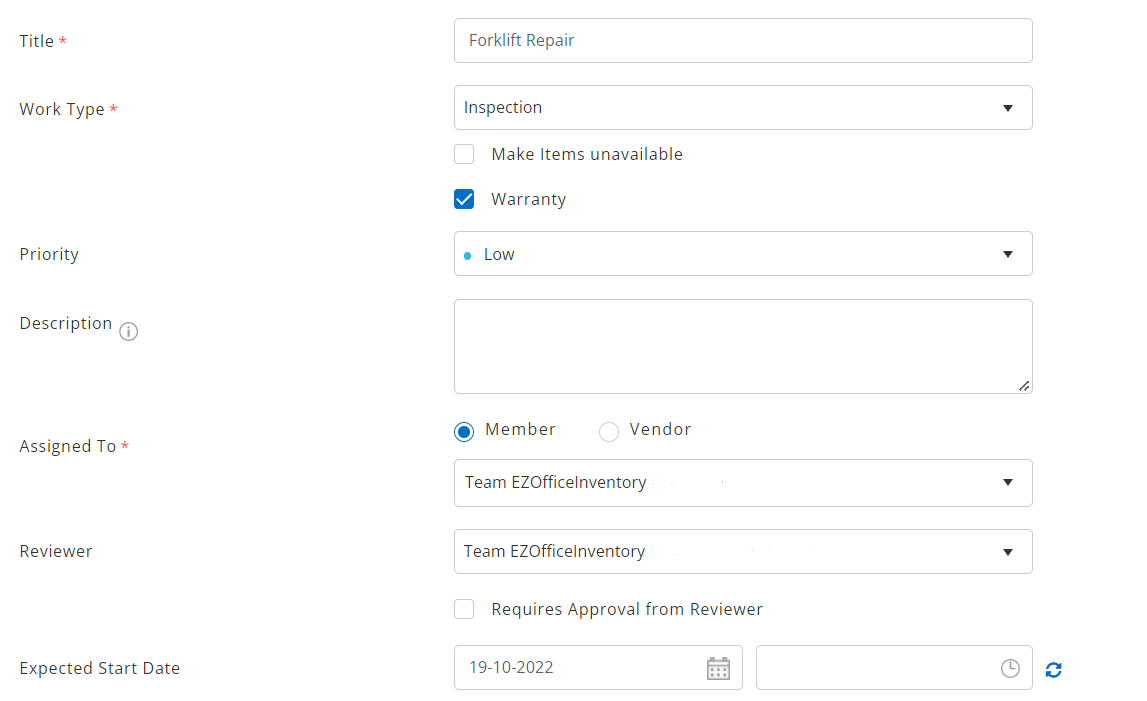
The Maintenance Work Order type includes the following fields :
Title and type: You can give titles to your Work Orders here. These can be used to bring up Work Orders via the search bar at the top of the page. Select Maintenance Work Order type from Standard, Repair, Inspection, Upgrade, Preventive or Other.
Item unavailability: When checking an item for maintenance, you can choose to make it unavailable till the maintenance is completed.
Note: The ‘Make Items Unavailable’ checkbox will trigger a maintenance event for all these assets when the Work Order is Started by a user. When it is Completed by a user, the maintenance will similarly be marked Complete. This means you can manage both Work Orders and Asset Maintenance simultaneously!
Warranty: For Assets under warranty, select this checkbox.
Priority: Choose whether this task is a high, low or medium priority.
Description: Details can be added here. Images attached to a Work Order can be embedded into this description and printed out directly as part of the Work Order Printout. To do this, just add {{image_name.png}} to a description.
Assigned to: You can assign a work order to a member within your User Listing or a vendor. Please note that while you can create a Maintenance Work Order without selecting an Assignee, you will not be able to start it unless you choose one.
Reviewer: The person set to review this Work Order.
Expected Start Date and Due Date: Enter a date when the Work Order is expected to start and be completed till. The expected start date can be different from the actual start date.
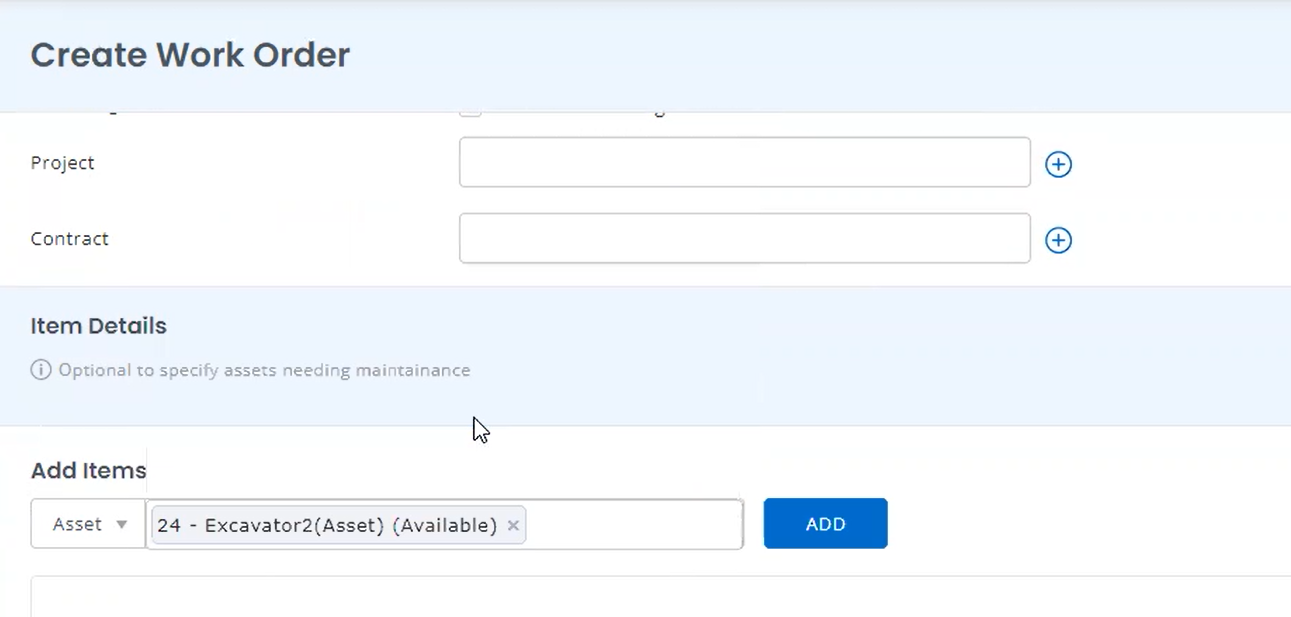
4.1.2. Associated Items
The third section of the Work Order page will change depending on whether you picked a Maintenance or General Work Order. Let’s go through both of these in turn.
a. Maintenance Work Orders
This is the default Work Order type. Since it is used for maintenance, you can add assets that need maintenance to it. Simply type in the name or Asset# of the asset you want to associate with the Work Order:
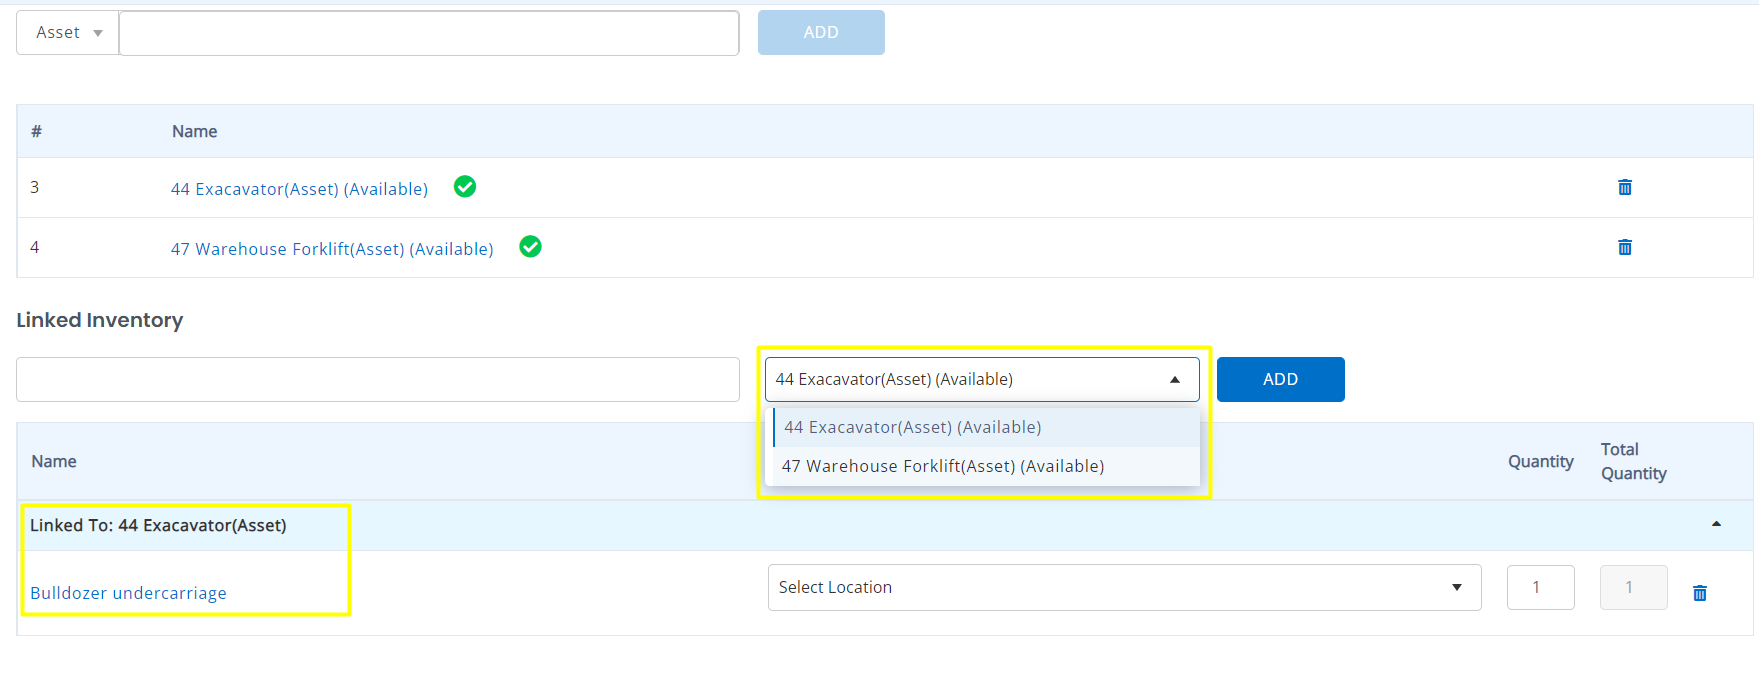
Assets added to the Work Order can also be linked to the inventory. If you have added more than one Assets, you can select the specific Asset and link it to inventory as shown below:
Once you select the related Assets, you can create the Work Order.
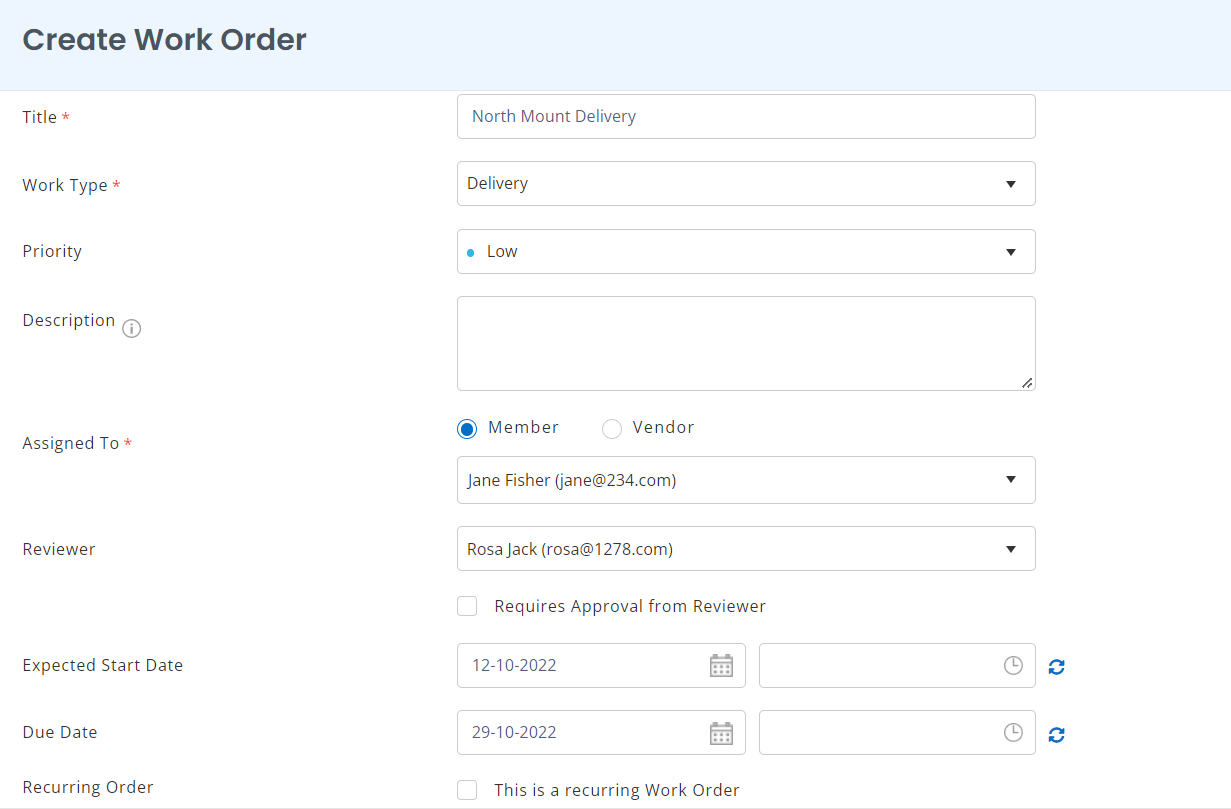
b. General Work Orders
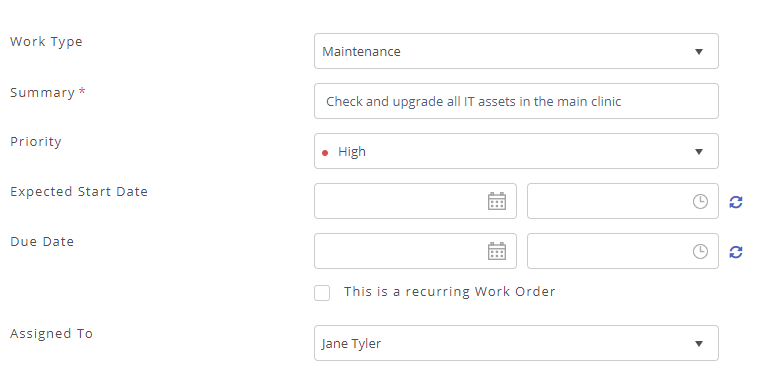
The General Work Order allows you to add all sorts of components to your Work Order. Please note that this does not trigger maintenance events. Basic fields for a general Work Order look like this:
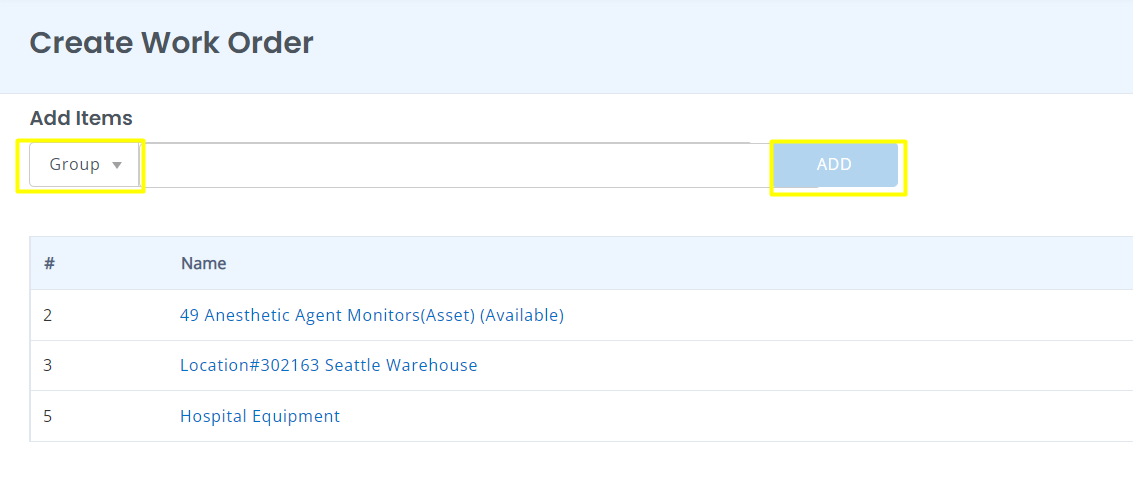
You can add ‘components’ to General Work Orders. These can include all sorts of elements that will be a part of that Work Order, including Assets, Groups, Locations, Users, Asset Stock, etc.
To add an item, simply select the appropriate component type (such as an Asset). You can then type the name or ID of the relevant item and click the ‘Add’ button when it shows up. In the example below, we have added an Asset, Location and Group to the WO.
This gives you so much flexibility in the kinds of Work Orders you can create and escalate. If you’re using a fixed bundle of tools on a maintenance task, for example, you can add it to a cart and associate it to a Work Order component for quick reference. As another example, you could list all the warehouse locations where equipment needs to be audited, and check them off as audits get completed.
4.1.3. Recurring Work Orders
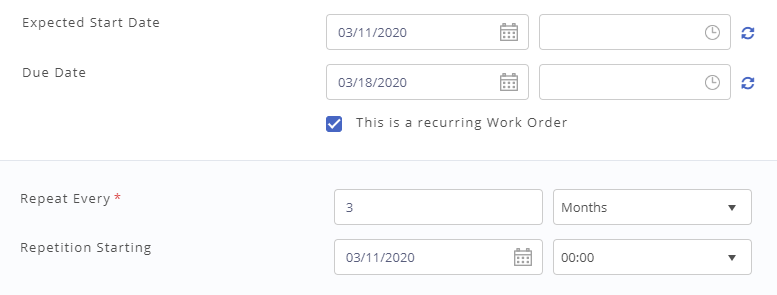
If a work order repeats at regular intervals (for maintenance tasks that need to take place every month, for example), you can specify that by checking the ‘This is a recurring work Order’ option:
By filling out the duration between repetitions and the starting dates for this cycle, a new Work Order will automatically pop up at the intervals you defined. It will be an exact copy of the older Work Order and will be in the ‘Not Started’ state until someone formally starts it. To stop recurrence for a Work Order, uncheck this option from the last active Work Order. This will prevent the system from firing recurring Work Orders for this in the future.
5. Taking actions on a Work Order
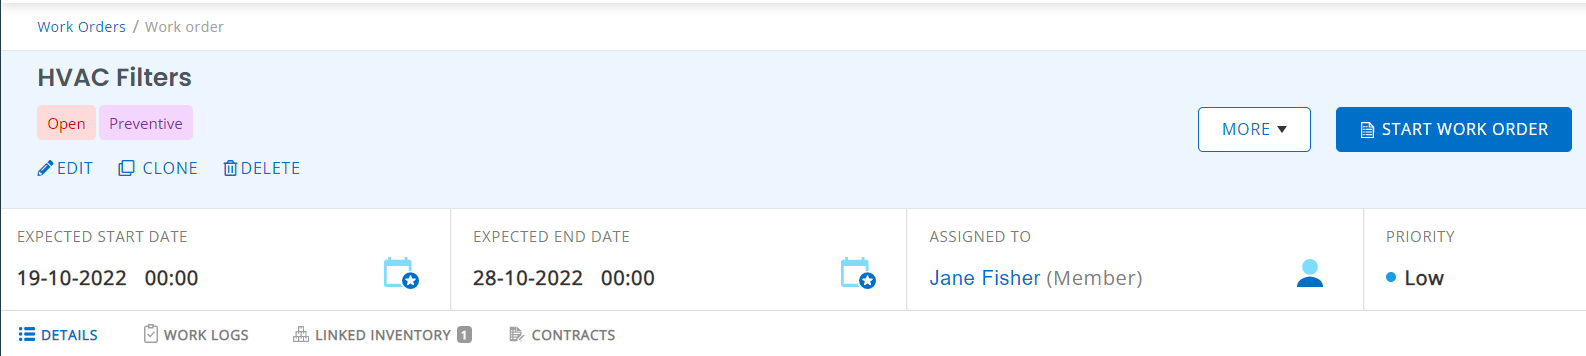
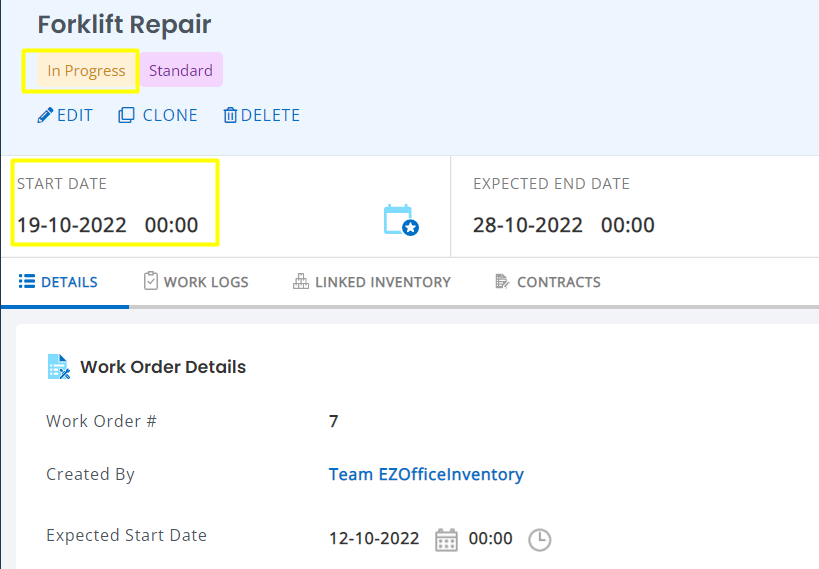
The details page for a Maintenance Work Order will show critical KPIs right at the top:
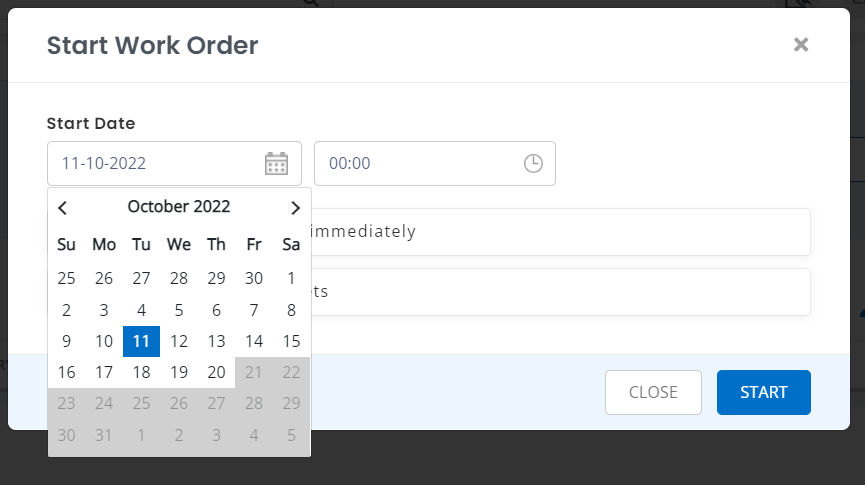
You can start the Work Order to add details like costs, work logs and their associated costs. An overlay will appear asking you enter the start date when the Work Order was actually put into action. Here you can even choose previous dates for a Work Order that is in progress and was not updated on the app:
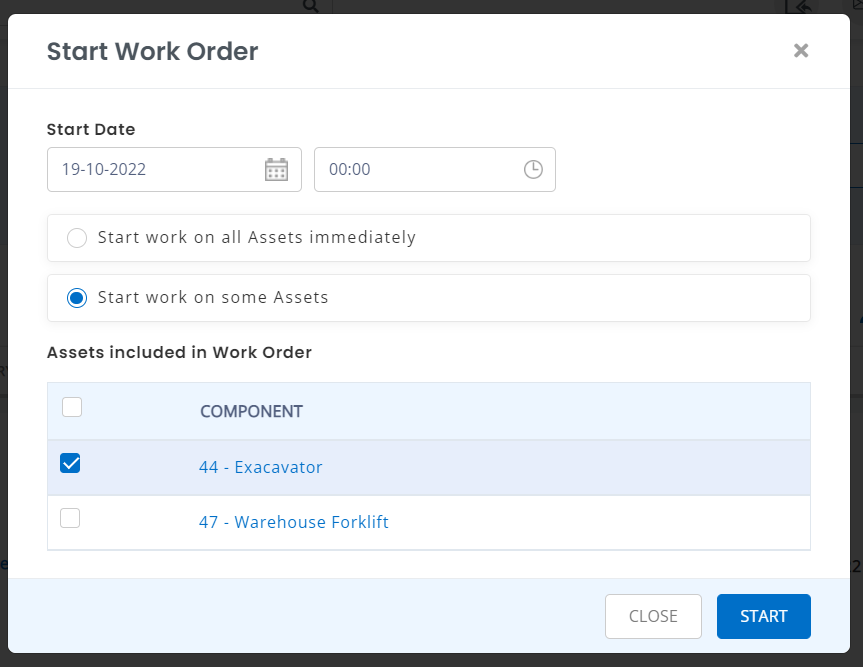
Next you can select to start work on either all Assets or some of the linked Assets.
When you start the Work Order, you can see that the expected date has been changed to Start Date and the Work Order is in progress:
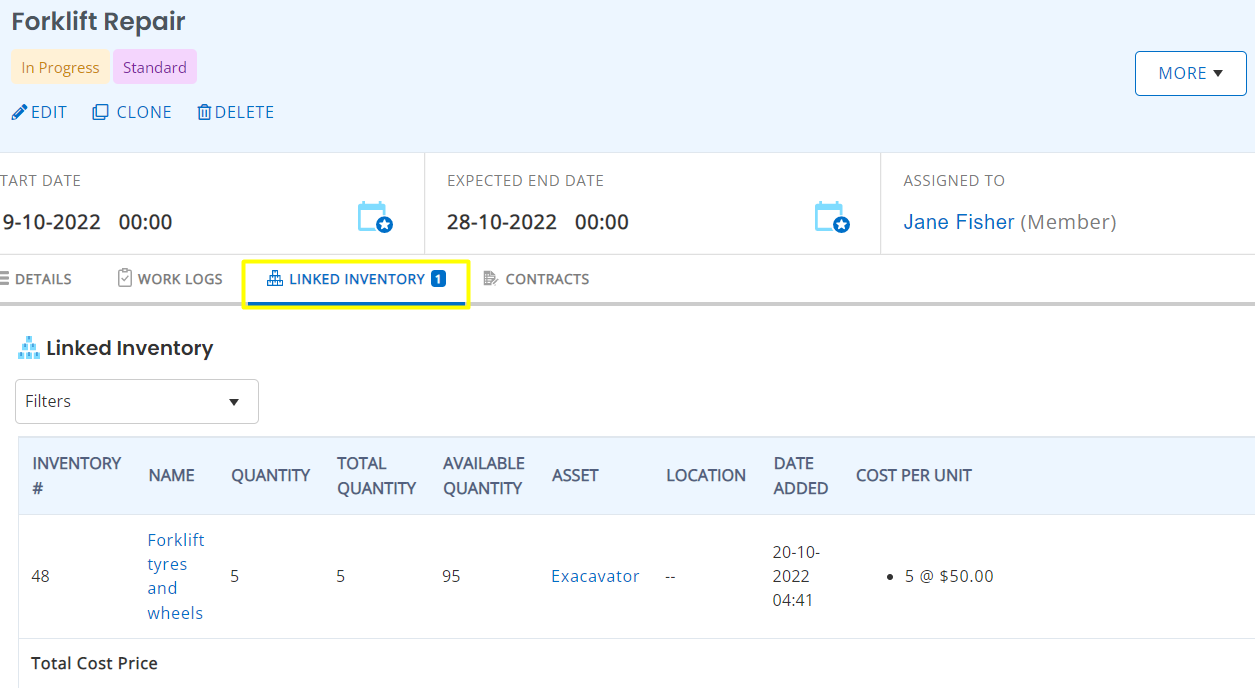
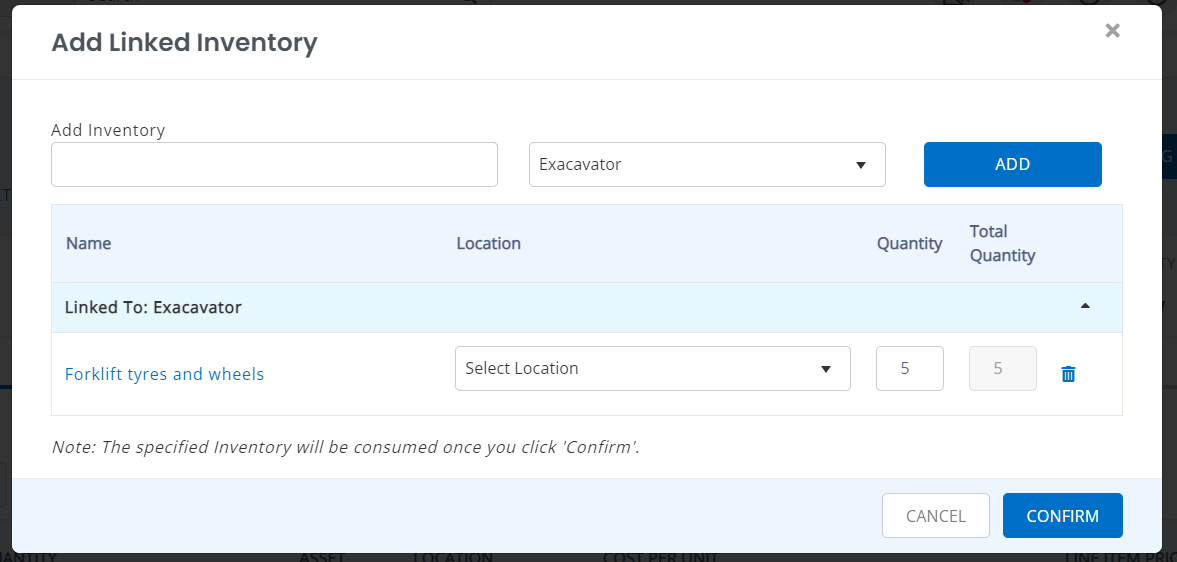
As a next step, you can link inventory to your Assets in the Work Order from the following tab:
Here you can select the required Inventory and the associated Asset. After this you can add the quantity, location and hit confirm.
The linked inventory and associated costs will be shown as below:
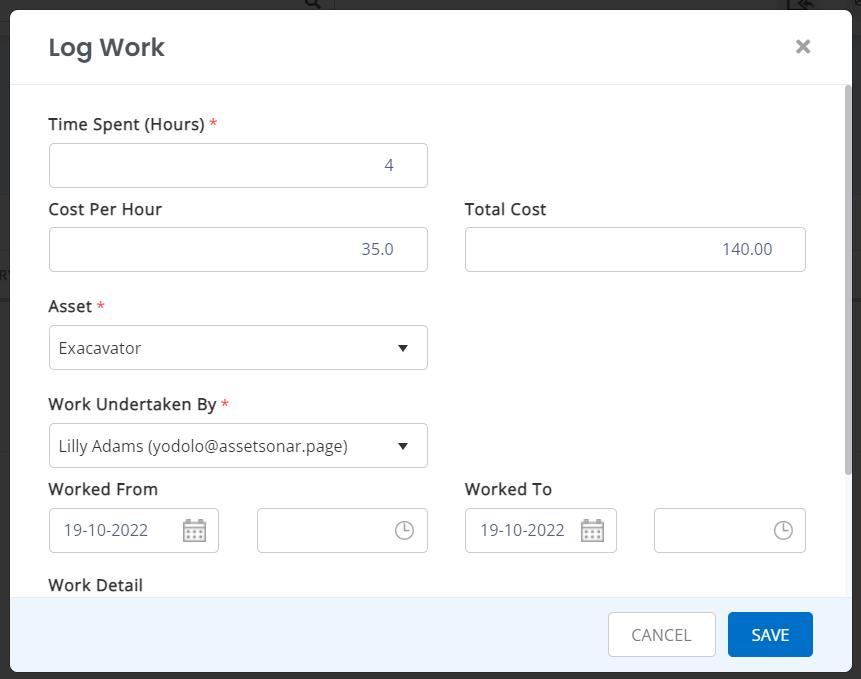
In order to document hours spent, you can update the Work Logs for your WO:
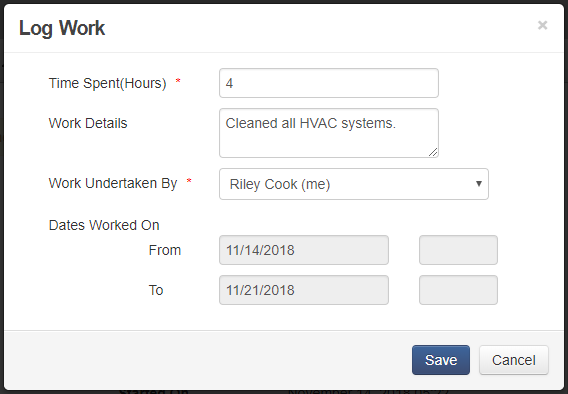
Add the following details such as hours spent, cost per hour, and work undertaken by and more shown below:
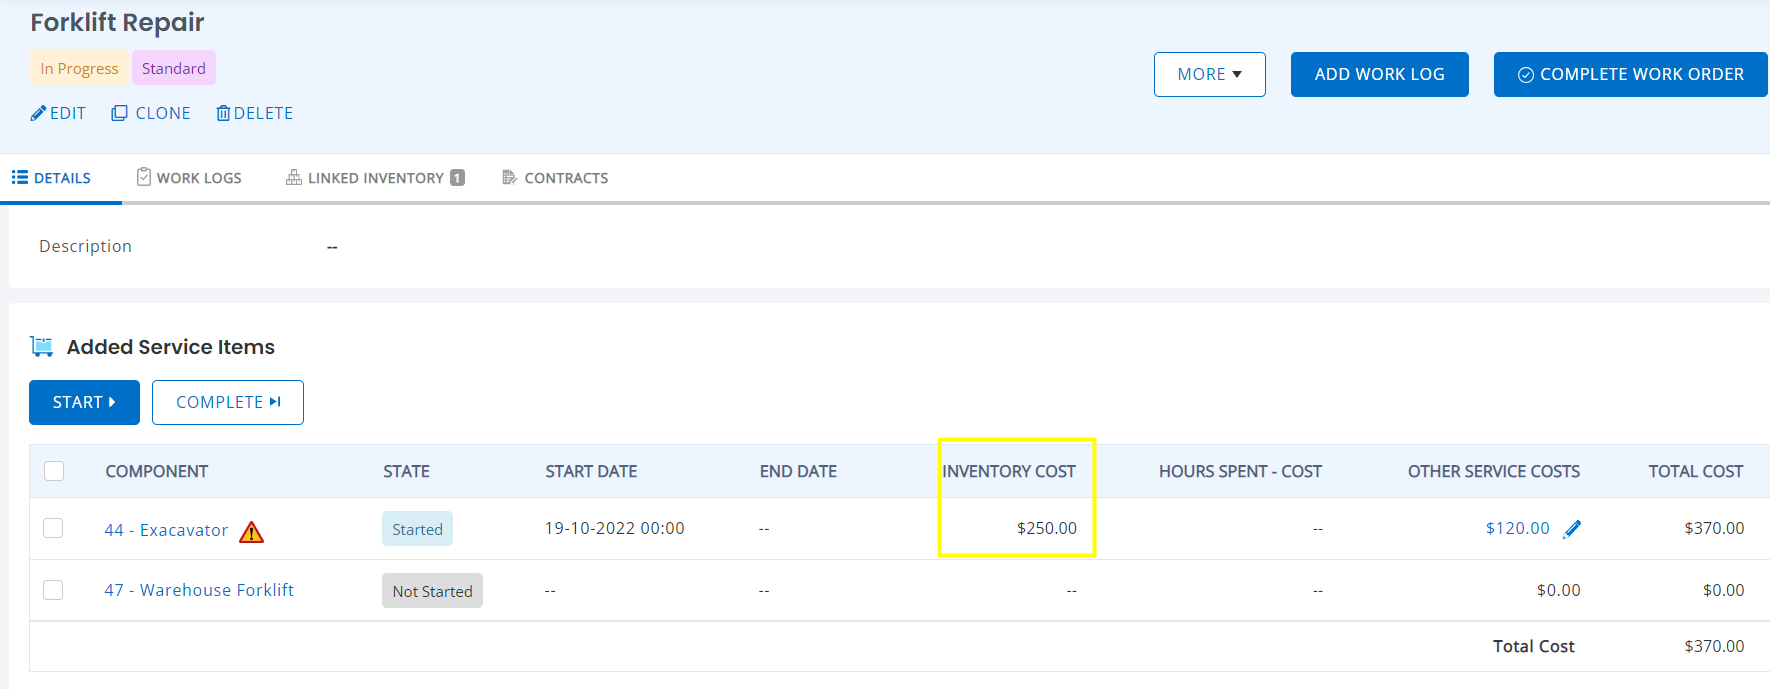
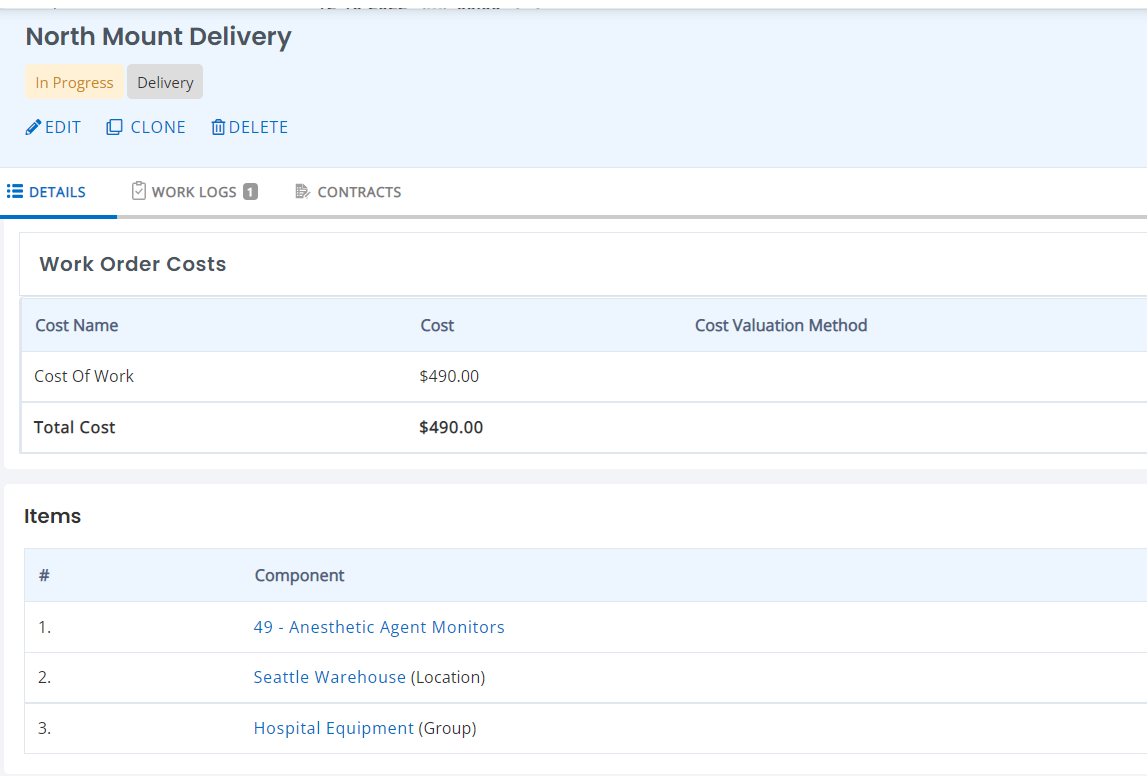
After adding the Work Log, you can add any other service costs that were incurred such as transportation costs. Then you can view the total costs spent on the Asset in the WO:

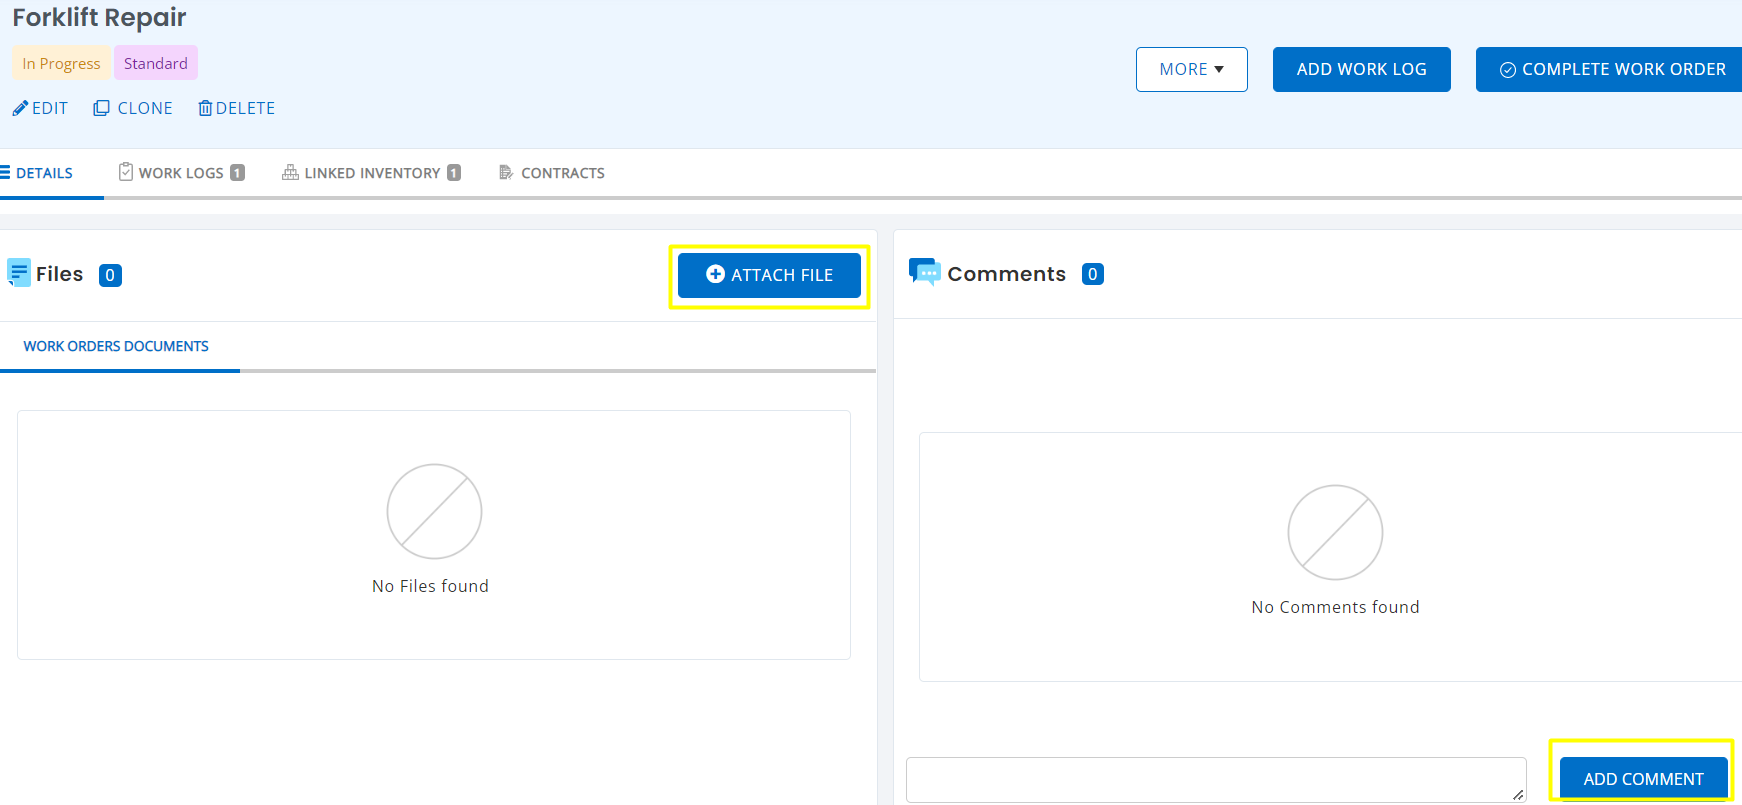
You can also attach relevant documents and add comments to update the Work Order as they progress.

Work Orders can also be linked to Contracts whenever required. Go to the Contracts details page → Work Orders → Link Work Orders and choose a Work Order from the dropdown.
Once all details are updated, you can now complete service for the Asset as shown below:
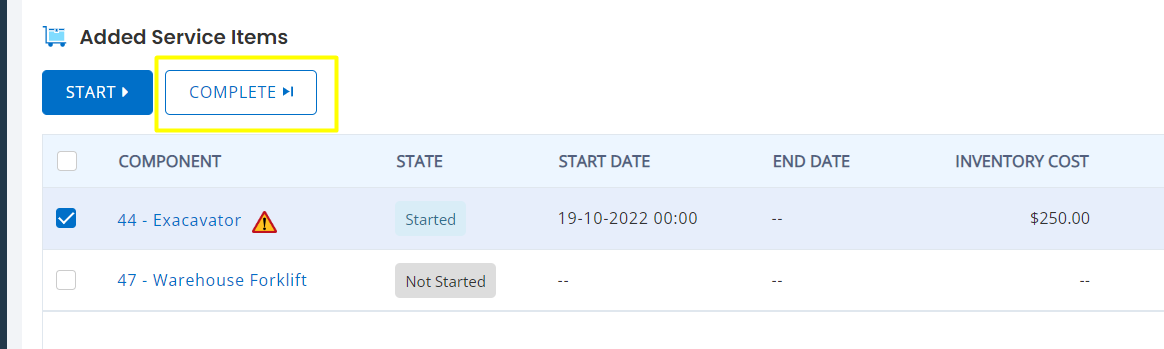
An overlay will appear asking you to enter the End Date for the Service of the Asset.
When working with a General WO, simply start the Work Order and add the Work Logs to document costs and hours spent on its completion:
The Work Log in a General Work Order will be displayed as follows:
6.Checklists
You can also add Checklists to your Work Orders. These allow you to create lists that can be attached to Work Orders. Assignees can then respond to these lists as they continue working on specific tasks.
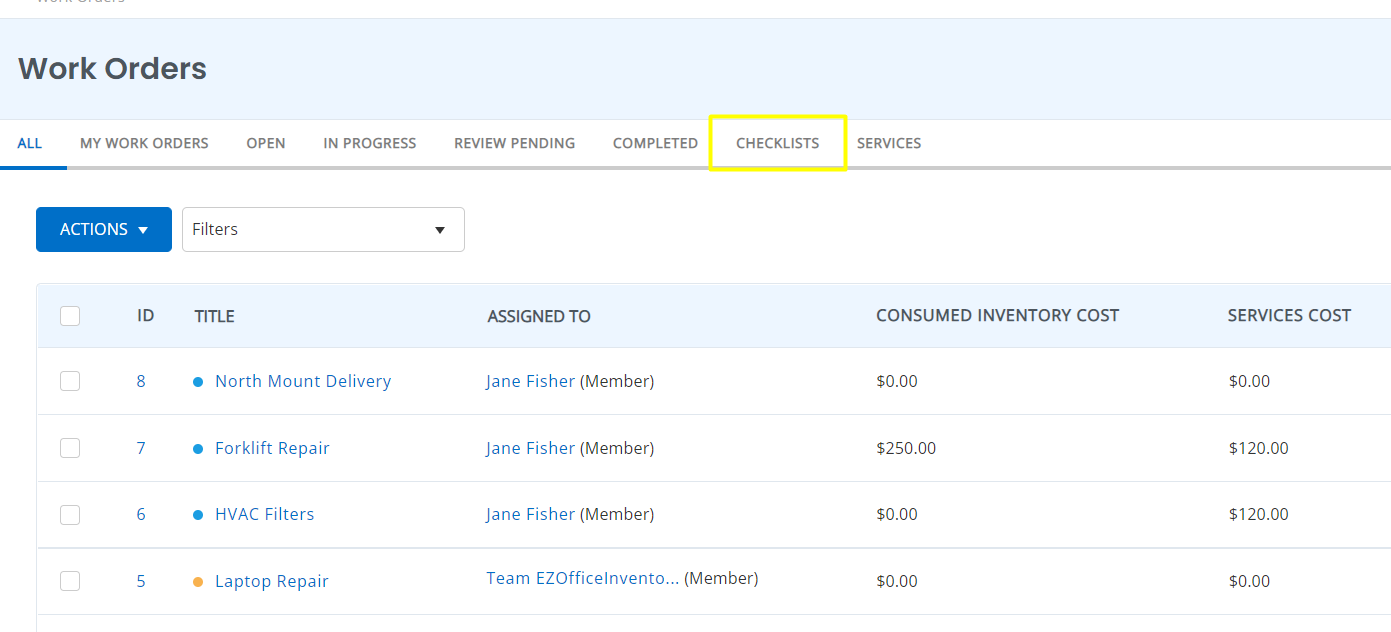
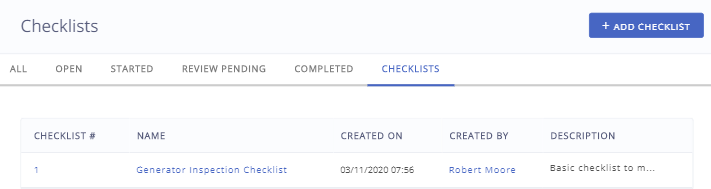
Multiple Checklists can be associated with a single Work Order. You can find them by clicking the Checklists tab on the Work Order listing page highlighted below:
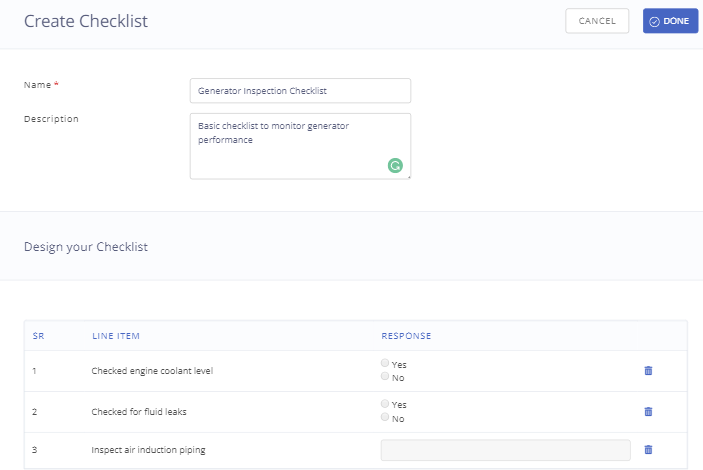
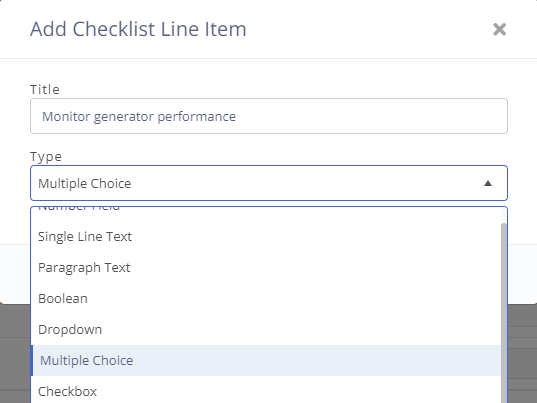
Click ‘Add Checklist’ to get started. Here, you can add basic details to your Checklist. You can then click the ‘Add New Line’ button to create your Checklist:
Each line item will have a Title and a Type. The Type can be of four kinds, depending on the line item itself. If you want users to detail how many items they inspected, for example, a Number Field would be useful. If you want them to answer whether or not they completed a specific task, a Boolean would be more helpful, or for additional options you could select Multiple Choice:
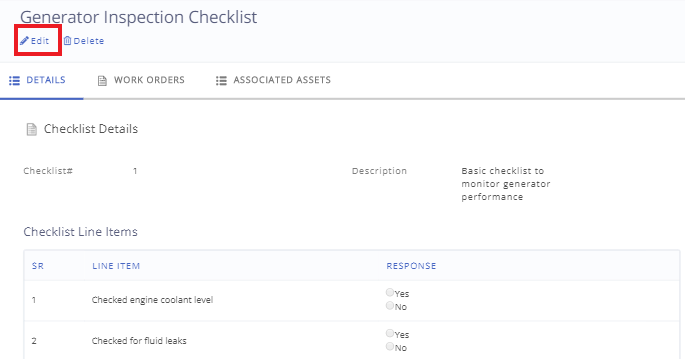
Next, you just click ‘Create Checklist’. Each Checklist will show a list of all associated Work Orders below it.
Checklists may be edited and deleted. However, if a Checklist has been associated with a Work Order, you will only be able to edit its name and description, and not any of its line items.
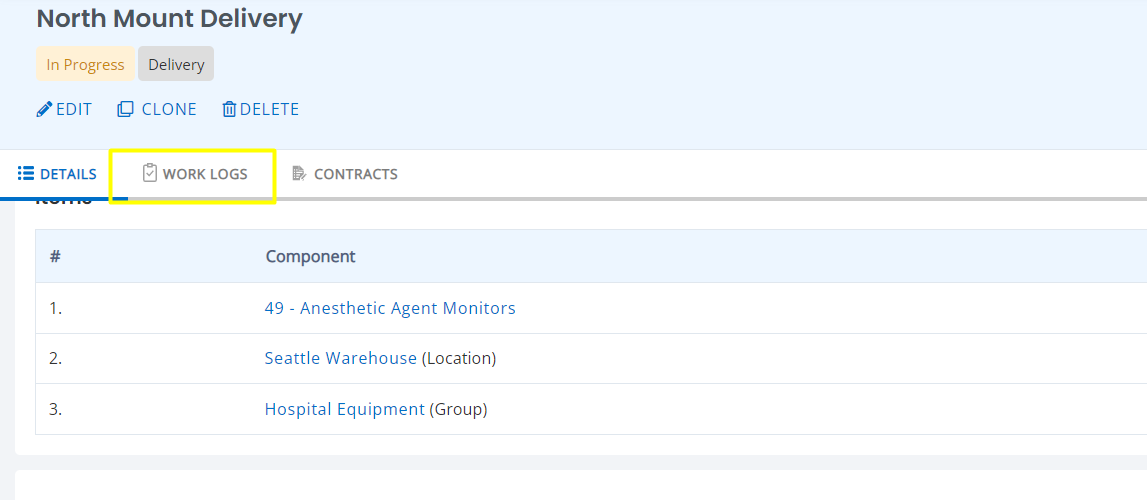
Below, you can see how we’re associating the Checklist we just created to the Maintenance Work Order we drew up earlier. Like all similar fields, you can pull these Checklists up by their name or number, click ‘Add’, and you’re done.
Once added, you can view the Checklists right from the associated Work Order. As the buttons below show, you can update Checklist responses on a Work Order that’s in an ‘In Progress’ state, delete the Checklist, or expand and collapse the Checklist according to your preference:
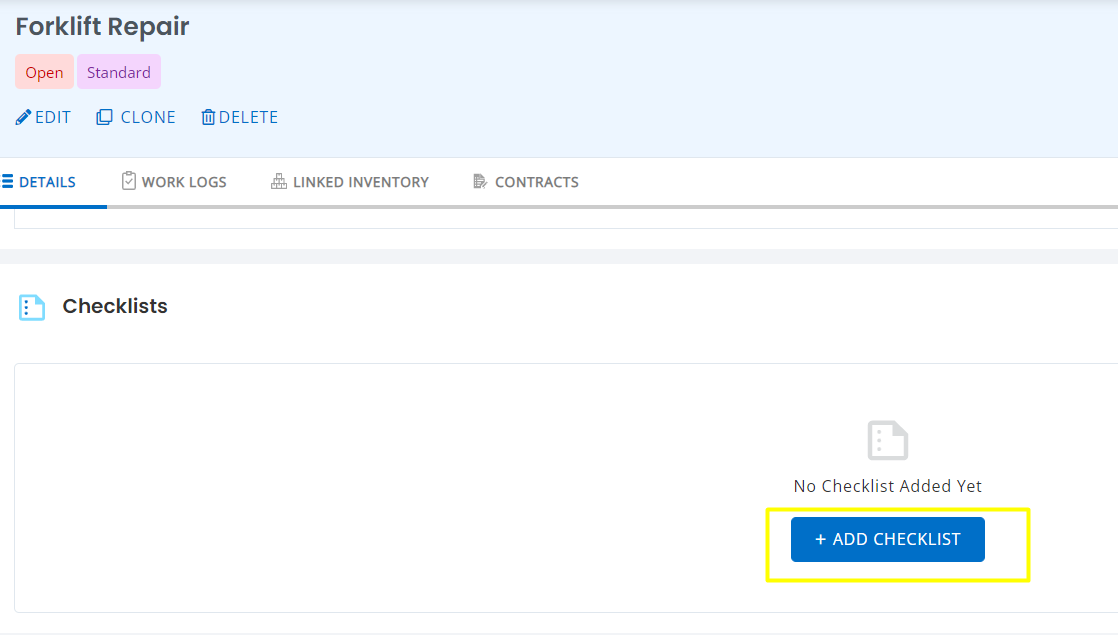
New Checklists can also be added directly from a Work Order detail page.
7.Updating Work Orders
Admins can change the Assignee, Reviewer and other details by editing a Work Order at any time. However, there are some details that can only be updated by the Assignee. While a Work Order is still in Progress, Assignees can edit them to include details such as the percentage of the task completed or the cost:
8. Alerts and Reminders
You can keep tabs on what everyone is doing by ‘Watching’ a Work Order. This sends automated alert emails when the status or Assignee changes, or when a Work Order is due. This can be toggled on and off by clicking ‘Watch’ or ‘Un-watch’ from the dropdown options that appear once you click on ‘More’ on the Work Order detail page.
Admins can also send email reminders to Assignees manually by clicking the ‘Send Reminder’ from the ‘More’ dropdown. This can help keep them accountable or furnish them with details as the task is in progress.
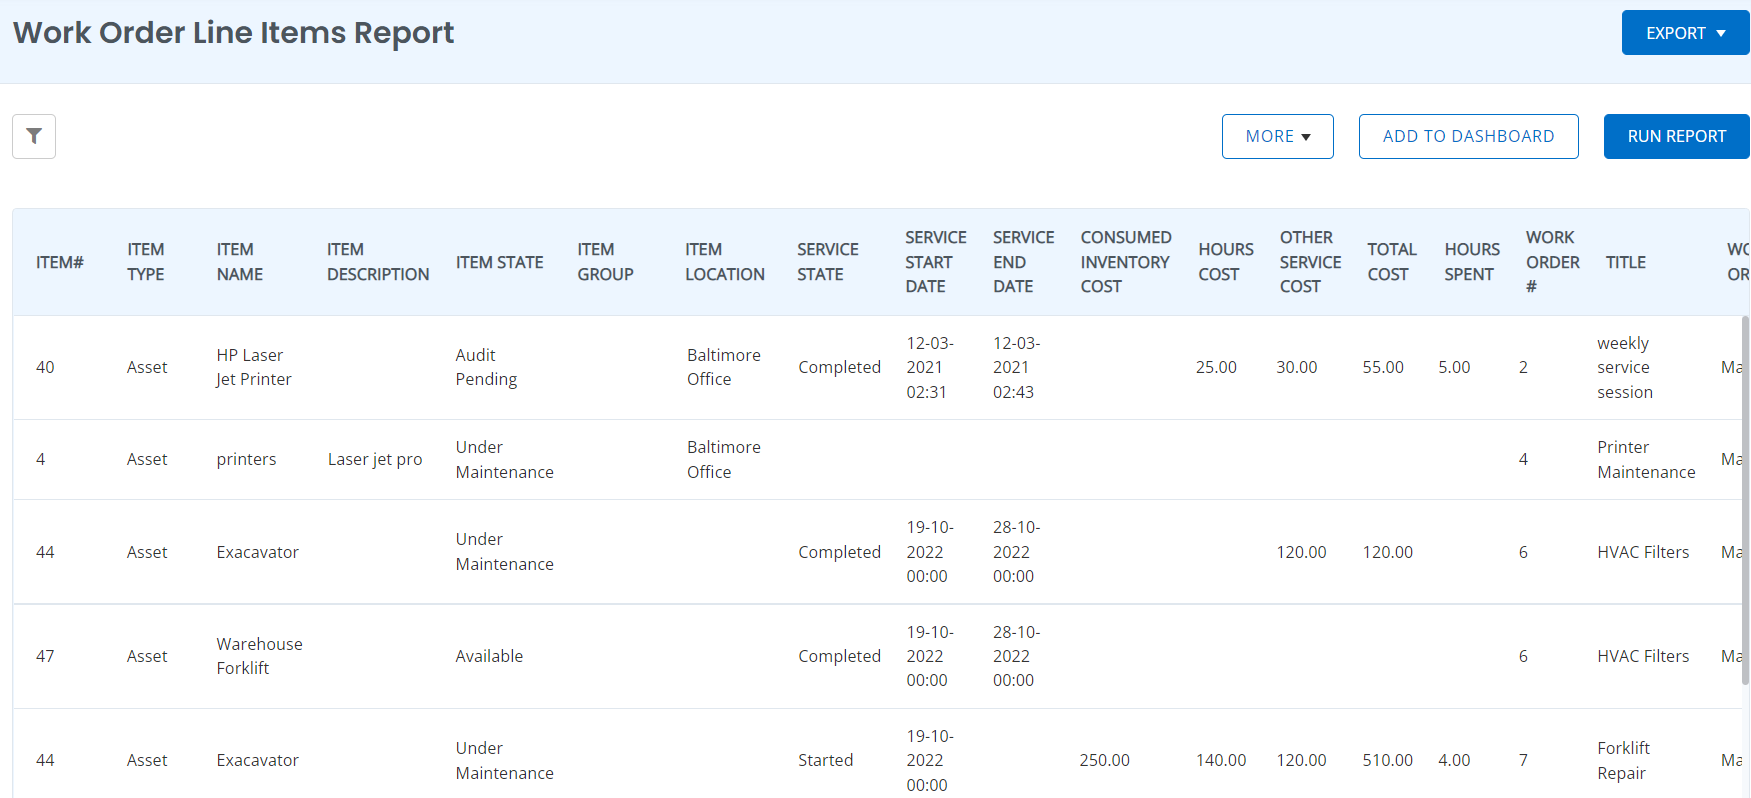
9. Work Order Reports
Go to the Navigation Menu→ Reports → Work Order Reports. From here choose your desired report. For example a Line Items Reports looks like this:
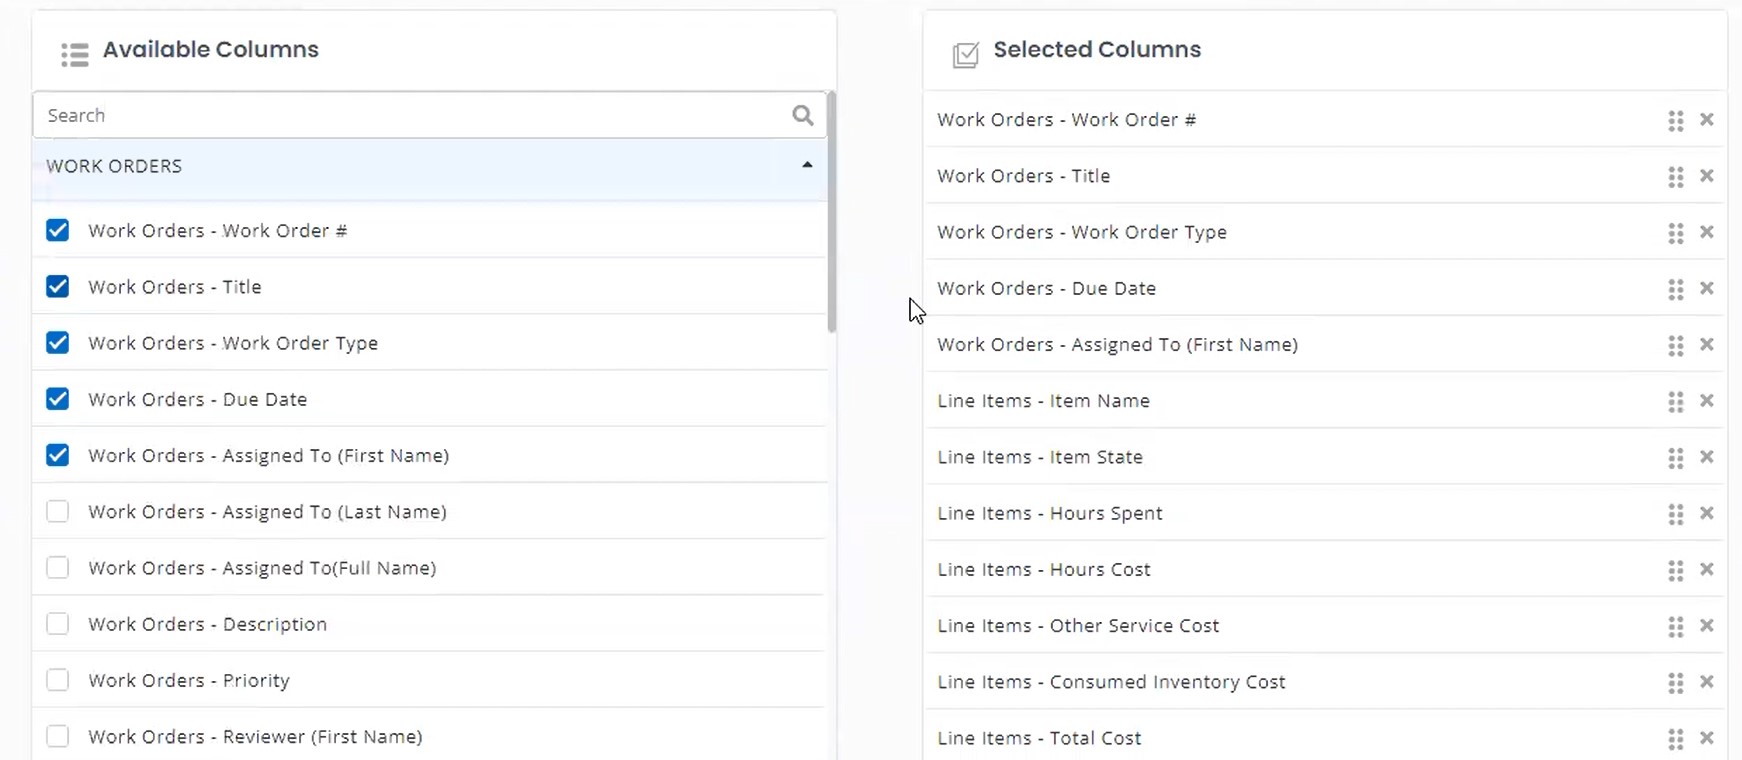
You can also run a Custom Report for Work Orders. We chose to run a Custom Report for Line Items for WO. Select the columns you want to display:
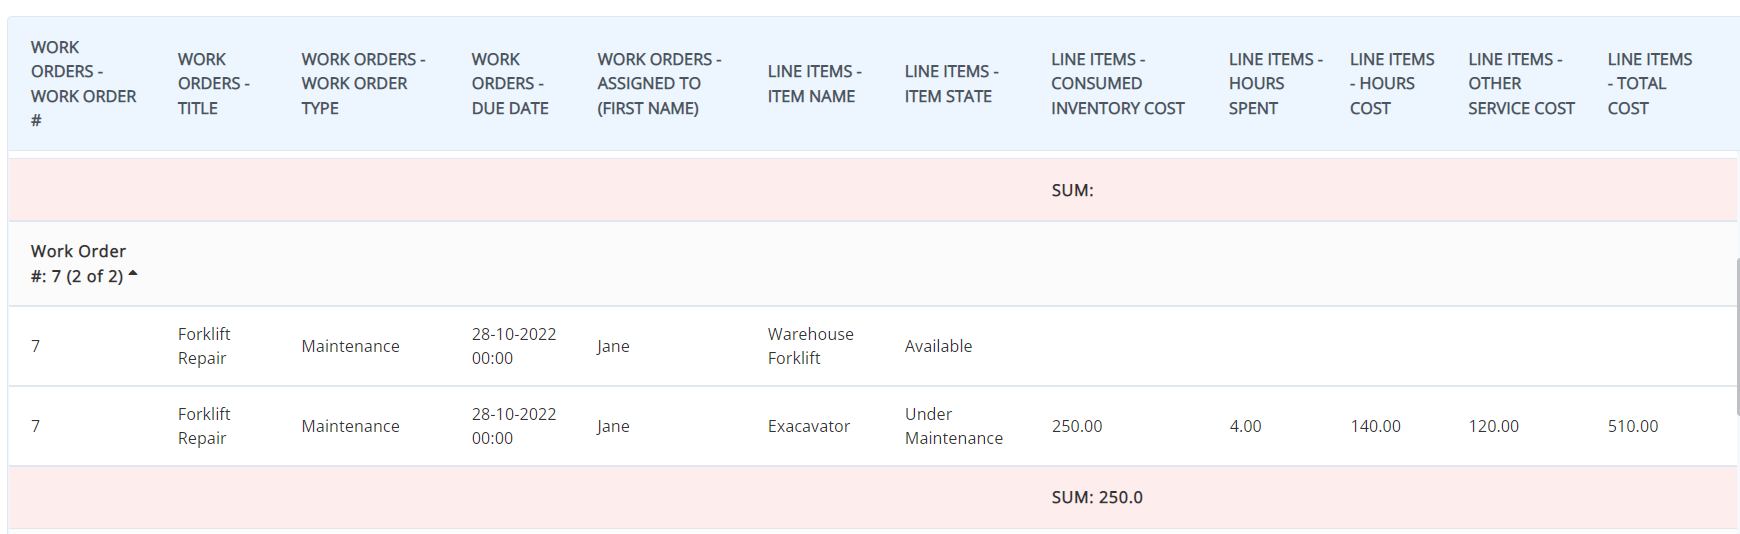
Add the relevant functions and run the report. Here is what our report looks like:
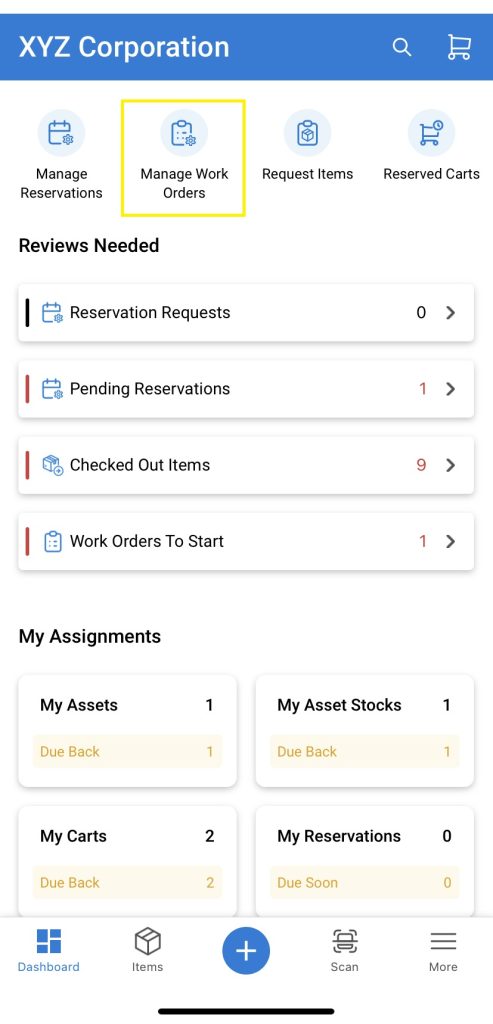

11. Work Orders on the Mobile App
You can access the Work Order module on the EZO mobile app by clicking on ‘Manage Work Orders’.
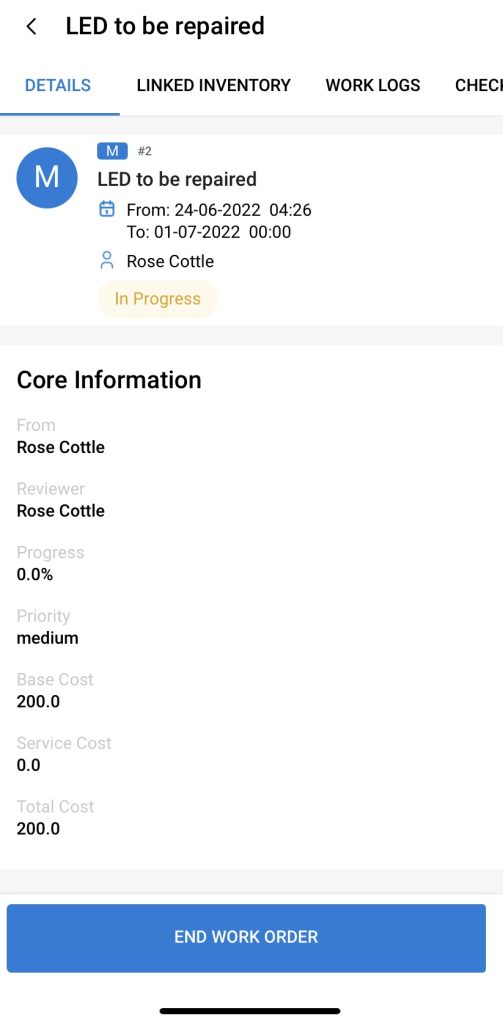
You can then click on a Work Order and take multiple actions. This includes Starting and Ending Work Orders, sending reminders, and more. To do this, simple click on any Work Order. For example, the following image shows a completed Work Order that needs to be ended.
You can also add comments, and update Work Logs and Checklists directly from the app. Here’s what updating a Checklist looks like on the app:
10. History Log
Click on ‘More’ and then ‘History’ to see the Work Order’s history trail and any changes that have been made to a Work Order since it was created. This includes changes in Reviewers, for example, or simply a change of state such as a Work Order going from ‘In Progress’ to ‘Completed’.
You can also run the Work Orders report to glean insights into worker productivity and answer critical questions relating to performance and process optimization.
And that’s all you need to know about work order management in EZOfficeInventory! The ability to link Work Orders, Users, Locations and Assets all under one system makes this a great tool for businesses hoping to bolster accountability and lower maintenance overheads.
Have feedback for us?
For questions and queries, drop us an email at support@ezo.io


