

This integration requires
- A subscription to Jira Service Desk
- A subscription to EZOfficeInventory
- EZOfficeInventory App from Atlassian Marketplace
This guide outlines the setup and workflows for the EZOfficeInventory app that is now available on the Jira On-Premise Server.
How does this integration complement EZOfficeInventory?
This integration provides support and ticketing capabilities that sync directly with the Jira asset tracking server. The app complements the self-hosted Jira server so you can manage issue resolution. With quick issue resolution, you lower equipment downtime so your company’s productivity never falters.
1. Benefits of the integration
Integrating EZOfficeInventory with Jira’s on-premise server enables teams to quickly identify tasks at hand, issues associated with each item, and useful details such as item location and AINs.
With this integration, you can:
- Directly view the Assets and reporter linked with an issue in Jira. This helps employees quickly view relevant Asset details to understand the problem areas in depth. They can also associate additional items as per the requirements of the issue. Consequently, this enables a more precise and thorough issue management.
- Track all Jira Issues related to an item directly from the Item Details page in your EZOfficeInventory Account. A Jira Issues tab on the page references all the issues for the item so EZOfficeInventory users can easily view all relevant issues.
With a complete overview of issues, users can record equipment details, check out replacement items, and track and resolve issues a lot quicker. Furthermore, you can gauge better insights into an item’s useful life by referring to the issues it has contended with in the past.
Use our new integration to iron out operational workflows and cut down on repair time for a more productive office environment.
2. Common workflows
- An employee notices a broken fax machine and creates an issue for it. EZOfficeInventory tracks Asset details for the machine and Jira tracks the issue workflow.
- An on-field technician requires help with operating an excavator. The current user quickly views the issue on Jira and pulls the Asset details for the user.
- A customer requests a memory extension for their laptop. The IT Helpdesk looks up the issue on Jira, pulls up the Asset details for the said laptop from EZOfficeInventory, and identifies the upgrade required. All prior issues related to the laptop are also visible.
- An engineer wants to understand the maintenance requirements for your HVAC unit. He quickly pulls all the relevant issues for the unit from your EZOfficeInventory Account.
- An IT manager wants to update a software solution on all company laptops. She creates the issue on Jira and links all company machines to it. Employees in charge will pull up Asset details for all laptops from the service desk and carry out the updates. The issue will be tracked via Jira.
3. Installation process
Follow these steps to install and integrate the on-premise Jira server with EZOfficeInventory.
Note: For the integration to work, ensure that the Account Owner in EZOfficeInventory is present as an Admin in Jira. Ensure this is the case before you try integrating the two applications.
3.1. Enable the Jira integration
Next, enable the Jira Server from EZOfficeInventory. Note that only Account Owners in EZOfficeInventory have permission to do this.
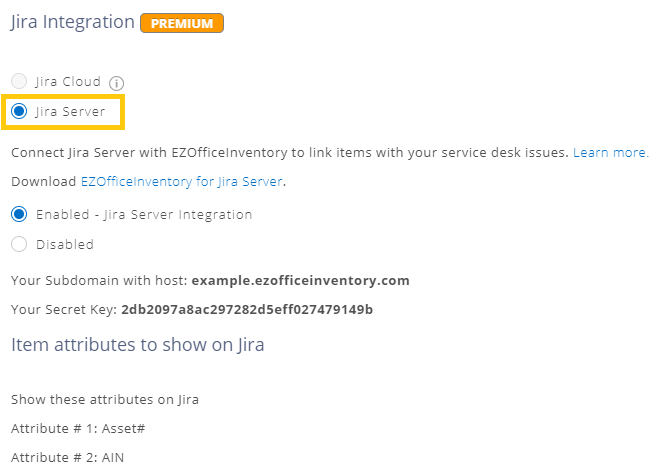
Log in to your EZOfficeInventory Account. Go to Settings → Add Ons → Jira Integration and choose ‘Jira Server’. Then click on the ‘Enable Jira Server Integration’ button.
3.2. Install EZOfficeInventory For Jira Server
Set up the EZOfficeInventory App from your Jira Account.
1. Get EZOfficeInventory For Jira Server from the Atlassian Marketplace and install it.
2. From your Jira Account, head to Settings → Manage Apps. You’ll find EZOfficeInventory under User-installed Apps.
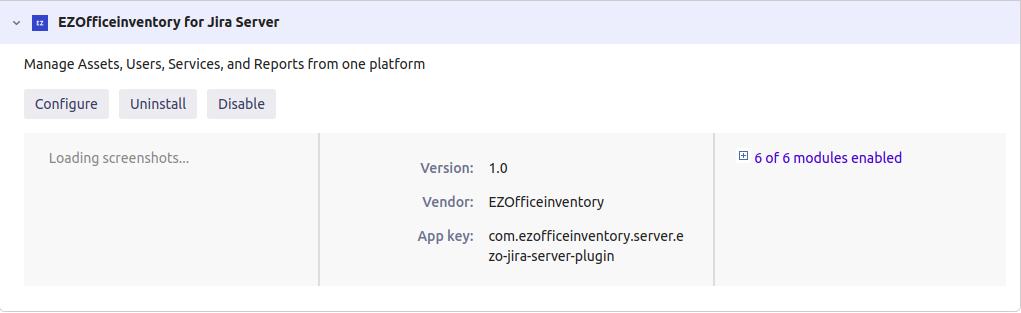
3. Hit the configure button and fill in the data fields with the following:
- Your EZOfficeInventory Subdomain with the host i.e. “businessxyz.ezofficeinventory.com”.
- Your ‘Secret key’. Get it from EZOfficeInventory Settings → Add Ons → Jira Integration. It will look like “de2fce1ad683976d2f515d0876027994”.
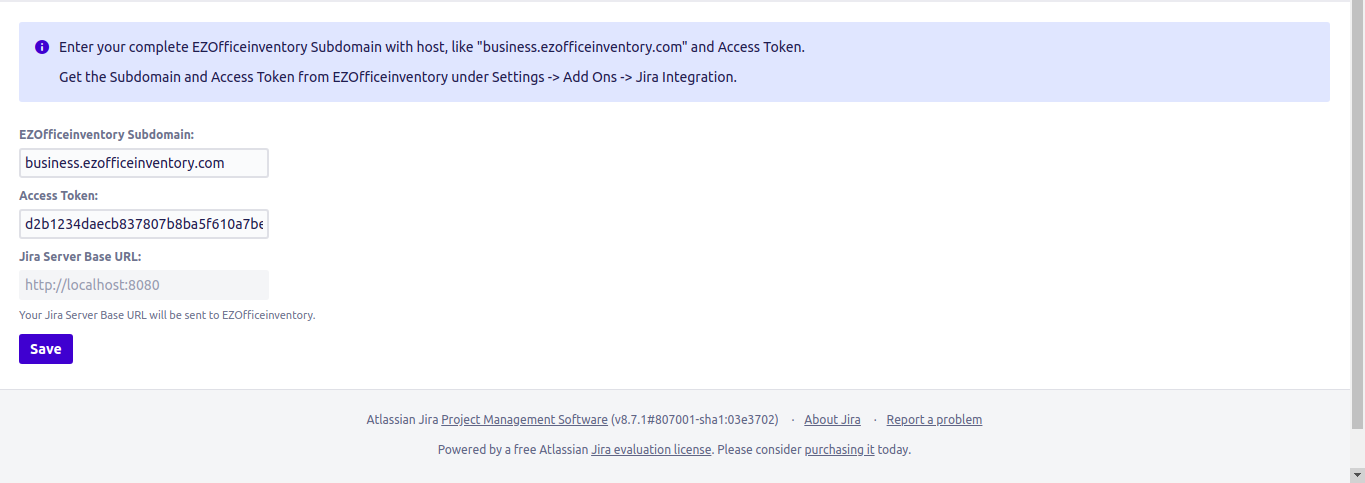
Once you click ‘Save’, a new Asset Container should be accessible in your Jira Server. This will indicate that all your Asset and Asset Stock items have synced to Jira.
Note: Inventory items are not synced to Jira.
That’s it – everything will automatically setup now. The integration is complete.
3.3. Choose Asset attributes
When connecting Jira Server from EZOfficeInventory, you can also choose which Asset Attributes to display in Jira. From Settings → Add Ons → Jira Integration, click on ‘Configure Attributes’.
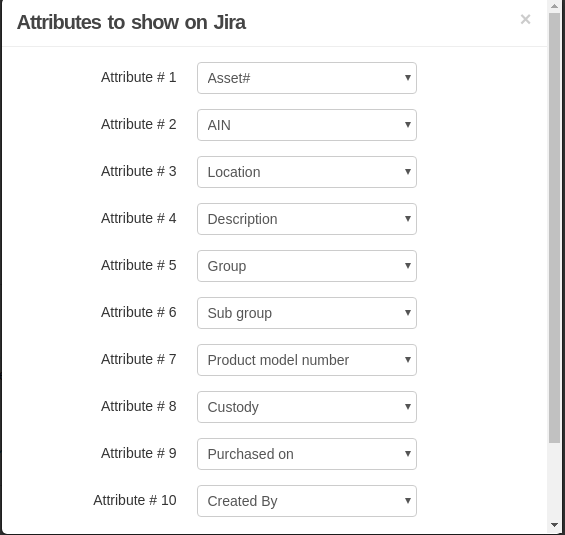
A new dialog box will prompt you to make your attribute selections. Once done, click on ‘Save this view’ to save the changes.
4. How the integration works
If you’ve successfully integrated the two applications, you’ll be able to see an Asset Container against your issues in Jira.
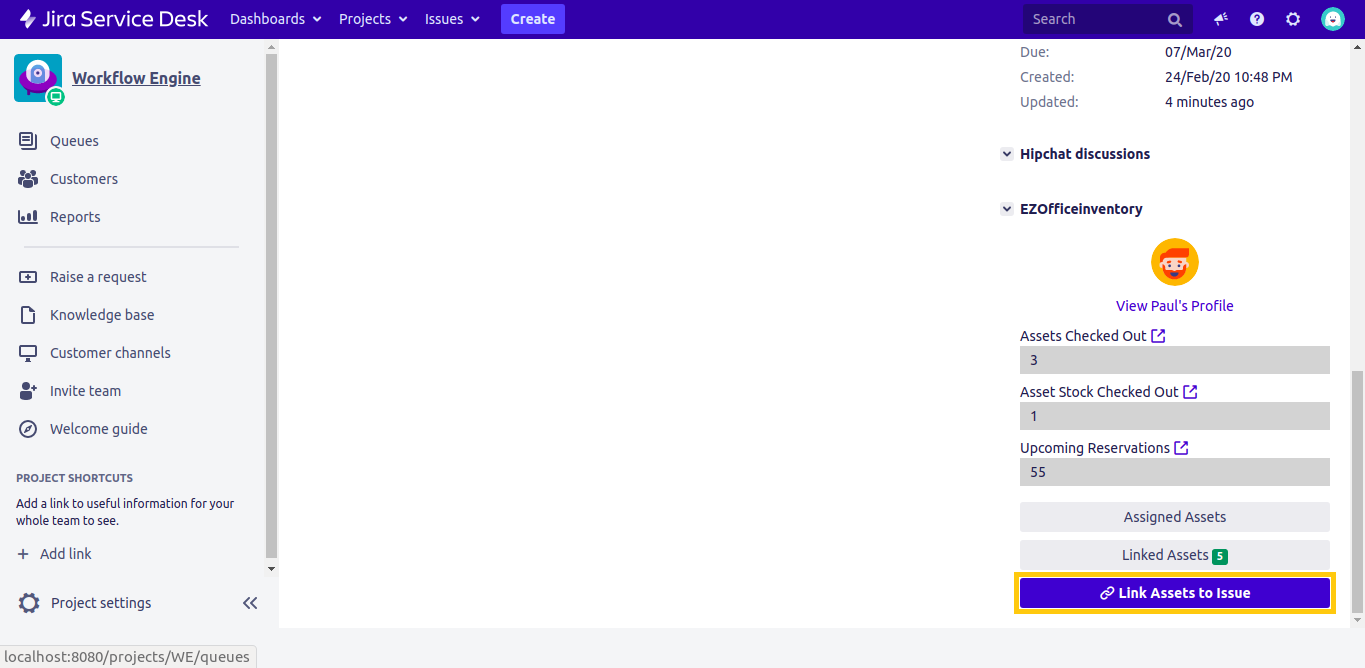
If no Assets are linked with the issue, the Asset Container will only display the ‘Link Assets to Issue’ button. On the other hand, if Assets are linked with the issue, they’ll be visible under the Asset Container.
Read more: EZOfficeInventory Integrates with Jira to Enable Seamless Issue Tracking
4.1. Link Assets to an Issue
To link Assets with an issue, click on the ‘Link Assets to Issue’ button as highlighted above. Then search for your requisite Asset by name, number, or AIN.
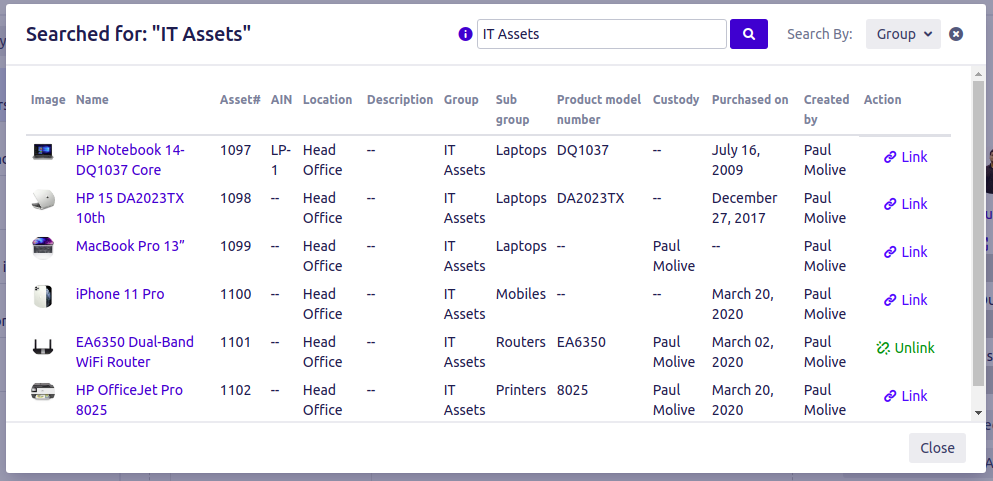
Additionally, you can link however many Assets with an issue as you like. Once linked, you can see all the relevant information about the Asset in the following tabular form:
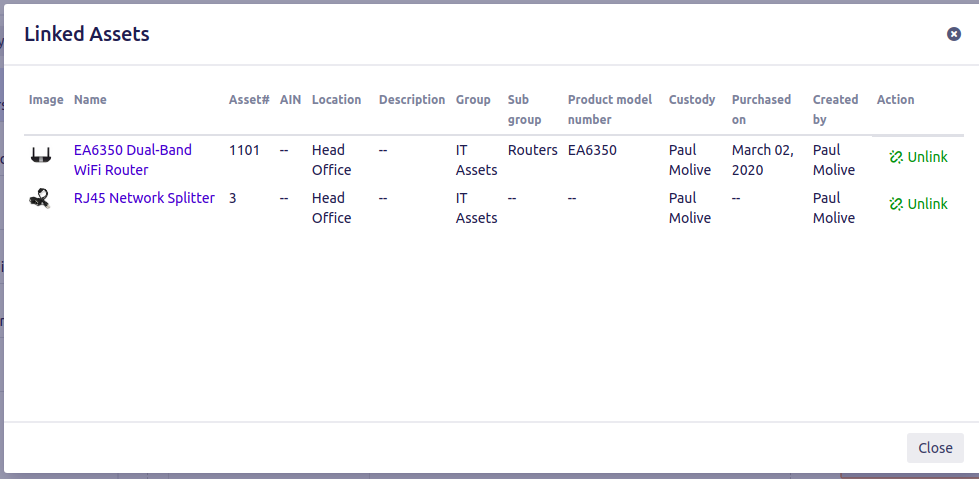
From here, you can verify linkages as required.
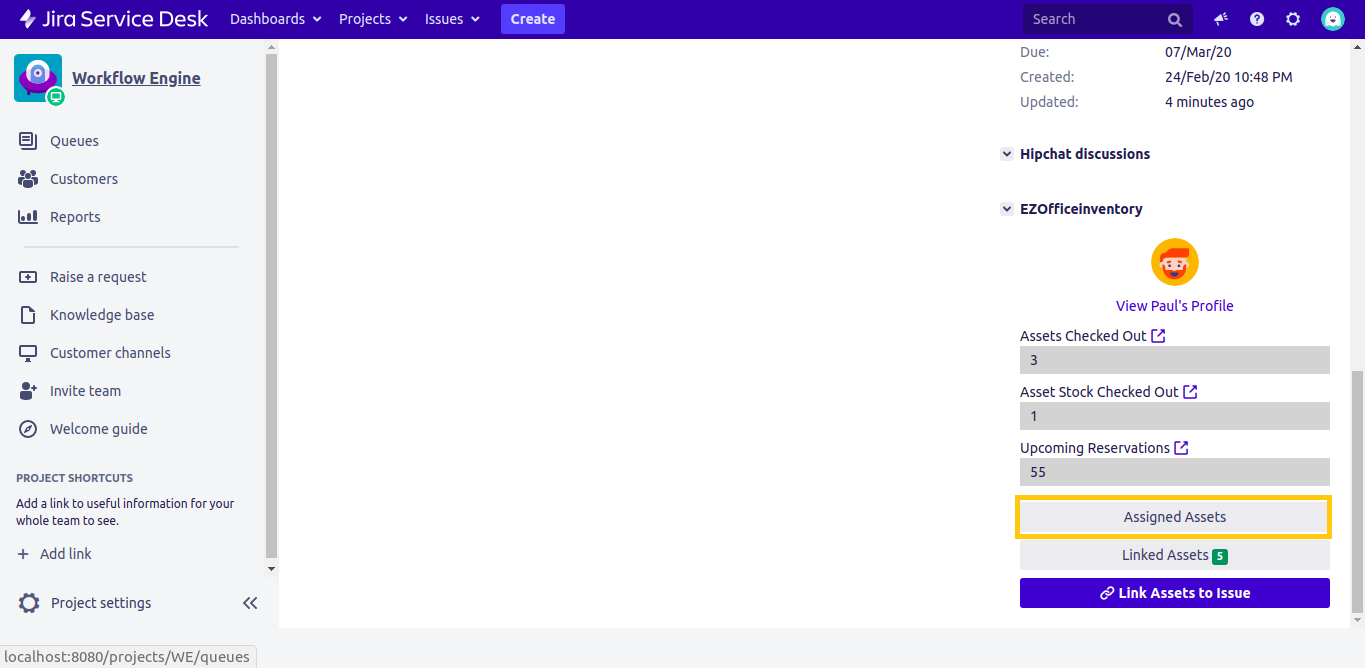
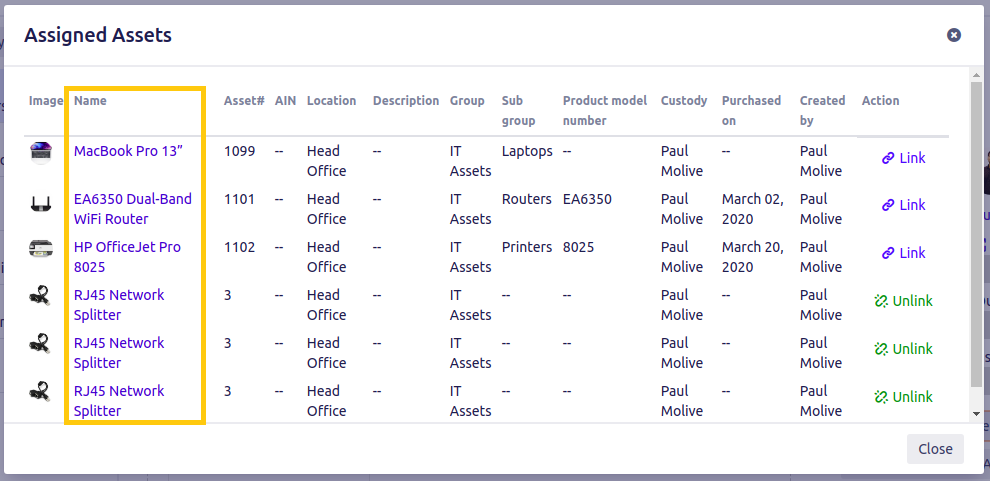
4.2. What are Assigned Assets?
Assigned Assets include all the Assets checked out by the particular user that reported an issue. These Assets can then be assigned to a particular ticket via the Assigned Assets tab. Assigning Assets to a ticket helps since the user won’t have to search for the relevant assets anymore.
4.3. Navigate to Item Details page from Jira
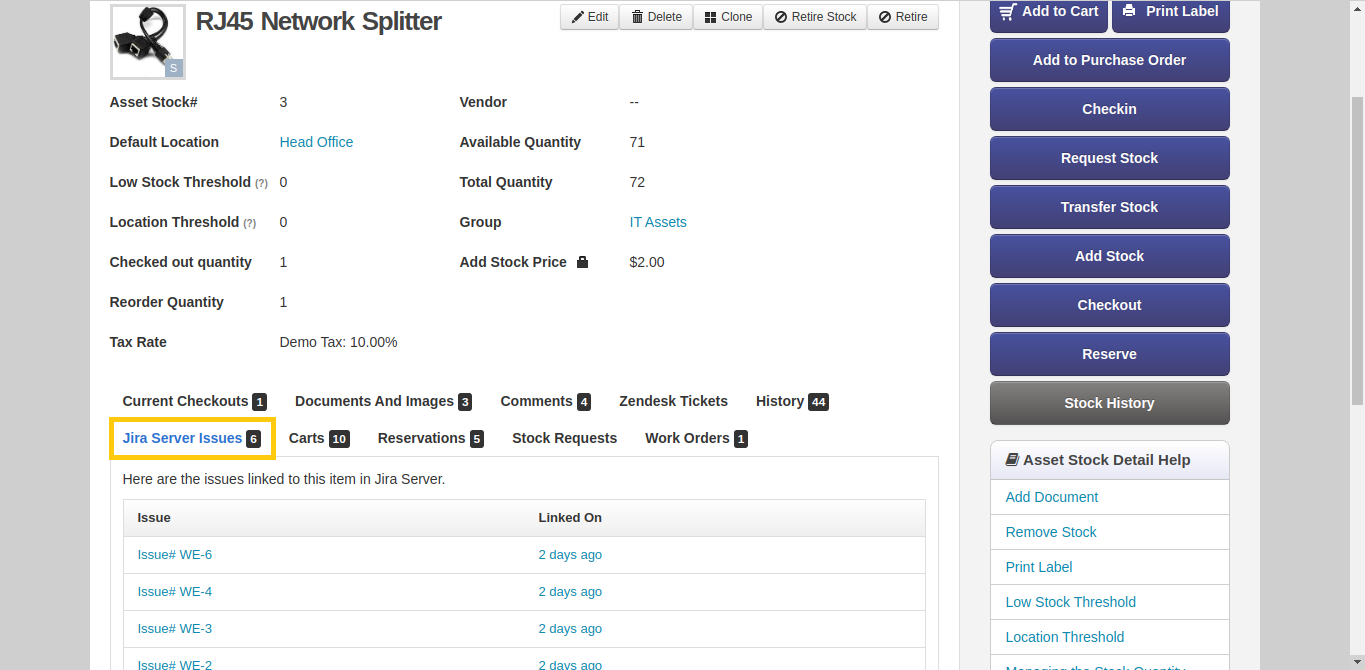
If you’d like to see an Asset in EZOfficeInventory, simply click on its name from the concerned issue in the Jira Server.
This will open EZOfficeInventory in your browser. Scroll down the Item Details page to see all the Jira Issues linked with the said Asset.
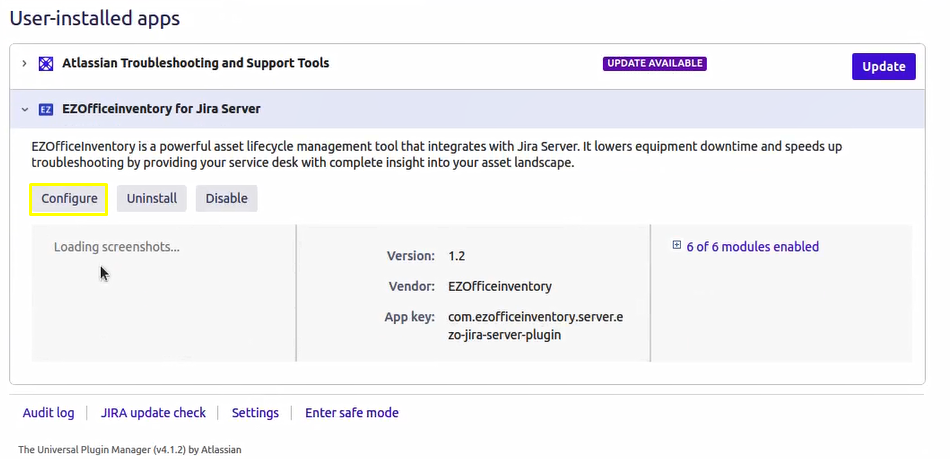
4.4 Limit Access by Project
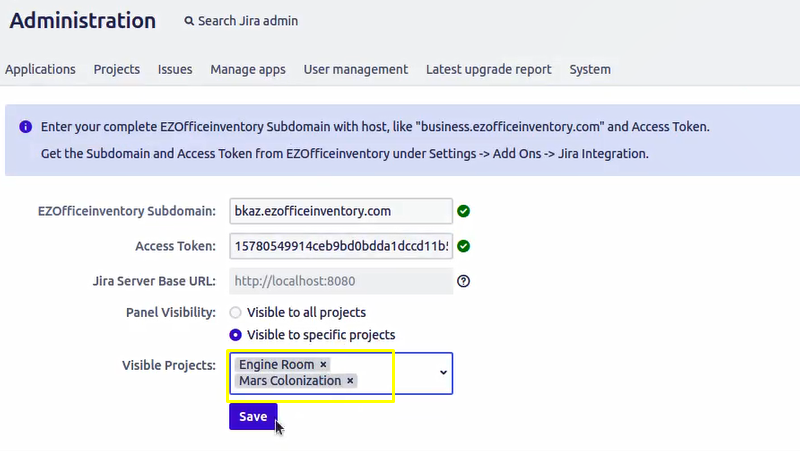
The Jira Server Integration also allows users to limit access by projects. In order to do this go to Settings-> Manage Apps-> EZOfficeinventory for Jira Server. When you click on the application, the details will pop up. Here click on Configure as shown in the image below:
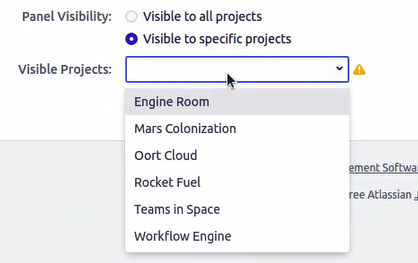
Select ‘visible to specific projects’
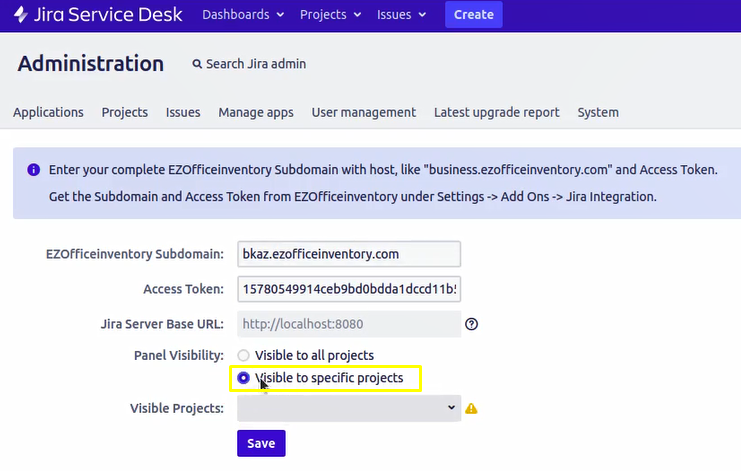
Choose the required project from the drop down and click Save.
Once you have saved your project, you can check whether the EZOfficeInventory access is visible on the project page. To view this go to the Projects drop down and check the project saved earlier for access. In the image below, our project is the Engine Room.
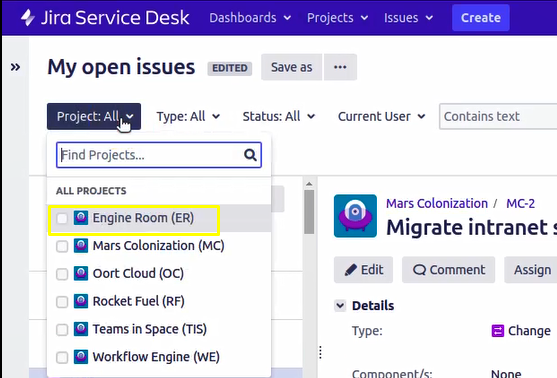
On the projects page you can scroll down to find EZOfficeinventory integration on the side for this project.
Note: This applies to all issues generated under the project.
On the contrary, you can compare a project which is not added in the project access option. In this example its Mars Colonization
In order to enable EZOfficeInventory access for more than one project, you can save multiple projects under configuration.
Have queries or feedback for us?
If you have any comments or questions regarding our integration, drop us an email at support@ezo.io.
To learn more about our integrations, view the complete list of our third-party integrations.


